031914 NSHS-5
STEP 7 CHECK THE HONING ANGLE
ACAUTION!
The deburr stone must be retracted to
avoid damaging the cutting edge.
1. Make sure the Knife is colored near the
cutting edge using a water soluble black
marker. This must be done in the area
where the Honing Stone will contact the
Knife when it is against the Knife.
2. Shut the door and pull out the “MASTER
OFF.”
3. Jog the Honer for one or two revolutions.
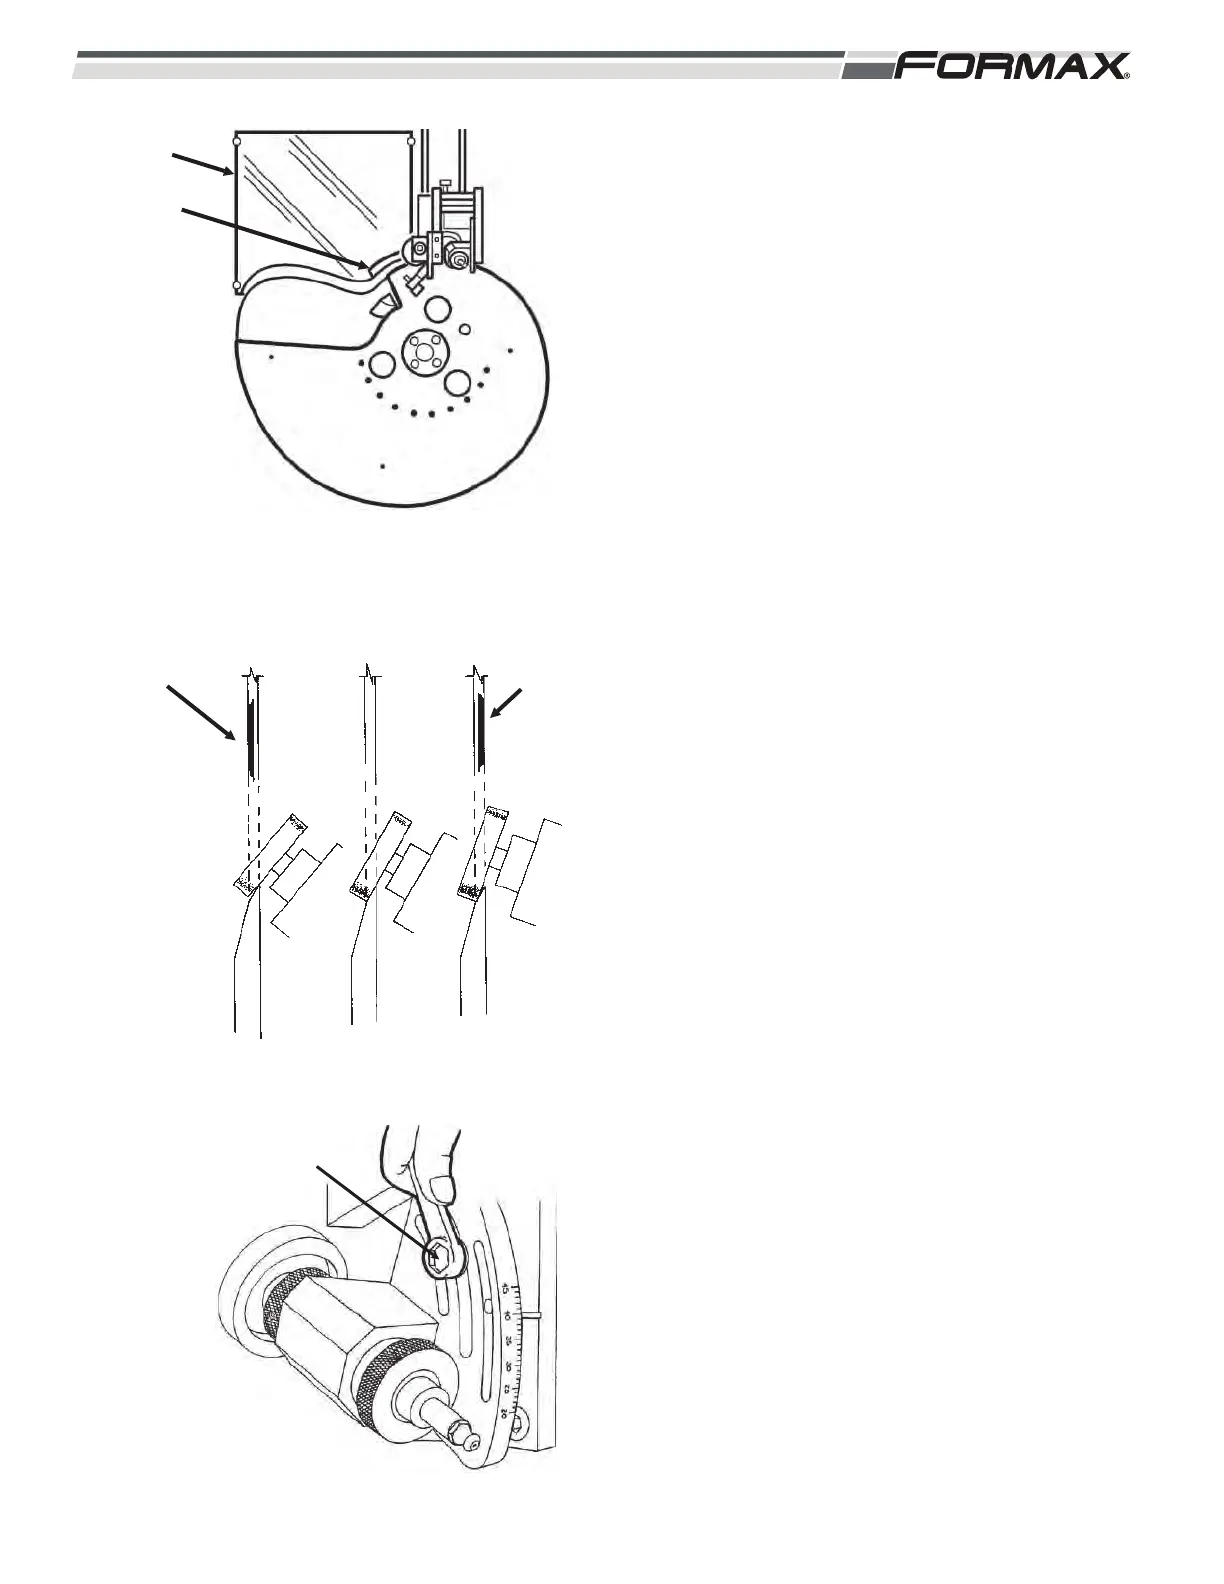
4. Check the marked spot on the Knife
cutting edge to see if the hone stone is
contacting the full edge (look in the mirror).
(Illustration 11)
5. If the angle is not correct, (Illustration 12)
adjust the angle of the hone stone, mark
the Knife and recheck until correct.
(Illustration 13)
ILLUSTRATION 11
CHECK
ANGLE
MIRROR
ILLUSTRATION 12
CORRECT
STONE SET AT
TOO LOW AN
ANGLE - MARK
REMAINS ON
BLADE
STONE SET AT
TOO HIGH AN
ANGLE - MARK
REMAINS ON
BLADE
ANGLE
ADJUSTMENT
ILLUSTRATION 13
 Loading...