NSHS-6 031914
STEP 8 CHECK THE DEBURR STONE
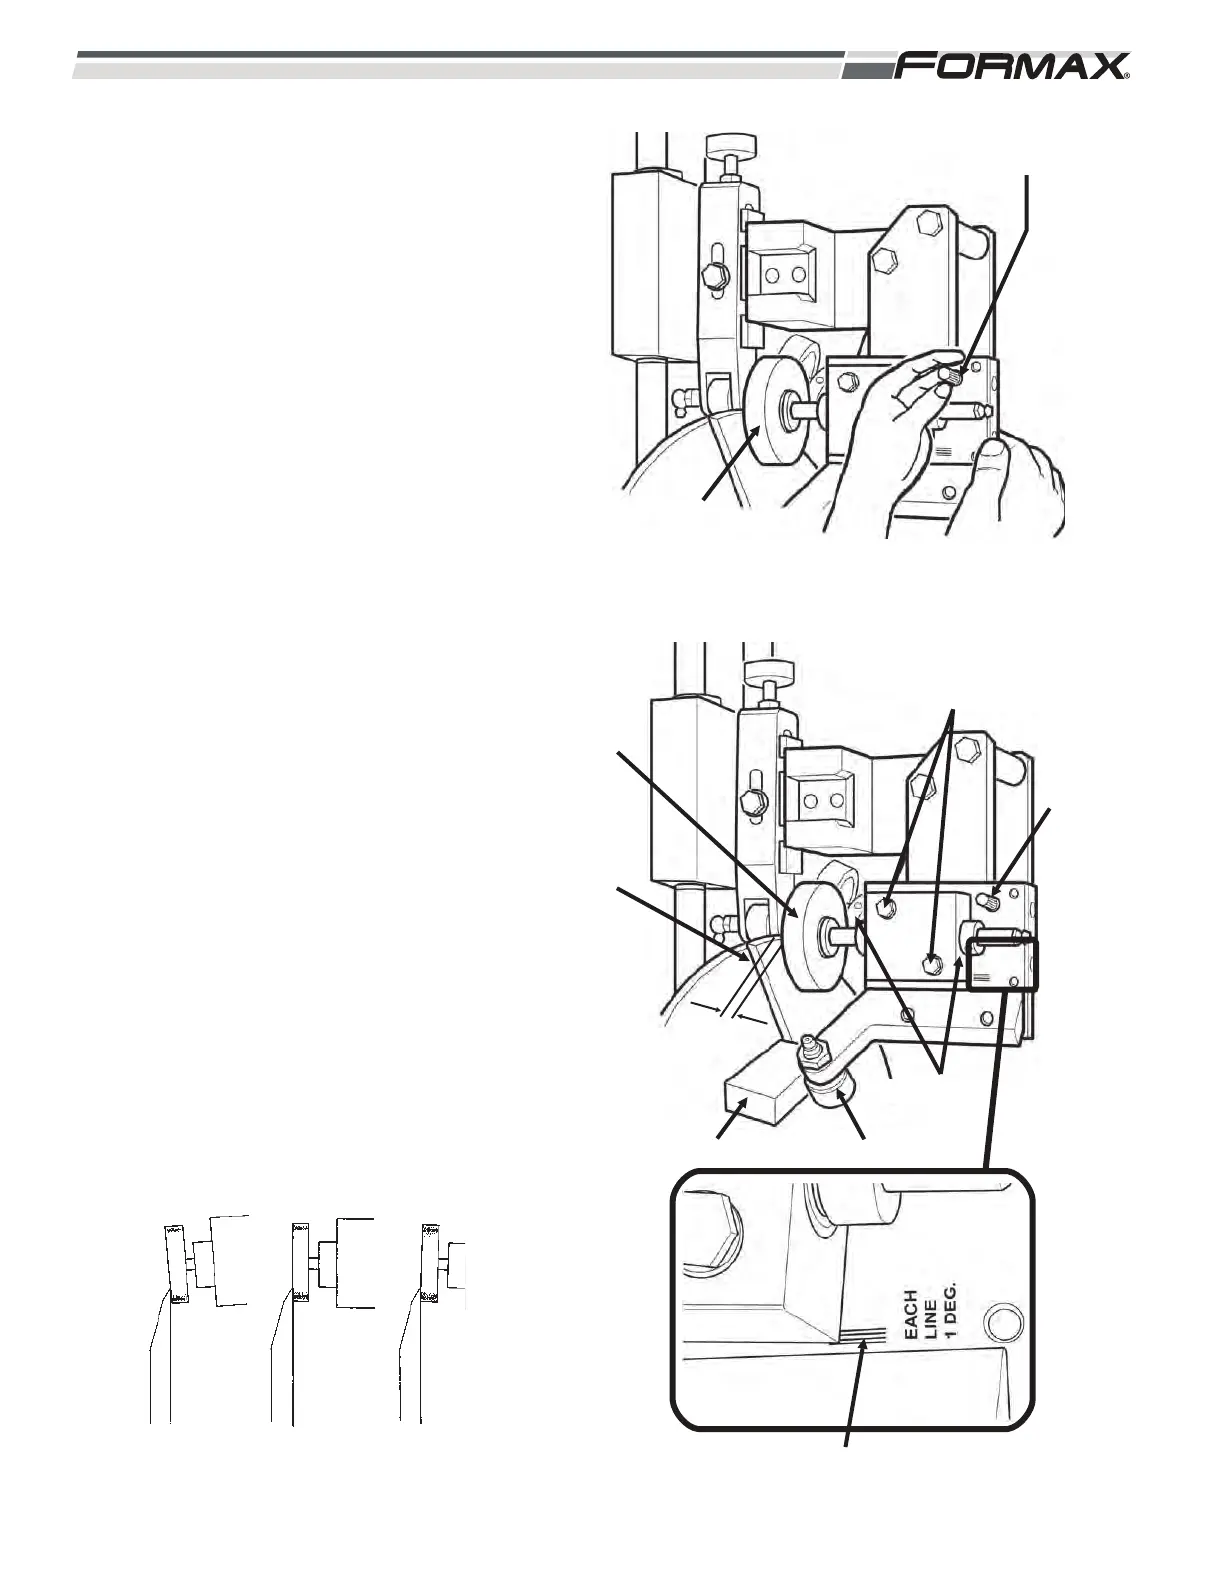
1. Engage the deburr stone: hold it with
one hand and carefully lower to the
Knife. Pull out the locking pin until it
releases. (Illustration 14)
2. Close the door, pull out the “MASTER
OFF” button and jog the Knife around
until the deburr roller is up on the
lifting cam. Push in the “MASTER
OFF” button and open the door.
(Illustration 15)
3. Check for a gap of about 3mm (1/8 in.)
between the deburr stone and the
Knife. Adjust the collars on the deburr
shaft to the correct gap.
(Illustration 15)
4. The back angle adjustment bolts
adjust the angle of the deburr stone to
the back angle of the Knife. You can
check the deburr stone contact the
same as in checking the hone angle
(by marking the blade).
(Illustration 16)
5. Disengage the Deburr Stone. Pull the
Assembly back and push in the
Locking Pin. (Illustration 15)
LOCKING PIN
DEBURR
STONE
ILLUSTRATION 14
ROLLER
DEBURR
STONE
ILLUSTRATION 15
KNIFE
3mm
(1/8 in)
GAP
LIFTING CAM
COLLARS
BACK ANGLE
ADJUSTMENT
BOLTS
Set to 3
o
NEGATIVE
ANGLE
POSITIVE ANGLE
DULLS EDGE
ILLUSTRATION 16
PARALLEL ANGLE
BACK-GRINDS BLADE
3° deg.
DEBURR
LOCKING
PIN
 Loading...