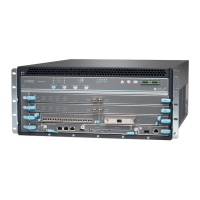
3. Install the replacement Routing Engine:
a. Power off node 0:
root@node0> request system power-off
b. Wait until a message appears on the console confirming that the services have stopped, and then
physically turn off the power.
c. Label and disconnect all the cables connected to node 0.
d. Replace the Routing Engine.
e. To prevent a split-brain scenario (where the control link is connected while both the nodes are in
the primary state), reconnect only the console cable and the cable to the fxp0 interface. Leave the
rest of the cables disconnected.
f. Ensure that the status of the control link and fabric link on node 1 is down:
root@node1> show chassis cluster interfaces
{primary:node1}
root@node1> show chassis cluster interfaces
Control link status: Down
Control interfaces:
Index Interface Monitored-Status Internal-SA Security
0 em0 Down Disabled Disabled
1 em1 Down Disabled Disabled
Fabric link status: Down
Control interfaces:
Name Child-Interface Status Security
(Physical/Monitored)
fab0 xe-11/0/3 Down / Down Disable
fab0
g. Power on node 0.
4. Load the configuration file, firmware, and scripts file on the new Routing Engine:
a. Insert the USB flash drive into the USB port on node 0, and access the UNIX-level shell on node 0:
root@node0> start shell user root
b. Copy the configuration file, firmware, and scripts file from the USB:
root@node0% cp /var/tmp/usb/config[date] /var/tmp/config[date]
root@node0% cp /var/tmp/usb/junos version /var/tmp/junos version
319

 Loading...