Settings
203
Pos: 34.43 /BA/Einste llungen/Großpackenpr esse/Nadeleins tellungen/Einst ellung der Obernadel Überschrift @ 21\mod_1239 169795346_78.doc x @ 230344 @ @ 1
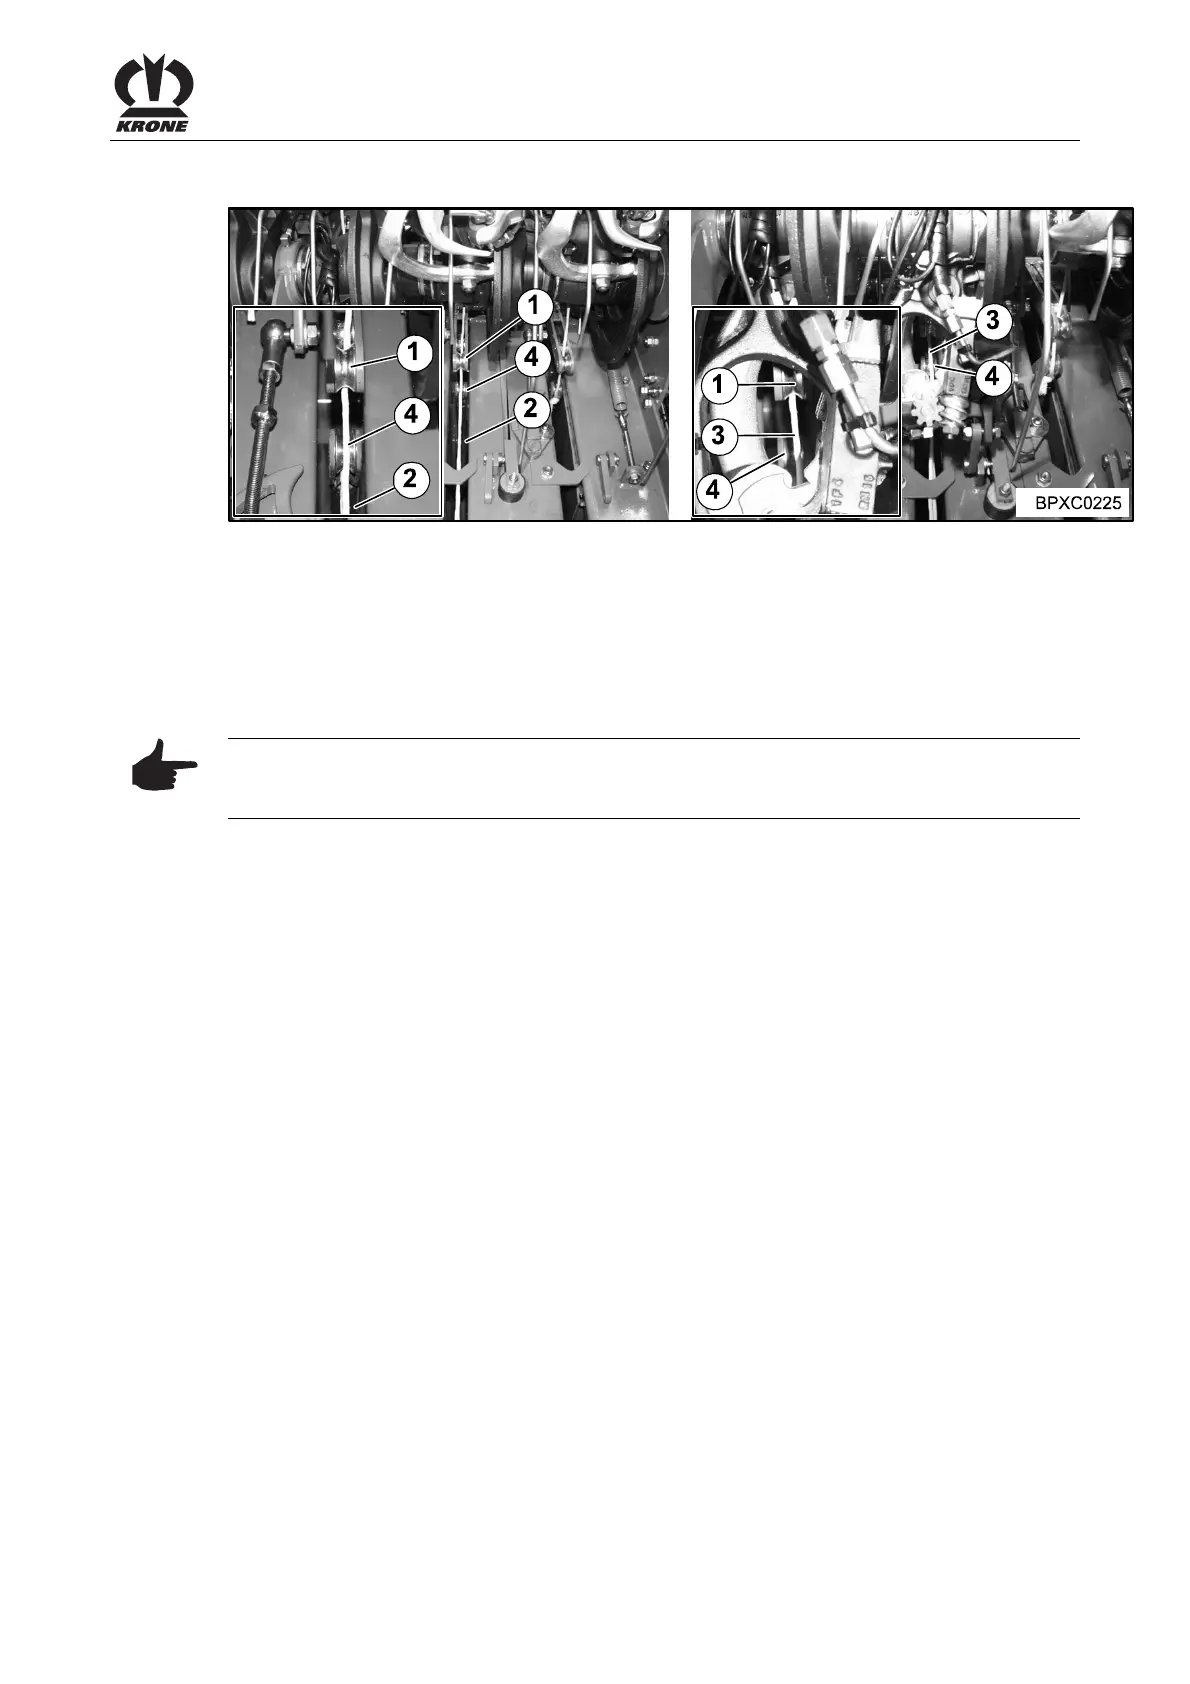
11.5 Setting the upper needle
Pos: 34.44 /BA/Einste llungen/Großpackenpr esse/Nadeleins tellungen/Einst ellung/Kontolle Ober nadel Bild @ 21\mod_1239169 831721_78.docx @ 230398 @ 2 @ 1
Fig. 140
Pos: 34.45 /BA/Einste llungen/Großpackenpr esse/Nadeleins tellungen/Einst ellung der Obernadel @ 21\ mod_1239169307049_78. docx @ 230320 @ 33 @ 1
The upper needle must be set so that the individual arms of the upper needles (1) are centred in
the channel slot (2). This can be done by lining up on the ends of the upper needle shaft with
shim rings.
Pos: 34.46 /BA/Einste llungen/Großpackenpr esse/Nadeleins tellungen/Kontr olle der Einstellung Obernadel @ 21\mod_1239167 533580_78.docx @ 230269 @ 3 @ 1
11.5.1 Checking the setting of the upper needle
• Trigger the tying process manually with machine at a standstill
Note
When manually triggering the tying process, make sure that there is tension on the tension arm
(6).
• Turn the flywheel manually until the upper needle (1) lifts
• Just before the needle (4) catches the upper twine (3) engage the flywheel brake
At this point in time, the upper twine should be centred in front of the needle (4). If this is not the
case, the individual arm of the upper needle (1) must be corrected.
Pos: 34.47 /BA/--- ------------ Seitenumbruch------ ---------- @ 0\mod_119617 5311226_0.doc x @ 4165 @ 4 @ 1
 Loading...