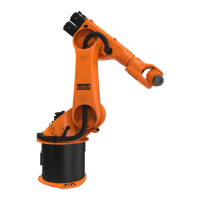
1 M5x16-8.8 Allen screw (4x)
2 Pneumatic lines
3 Gripper cables
4 Gripper
5 Gripper holder
14.4.2 Exchanging safety door switches
Precondition
• The robot controller is switched off and secured to prevent unauthor-
ized persons from switching it on again.
Procedure
1. Unscrew the cables.
2. Remove 4 TX-M4x20 Torx safety screws from each safety door switch.
3. Remove the old safety door switch.
4. Fasten each new safety door switch with 4 TX-M4x20-A4-80 Torx
safety screws.
5. Install the cables.
6. Carry out a function test.
Fig. 14-9: Exchanging a safety door switch
14.4.3 Exchanging the proximity switches on the gripper
Precondition
• The robot controller is switched off and secured to prevent unauthor-
ized persons from switching it on again.
Procedure
1. Mark the position of the proximity switches.
2. Detach the plug connection at the rear of the gripper.
3. Remove the cable strap.
4. Unplug the proximity switches.
5. Plug in new proximity switches. Pay attention to the markings.
6. Plug the cables of the proximity switches and the plug connection to-
gether.
7. Fasten the cables of the proximity switches using a cable strap.
ready2_educate
BA ready2_educate V8 | Issued: 05.09.2018 www.kuka.com | 125/154
Repair