(3) Check: When checking one side of front combination lamp, cover the other side or disconnect
the electrical connector plug to prevent the unchecked front combination lamp interfere the
focusing check.
Note: Do not cover the front combination lamp for more than 3 minutes, because the glass block
of front combination is made of synthetic resin, which is vulnerable to overheating. Start the engine,
to exceed 1500 rpm.
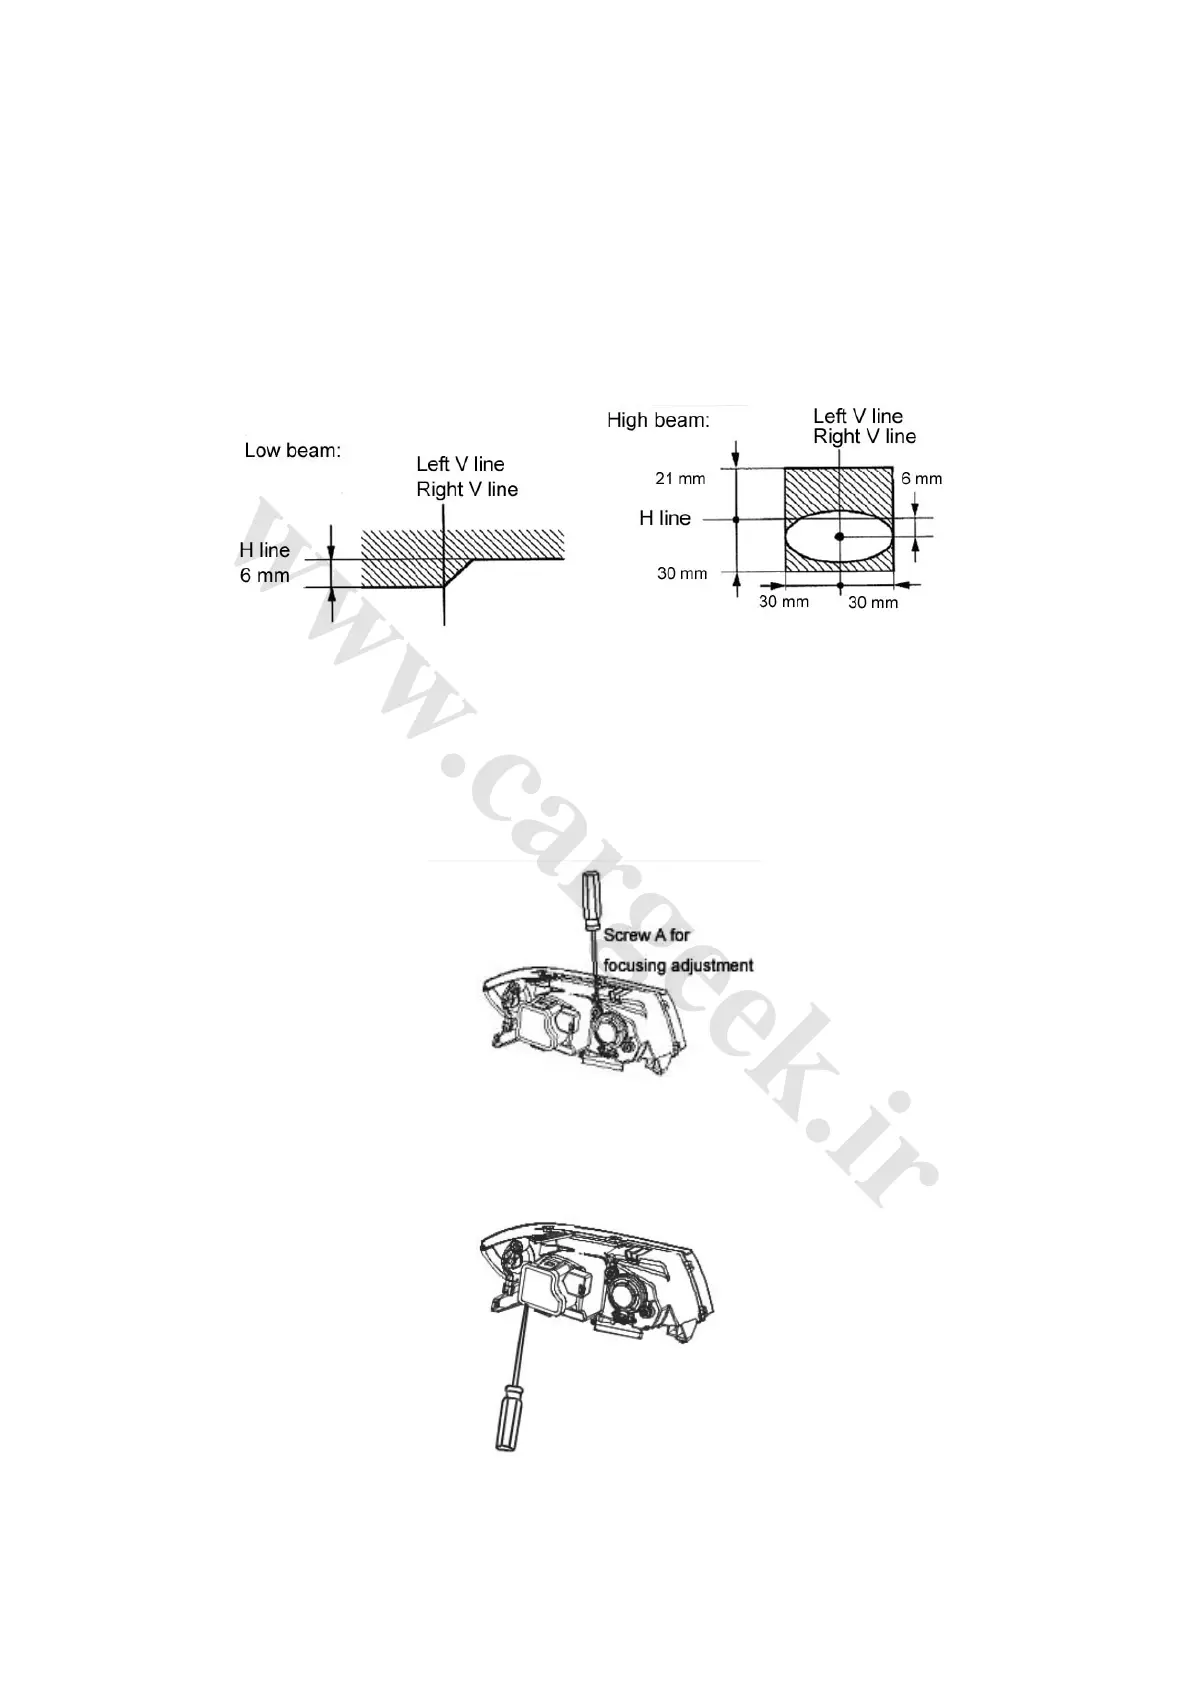
As shown in Fig. 4-80 and Fig. 4-81, turn on the front combination lamp to make the boundary
within designated area.
Fig. 4-80 Fig. 4-81
(4) Vertical focusing adjustment: Turn screw A for focusing adjustment using a screwdriver, to
focus the light within designated range, when turning the screw A clockwise, the focusing light
moves upward, contrarily, downward;
Horizontal focusing adjustment: Turn screw B for focusing adjustment using a screwdriver, to
focus the light within designated range, when turning the screw B clockwise, the focusing light
moves upward, contrarily, downward. As shown in Fig. 4-82.
Fig. 4-82
(5) Low beam adjustment: As shown in the Fig., vertically move the screw for focusing adjustment
to adjust the focusing of low beam, when turning the screw clockwise, the focusing light moves
upward, contrarily, downward. As shown in Fig. 4-83.
Fig. 4-83