Page 122 of 182 TP1A002–1 English
Aug 2015
Linx 8900 Operating Manual —
Add other fields
Linx 8900
Options
Display All Source Fields
If you set this option to Enabled, all of the source fields are displayed in the message. If the
barcode contains a number of source fields, each source field is a separate field (see
Figure 133).
6.6.2 Barcode example
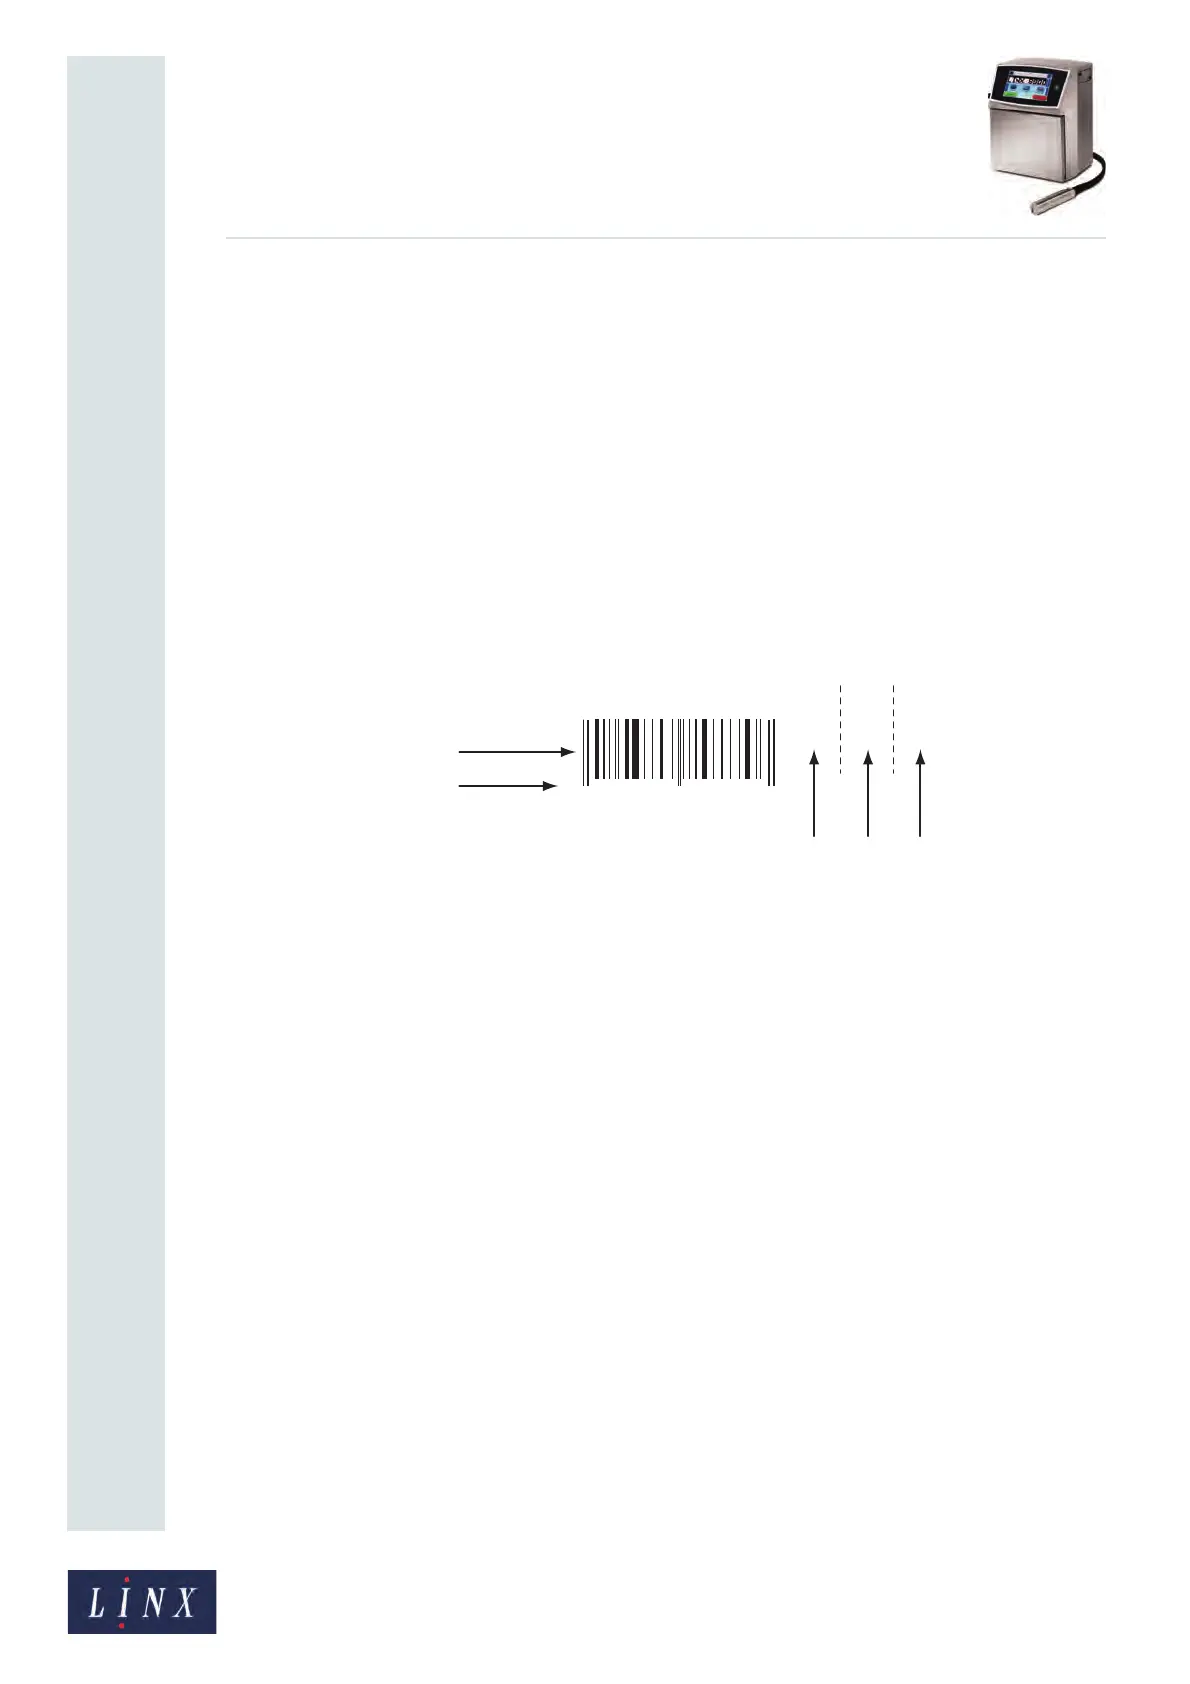
Figure 133 shows an EAN-13 barcode with the following options set to Enabled:
• Display All Source Fields
• Display Human Readable Text
• Display Checksum
Figure 133. EAN-13 barcode example
Figure 133 shows an EAN-13 barcode symbol (A) that contains the data from three text
fields (“1234”, “5678”, and “9012”). The barcode encodes the fields as a single 12-digit
number “123456789012”.
• Because the Display All Source Fields option is set to Enabled, the printer displays the
source fields (C, D, E) next to the symbol. The lines with dashes in the figure indicate
that the fields are separate. You can select and edit each one separately.
• Because the Human Readable Text option is set to Enabled, the printer also shows the
12-digit number (B) under the barcode symbol. The additional digit (“8”) in this
number is the checksum character.
• Because the Checksum option is set to Enabled by default, the number (B) includes the
checksum character “8”.
2 3 4 5 6 71 8 9 0 1 2 8
123456789012
DE
}
}
}
B
C
A
TJ1124