Page 83 of 182 TP1A002–1 English
Aug 2015
Linx 8900 Operating Manual —
Add other fields
Linx 8900
6 Add other fields
6.1 Add a Logo field
NOTE: You cannot create logos or graphics on the printer. You must copy logos or graphics
from a USB memory device to the printer. See ‘Copy graphics from USB’ on
page 137 for more information.
To add a Logo field to an existing message:
1 Edit the message, as described in the Linx 8900 Quick Start Guide.
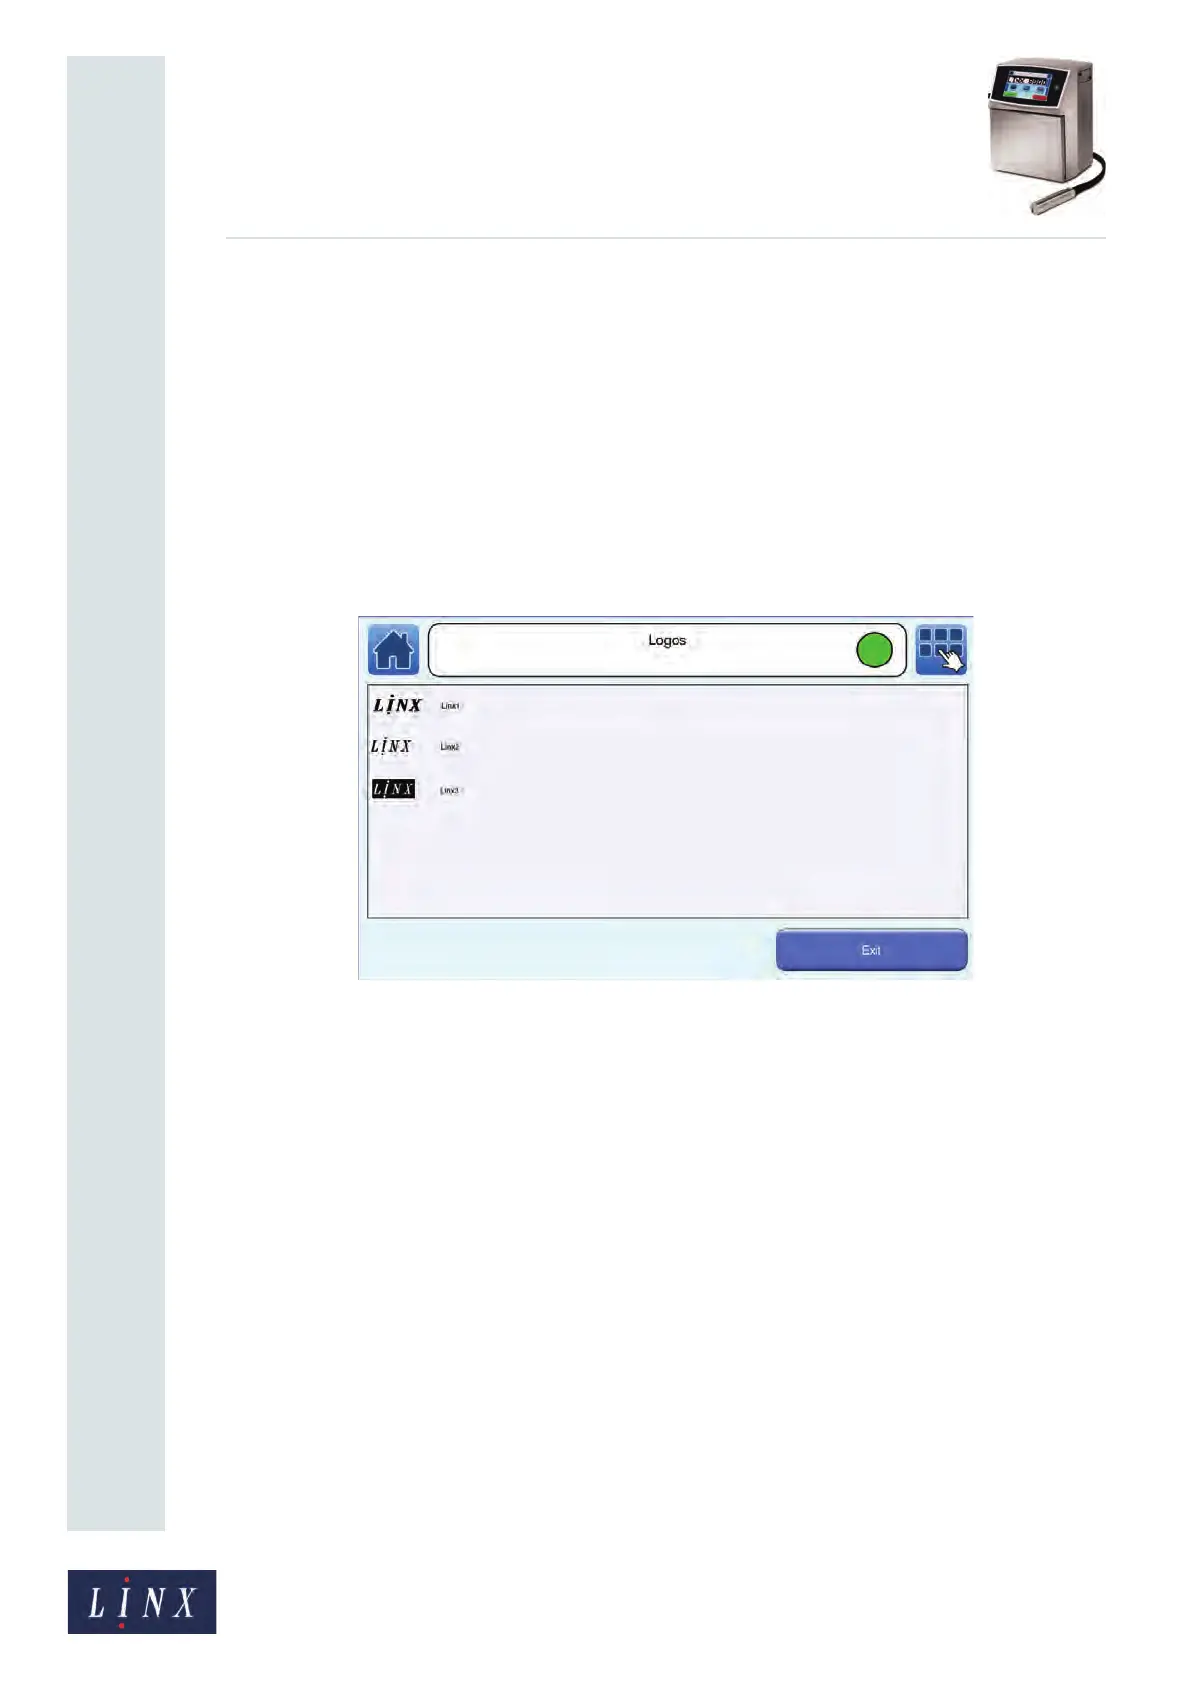
2 On the Select Field Type screen, touch the Logo button to display the Logos screen.
Figure 84. Logos screen
3 Use the scroll bar to scroll through the list to find the required logo.
4 Touch the image of the required logo to insert the logo in your message. The printer
displays the Editor screen and shows the content of your message.
5 Touch the Exit button to return to the Editor screen where you can save or discard
the changes to your message.
6.2 Add a Sequential Number field
A sequential number field is a field that contains a number that is updated automatically.
The printer updates the number at each occurrence of a trigger event, which you can define.
See ‘Print Trigger’ on page 59 for more information about print triggers.