Page 2 of 182 TP1A002–1 English
Aug 2015
Linx 8900 Operating Manual —
Installation
Linx 8900
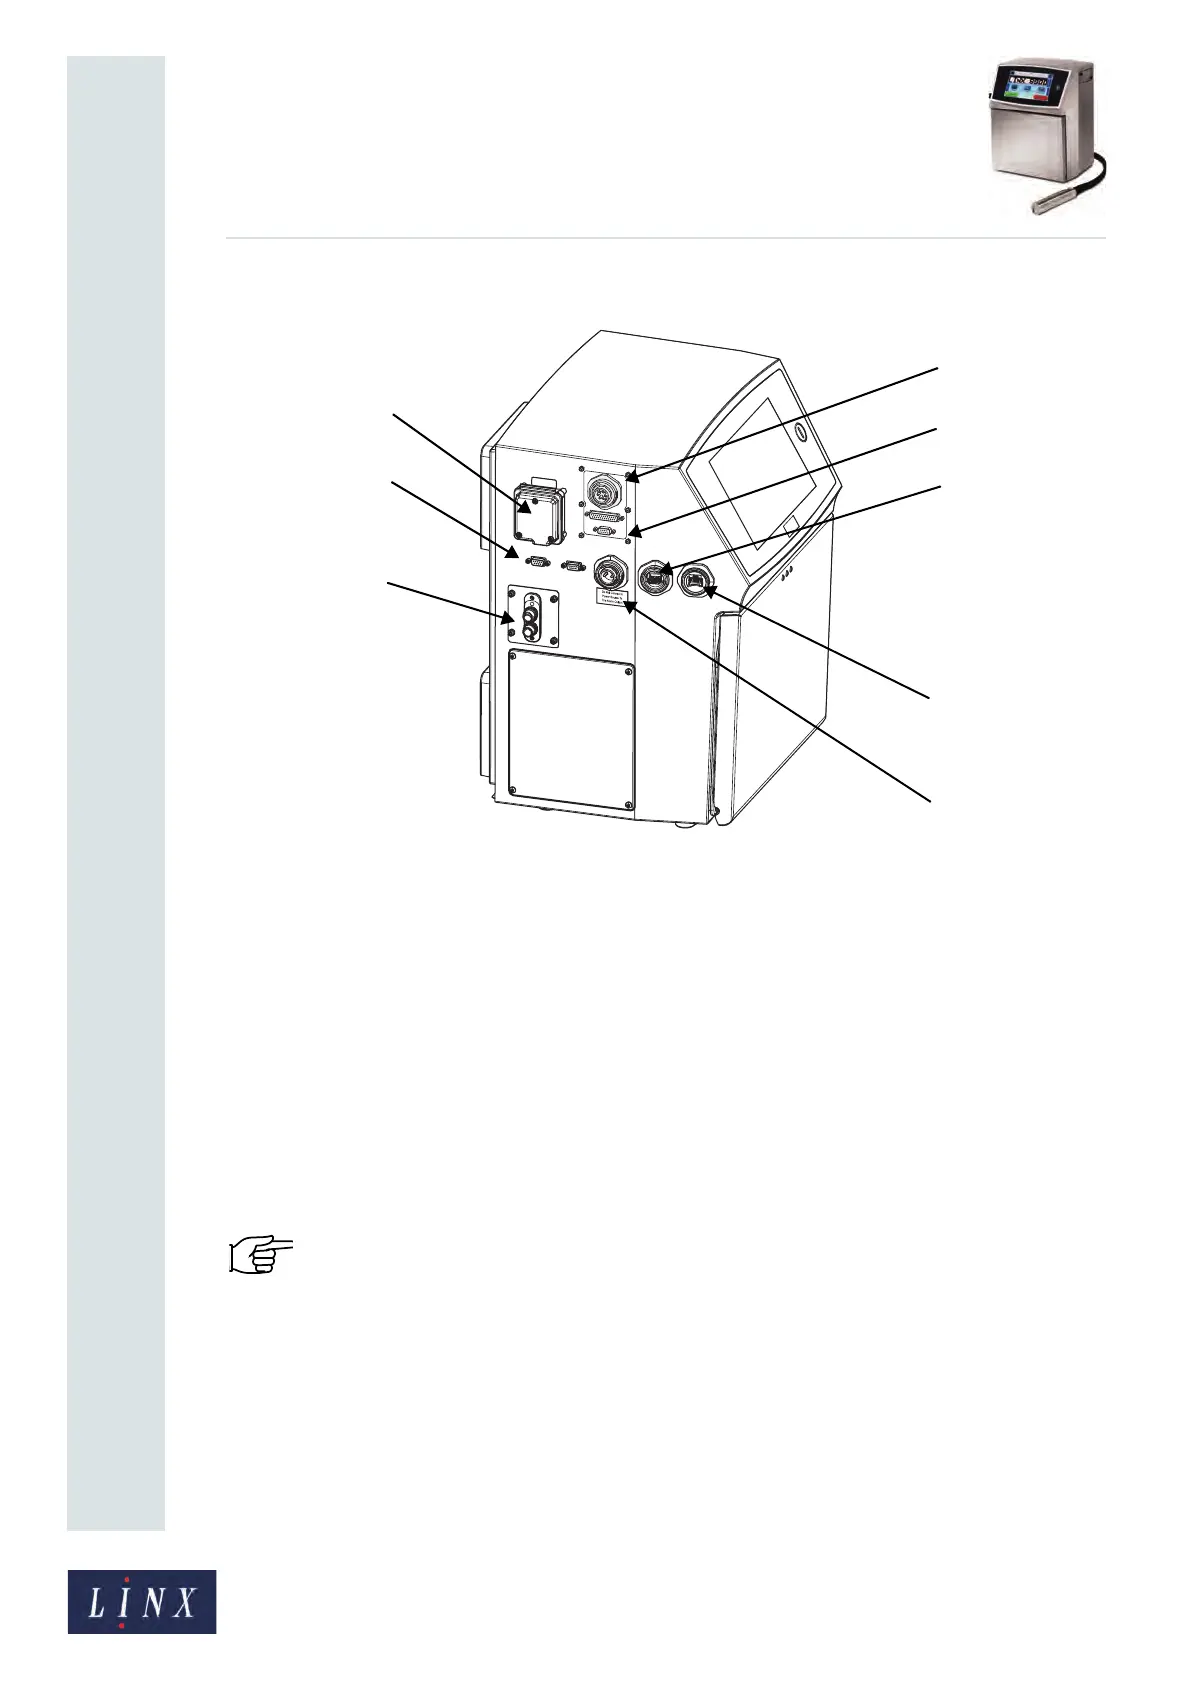
Figure 1 shows the connections for the Linx 8900 printer.
Figure 1. Printer connections
A External power connection
B Print trigger / shaft encoder connection (x2)
C Printhead conduit mounting plate
D External alarm connection (24 V)
E Ethernet interface
F USB interface
G RS232 interface (configurable option)
H Volt-free contact (VFC) alarm connection (configurable option)
1.5 Connect to a power source
IMPORTANT: Before you start, you must make sure that you can easily access the cable
plug for the mains electrical supply.
The Linx 8900 printer uses a single-phase, 50/60 Hz AC supply of 100 V (maximum current
3 A) to 230 V (maximum current 1 A). Any AC voltage within this range provides
acceptable power. The mains electrical supply fuse is 5 mm x 20 mm, antisurge T, ceramic,
with a rating of 4 A.
89250