Gocator Line Profile Sensors: User Manual
Gocator Web Interface • 184
3. If it is not already selected, click the Parameter tab in the tool configuration area.
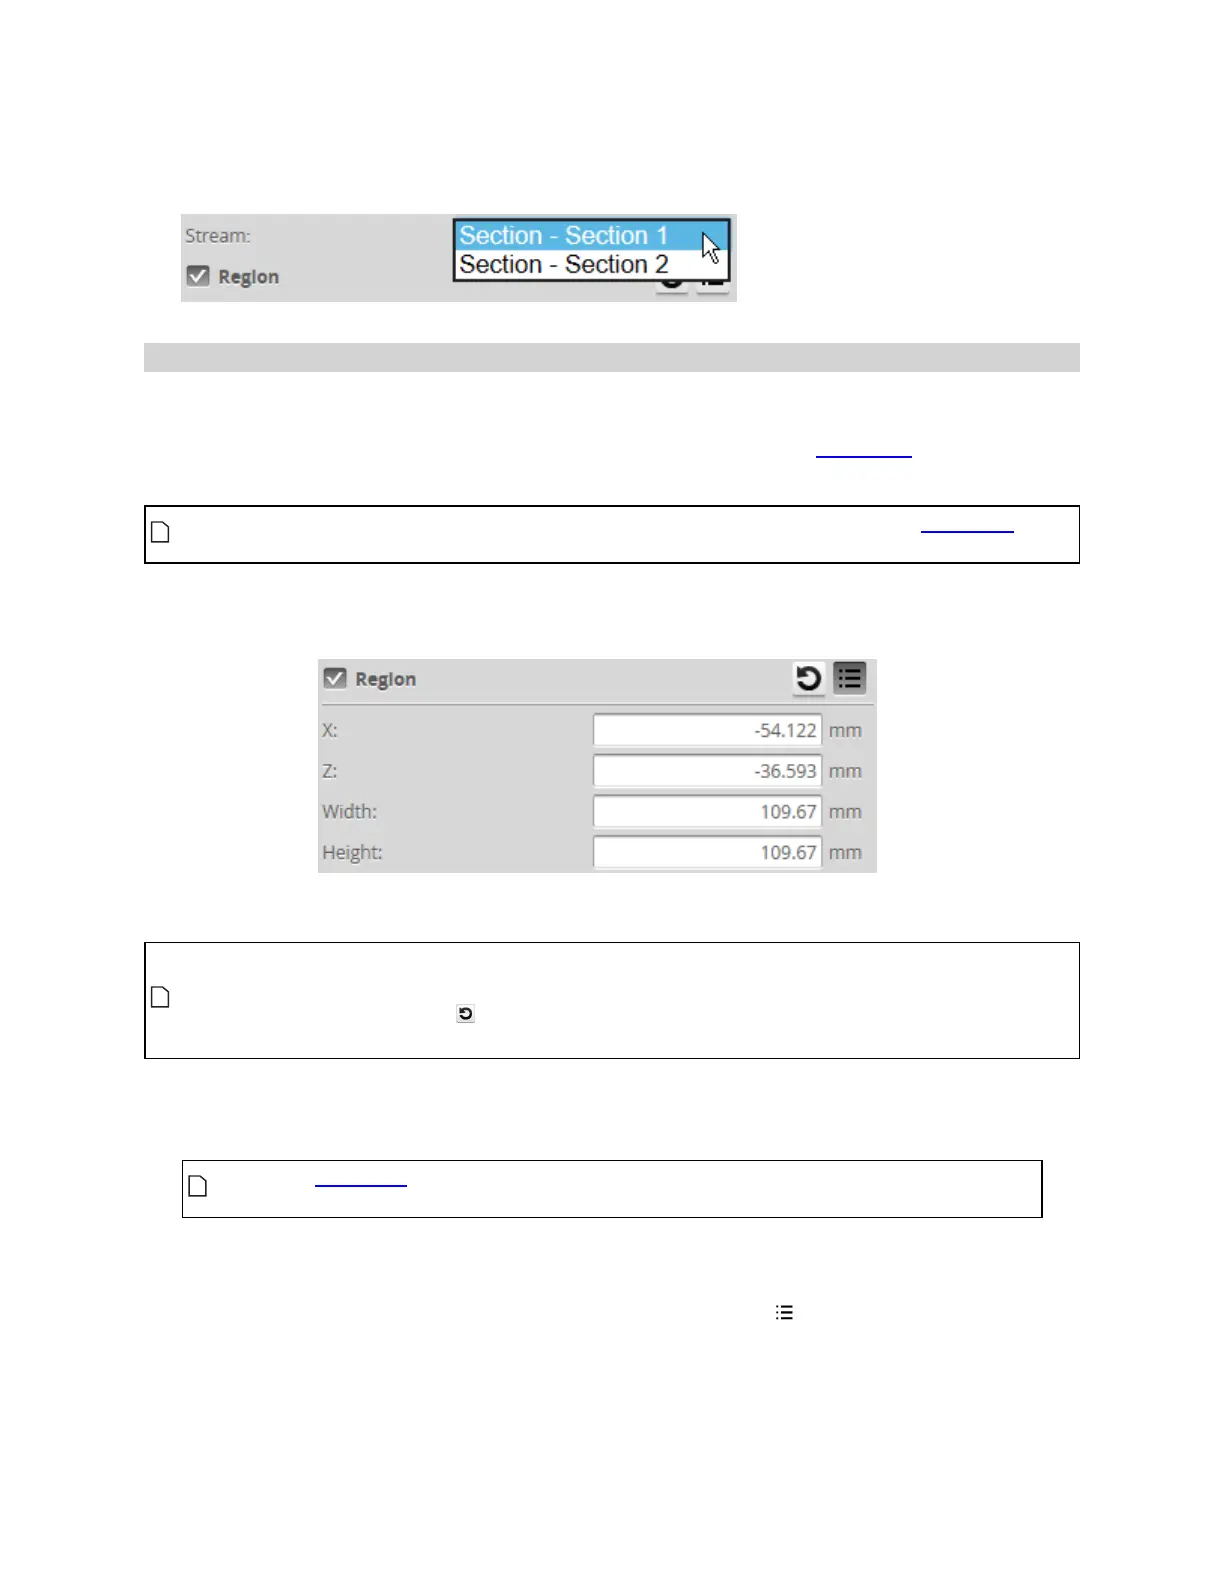
4. Select the section in the Stream drop-down list.
Regions
Many measurement tools use user-defined regions to limit the area in which measurements occur or to
help in the identification of a feature (Feature Points on page 187), a fit line (Fit Lines on page 189), or left
or right side of the Panel tool ( see Panel on page 229). Unlike reducing the active area, reducing the
measurement region does not increase the maximum frame rate of the sensor.
You can disable regions entirely and cause the measurement tool uses the entire active area by
unchecking the checkbox next to the Regions setting.
All tools provide region settings under the upper Parameters tab. This region applies to all of a tool's
measurements.
Region settings are often found within expandable feature sections in the tool's panel.
In 2D mode, the tool region defaults to the center of the current data view, not the global field of
view. In 3D mode, the region defaults to the global field of view.
Use the region reset button ( ) to set the size of a region to its default. This is useful after zooming
in or out in the data viewer.
To configure regions:
1. Go to the Measure page by clicking on the Measure icon.
The scan mode must be set to the type of measurement you need to configure.
Otherwise, the wrong tools, or no tools, will be listed on the Measure page.
2. In the Tools panel, click on a tool in the tool list.
3. Configure the region using the mouse in the data viewer.
You can also configure regions manually by clicking the expand button ( ) and entering values in the
fields. This is useful if you need to set precise values.