4-46 P/N 9-500-0255
Service Manual
Chapter 4: Calibrations and Performance Checks
X-ray and Light Field Check and Alignment Procedures
7.3 Aperture Adjustment Procedures
Set up the unit for performing the aperture adjustments as follows:
1. Remove the Tubehead covers as per Chapter 6, Section 3.2.1, if not previously removed
during service procedures.
2. Install the X-ray Field Alignment Template as per Section 7.1.
3. If necessary, power up the mammography unit.
Note… Not all apertures are standard equipment on the Affinity. Perform the
sections applicable to the apertures packaged with the unit.
4. Adjust the Affinity apertures (shown in Figure 4-12) in the order shown below:
• Section 7.4, Auto Aperture Alignment
• Section 7.5, Magnification Full Field (18 x 24 cm) Aperture Alignment (SM FS)
• Section 7.6, 10 cm Coned-down Contact Aperture Alignment (LG FS)
• Section 7.7, 7.5 cm Spot Contact Aperture Alignment (LG FS)
• Section 7.8, 7.5 cm Spot Magnification Aperture Alignment (SM FS)
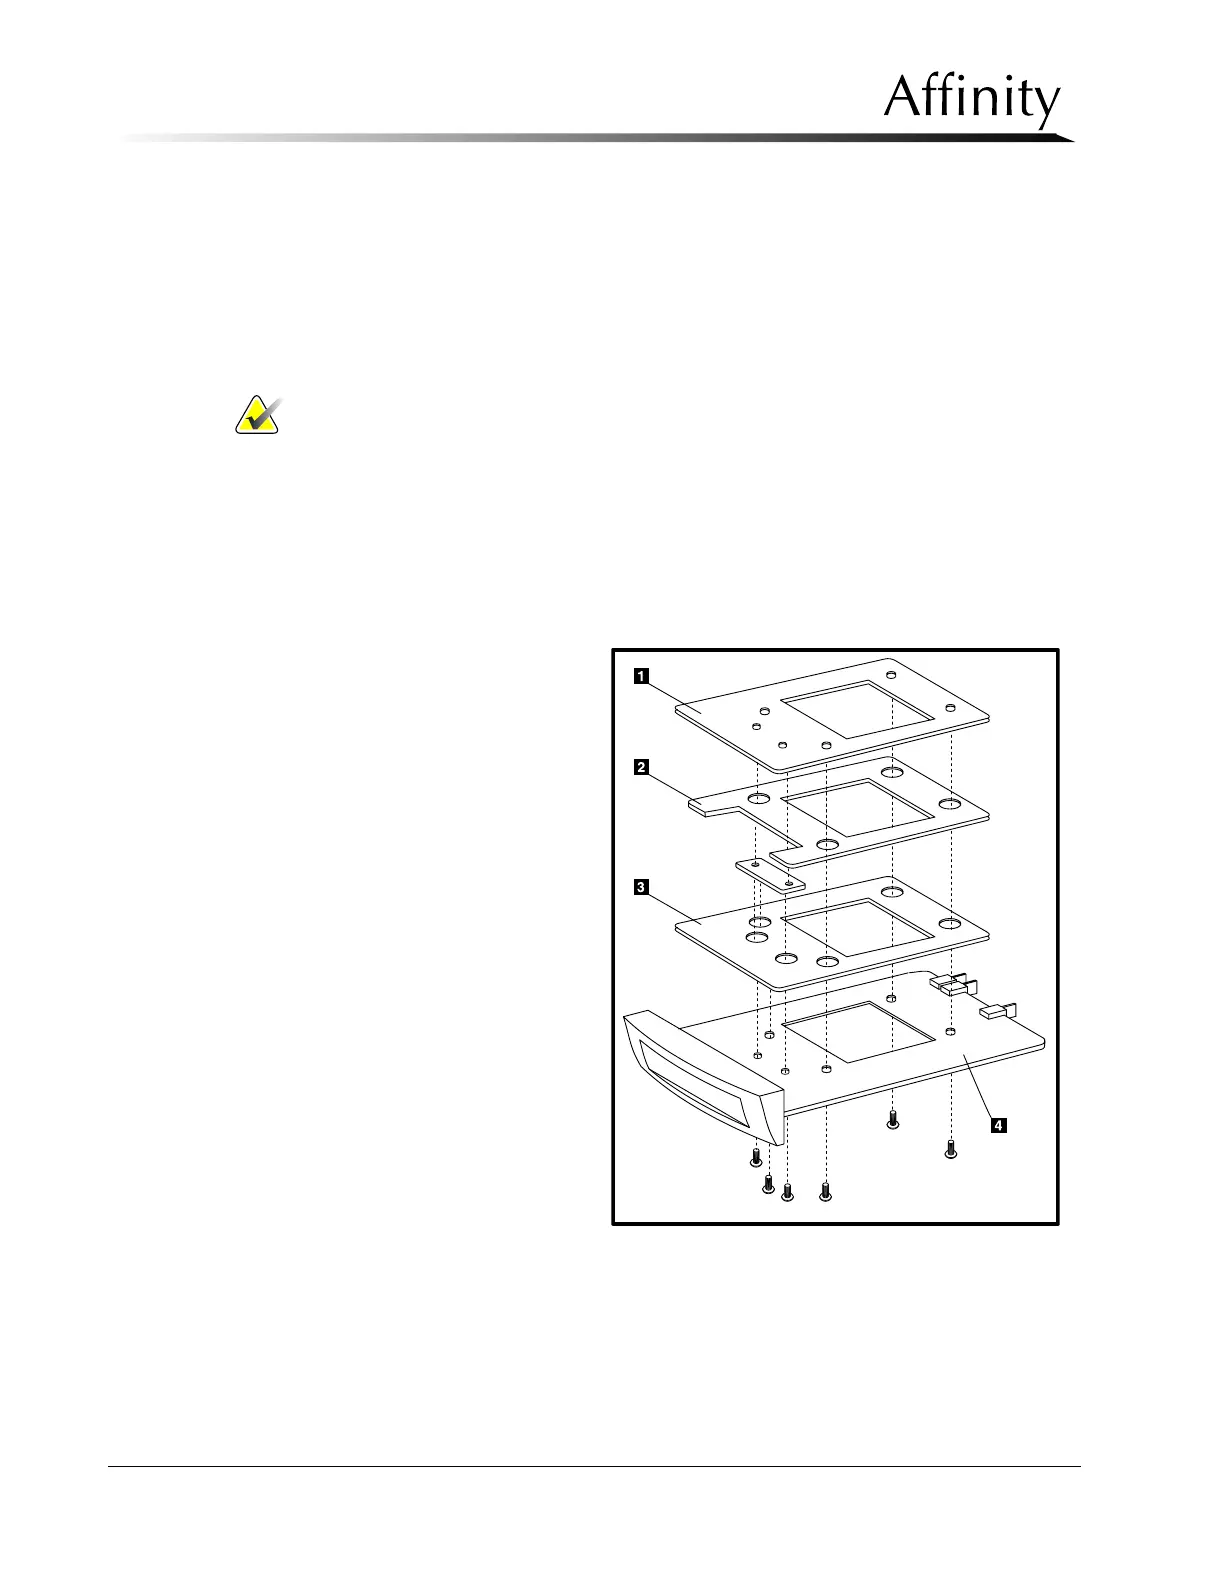
Legend for Figure 4-11
1. Top Plate
2. Left/Back Alignment Blade
3. Right/Front Alignment Blade
4. Base Plate
Figure 4-11: Aperture Alignment