6-40 P/N 9-500-0255
Service Manual
Chapter 6: Maintenance—Remove and Replace Procedures
C-Arm Components—Remove and Replace
3.2.4 C-Arm Cooling Fan
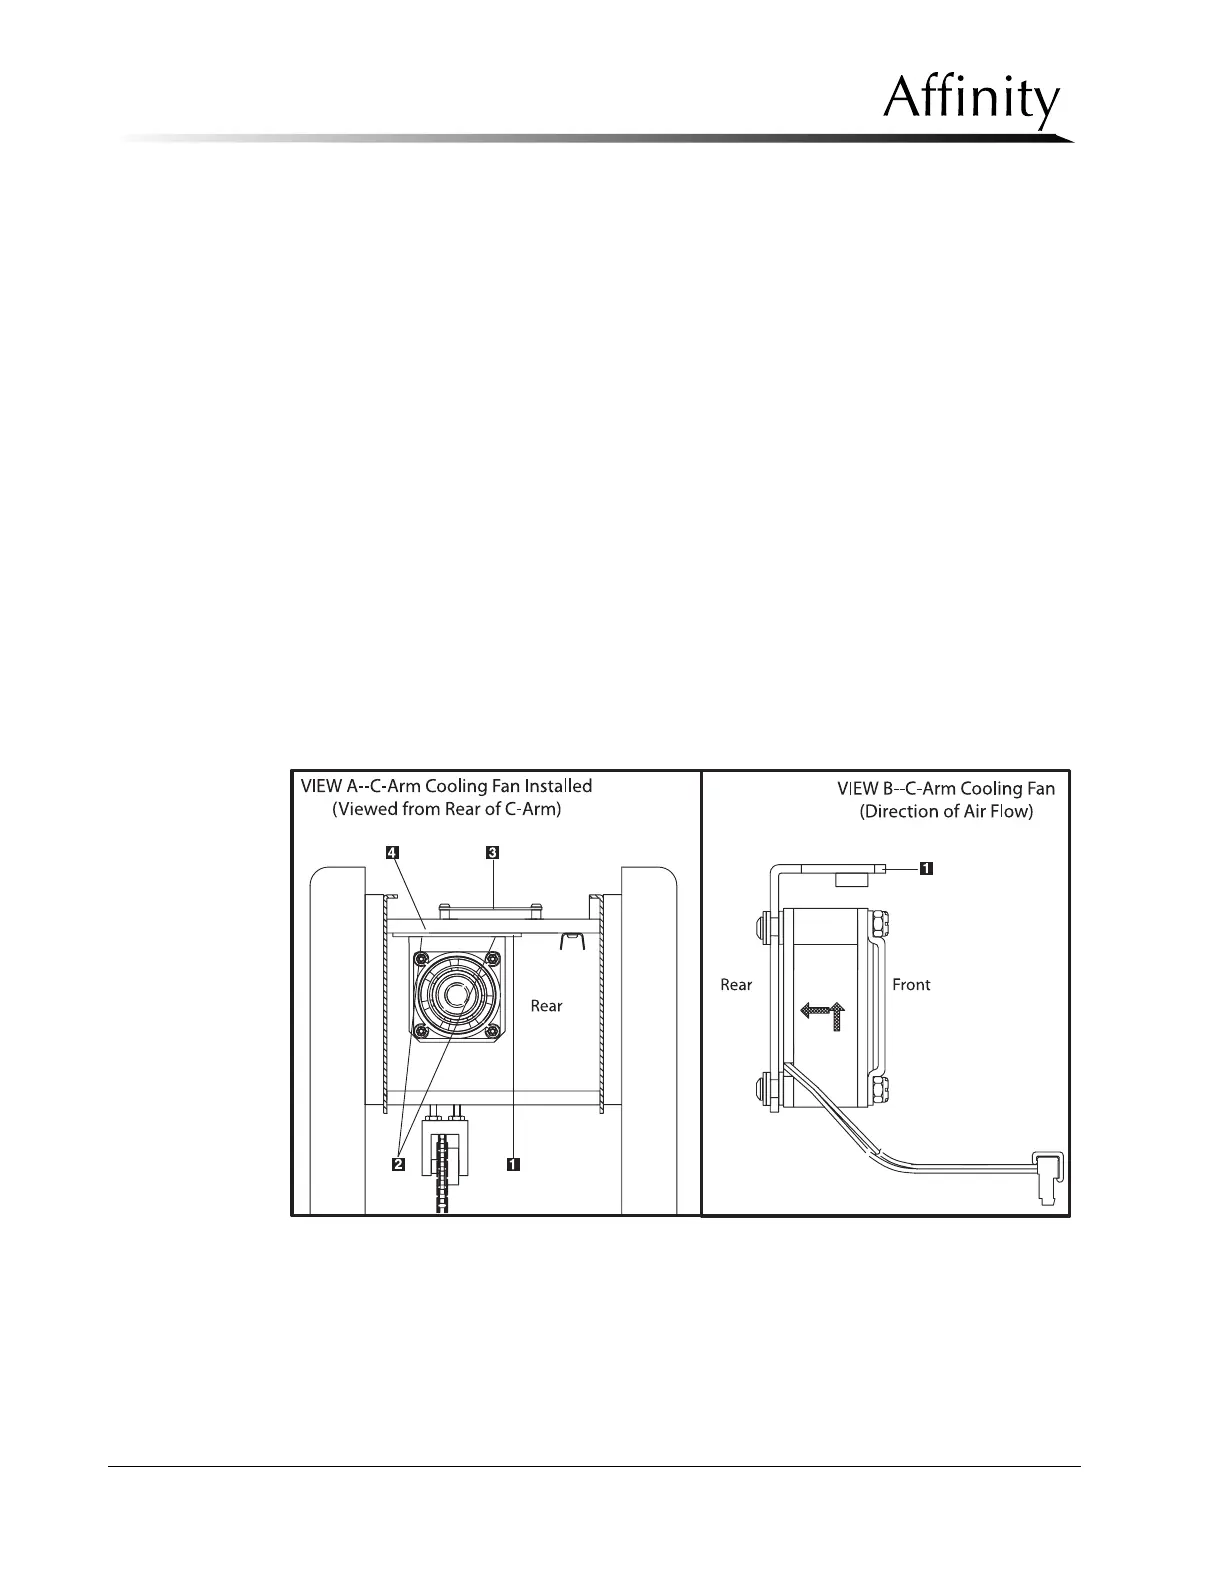
The C-arm Cooling Fan is mounted to the lower portion of the C-arm Top Plate
(Figure 6-27, Item 4).
1. Remove power from the unit. Remove the C-arm Top and Upper Rear Covers as
per Section 3.1.2.
2. Disconnect the fan wiring harness from the Filament Protect Board (Figure 6-27,
Item 3). Note the locations if they are not labeled.
3. Remove the Filament Protect Board as per Section 3.1.3, Steps 2 through 4.
4. Remove the 2 screws (Figure 6-27, Item 2) that secure the fan mounting bracket
(Figure 6-27, Item 1) to the C-arm Top Plate. Pull the fan out of the unit.
5. Install the replacement cooling fan by reversing this procedure. Ensure the air
flow is as shown in Figure 6-27, View B.
6. Before installing the tubehead covers, apply power and verify that the fan
operates.
Legend for Figure 6-27
1. Mounting Bracket
2. Mounting Hardware
3. Filament Protect Board
4. C-Arm Top Plate
Figure 6-27: C-Arm Cooling Fan—Removal