P/N 9-500-0255 4-55
Service Manual
Chapter 4: Calibrations and Performance Checks
X-ray and Light Field Check and Alignment Procedures
7.12 Light Field Illuminance Check
Intensity and consistency of the Light Field are checked by performing the following
procedure. Refer to Figure 4-16.
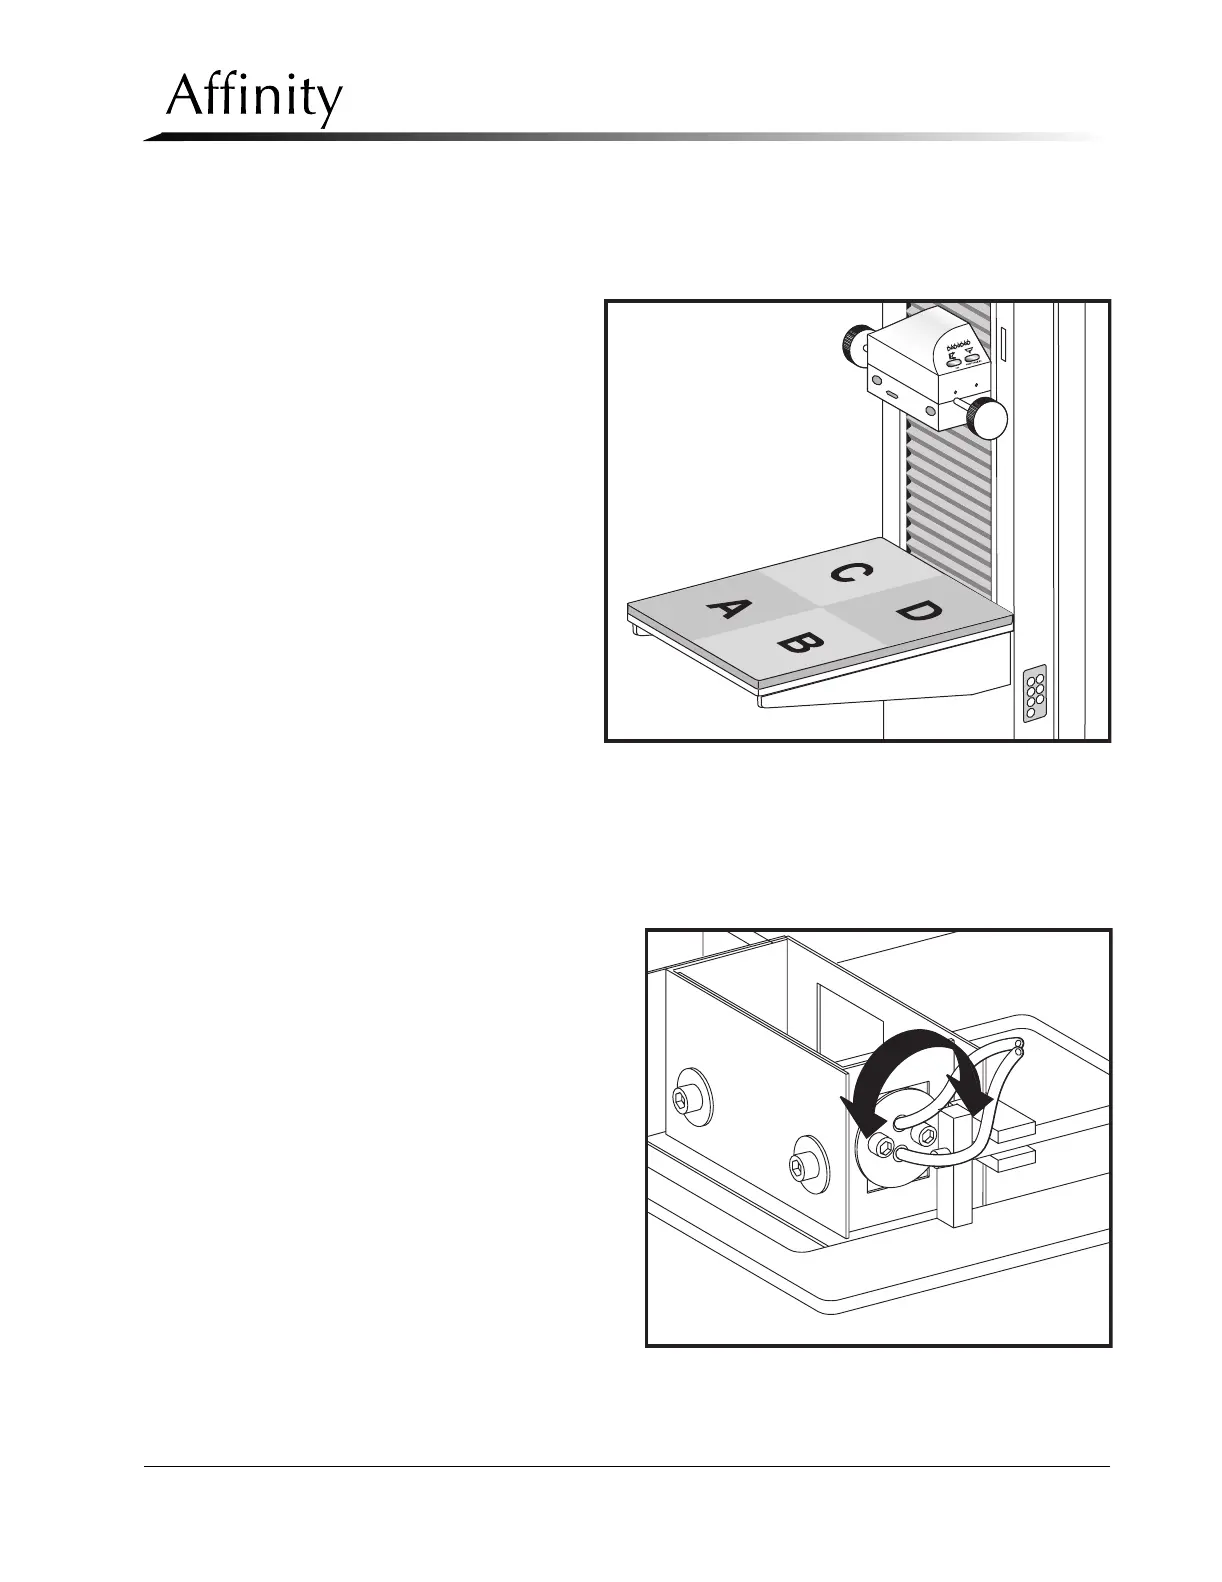
1. Insert the Auto-Aperture
into the tubehead slot.
Place a light meter probe
at position “A” (Figure 4-
16) on the image receptor
support with its sensor
facing up.
2. Take a background light
reading (Light Field lamp
OFF) and record the
results. Take a light read-
ing with the Light field
lamp ON and record the
results.
3. Convert both readings to
lux values (use the con-
version table on the meter,
or in the meter manual).
Subtract the background
lux value from the Light
Field lux value. Record
the difference.
4. Repeat this Illuminance test for positions “B,” “C,” and “D” in Figure 4-16.
5. If the difference in any quadrant is less than 160 lux, the Light Field Illuminance Test is
considered failed.
6. If necessary, remove the lower
tubehead cover, then loosen
the two screws that secure the
lamp socket to the lamp cradle
(Figure 4-17).
7. Increase the light field illumi-
nance by adjusting the lamp
position within the cradle.
Rotate the lamp and socket
together until the lamp fila-
ment is parallel with the plane
of the mirror. Tighten the
screws, replace the tubehead
cover, then repeat the test.
8. Verify that the length-to-width
ratio of the light field is not
altered.
9. If the check still fails, replace
the lamp and repeat the entire
check. When complete, perform the light field alignment as per Section 7.10.
Figure 4-16: Probe Locations—Light Field Illuminance
Figure 4-17: Adjustment—Light Field Illuminance