4-12 P/N 9-500-0255
Service Manual
Chapter 4: Calibrations and Performance Checks
Exposure System Calibration
5. On the Filament Protection
Board, connect a storage oscil-
loscope to TP2 (mA SENSE)
and TP3 (GND).
6. Turn the unit ON.
7. Install a Bucky on the IRSD.
8. After the Run Mode screen dis-
plays, highlight the Filter data
field, and select the Mo filter.
9. From the Run Mode screen,
access Calibration Screen #1
by pressing Reset + Right
Arrow four times.
10. Highlight the Auto Cal data
field, then press a Change key
until the field reads: ON.
11. Highlight and change the
appropriate data fields to set
the unit for a Manual mode
exposure at 20 kV, 40 mAs,
Large focus.
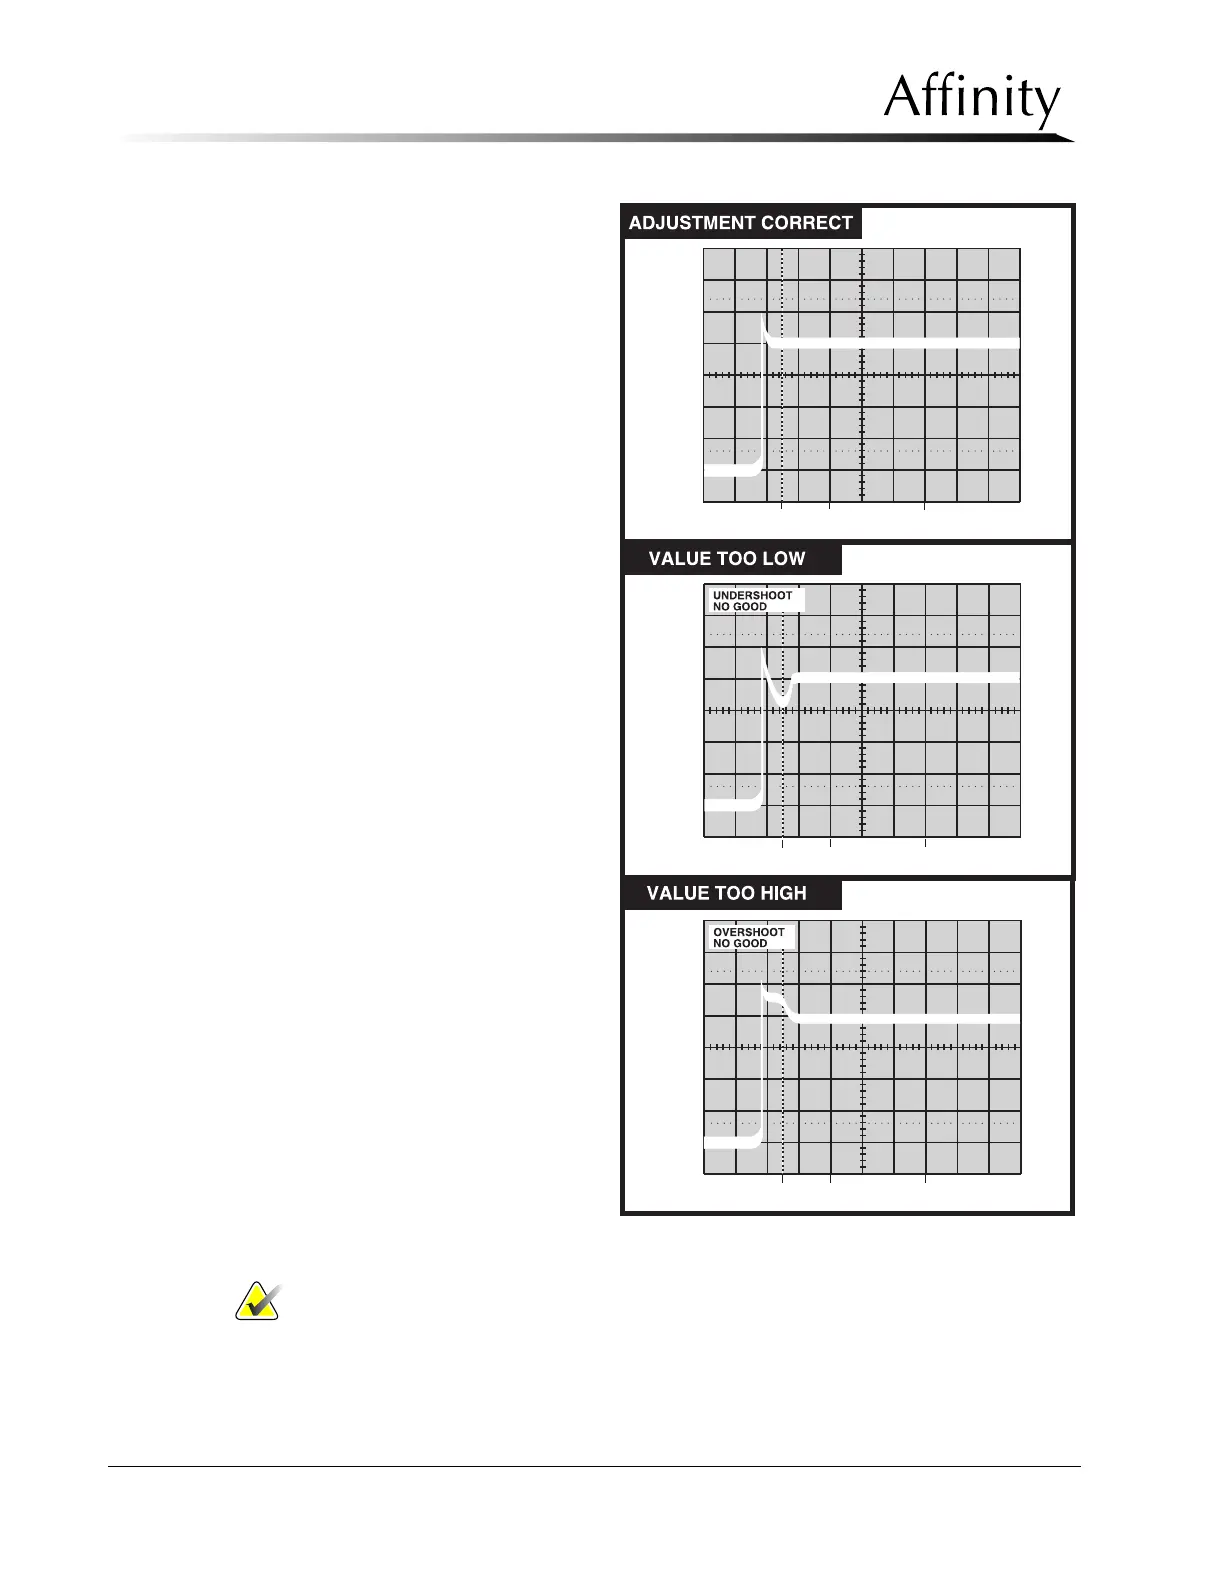
12. Make an exposure. The system
will automatically adjust the
starting filament values. Wait
40 seconds, take a second
exposure. Wait 40 seconds,
take a third exposure. After
each exposure, check the
waveform on the oscilloscope
for under- or overshoot (Figure
4-4). Verify that the waveform
appears stable and is at the cor-
rect amplitude for the set kV as
shown in Table 4-3).
Notes… To fully calibrate the system, 3 exposures (at 40 second intervals between
shots) must be taken.
Note the mA Target (“T”) value and the mA Start (“ST”) value displayed at
the bottom of the screen. The difference between the start value and the
target value should be less than 10.
Figure 4-4: Example—Filament Waveforms Pattern