P/N 9-500-0255 4-15
Service Manual
Chapter 4: Calibrations and Performance Checks
Exposure System Calibration
4.4 Backup Timer Test
Perform this procedure at initial installation, or after replacing the Microprocessor Board to
ensure that the Backup Timer is working properly. This test will attempt to generate a 7
second exposure. The Backup Timer must detect that the exposure duration has exceeded
the maximum and terminate the exposure immediately.
Note… This test does not generate radiation.
1. Turn the unit OFF.
2. Remove the Gantry’s right side panel (to access the Microprocessor board) as per Chap-
ter 6, Section 2.1.1.
3. On the Microprocessor board, set the unit for the service mode (S2 switch 1 = ON).
4. Turn the unit ON.
5. Access Calibration Screen #1.
6. Highlight the Timer Test data field using the Scroll keys. Press a Change key until the
data field reads: ON.
7. Turn the unit OFF.
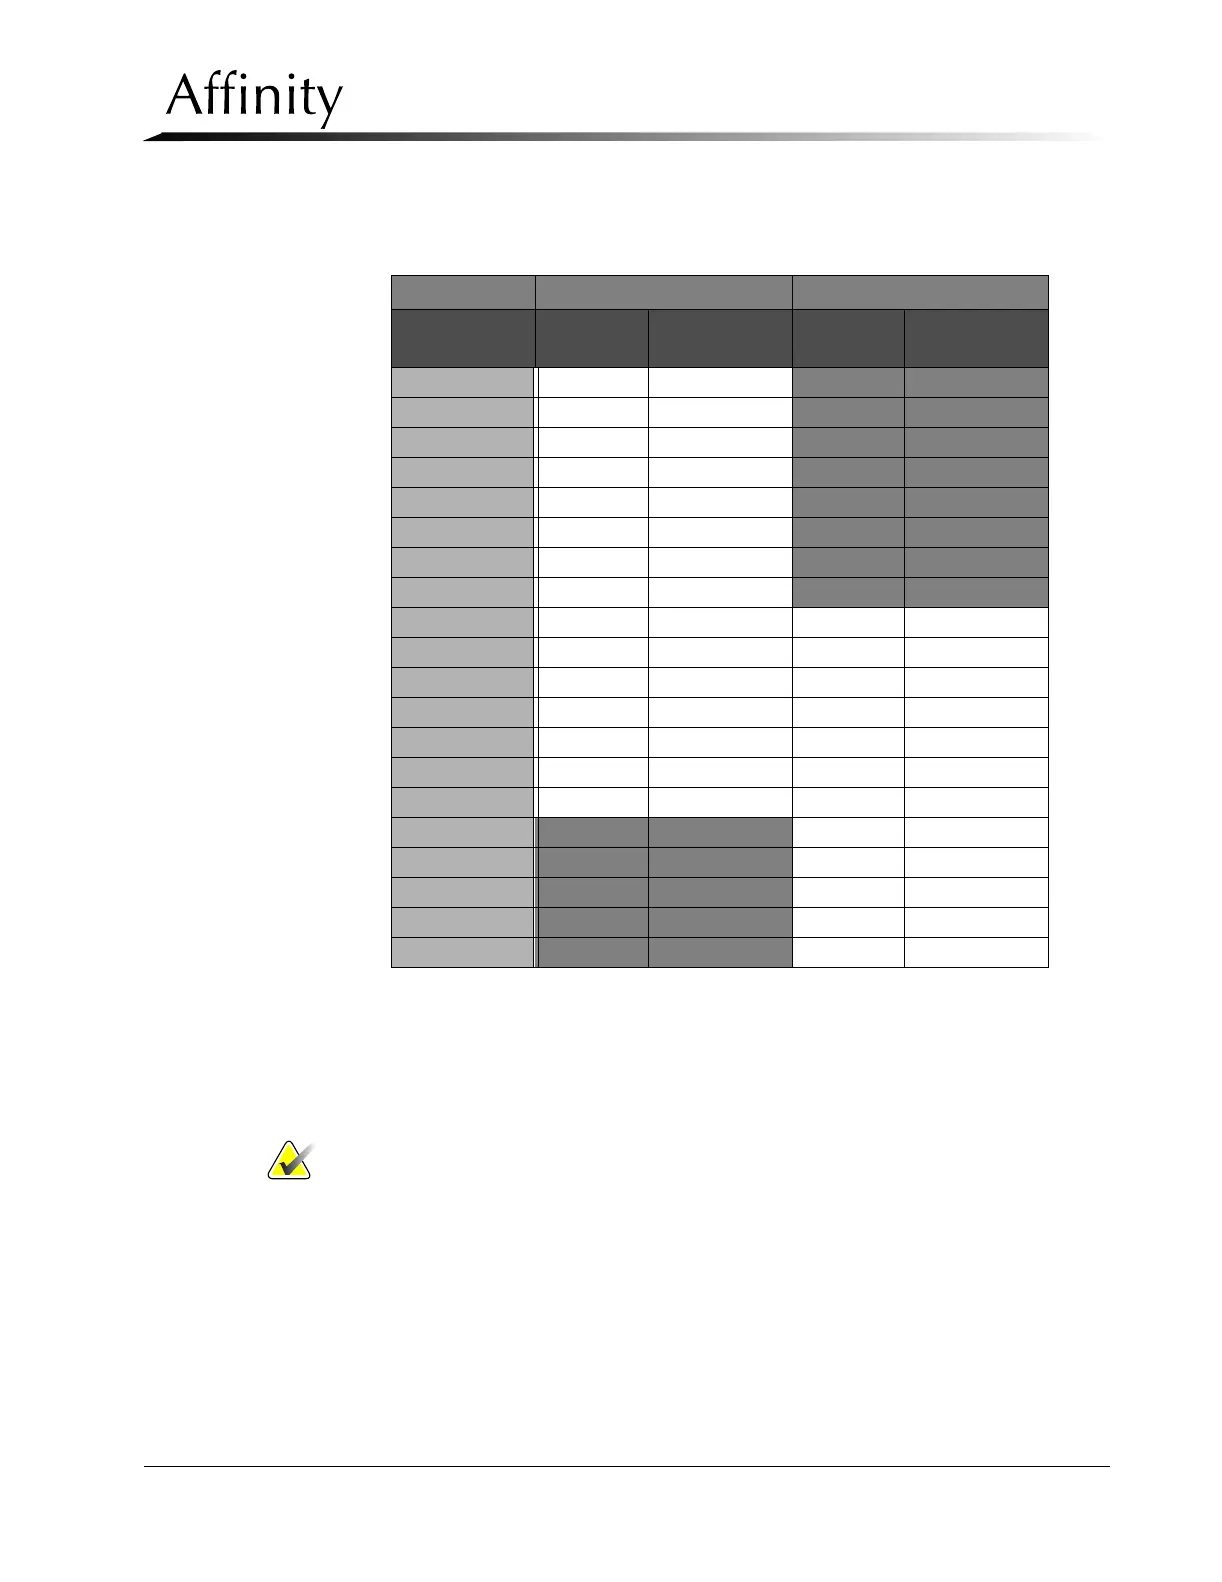
Table 4-4: Reduced mA Filament Waveform Amplitude
Large Focal Spot (Mo) Large Focal Spot (Rh)
kV Reduced
ma
Results Reduced
ma
Results
20 kV 20 ---
21 kV 22 ---
22 kV 24 ---
23 kV 26 ---
24 kV 28 ---
25 kV 30 ---
26 kV 30 ---
27 kV 30 ---
28 kV 30 30
29 kV 30 30
30 kV 30 30
31 kV 30 30
32 kV 30 30
33 kV 28 28
34 kV 28 28
35 kV --- 26
36 kV --- 26
37 kV --- 26
38 kV --- 24
39 kV --- 24