Manitowoc Published 07-19-16, Control # 249-01 7-9
2250 SERVICE/MAINTENANCE MANUAL POWER TRAIN
Maintenance
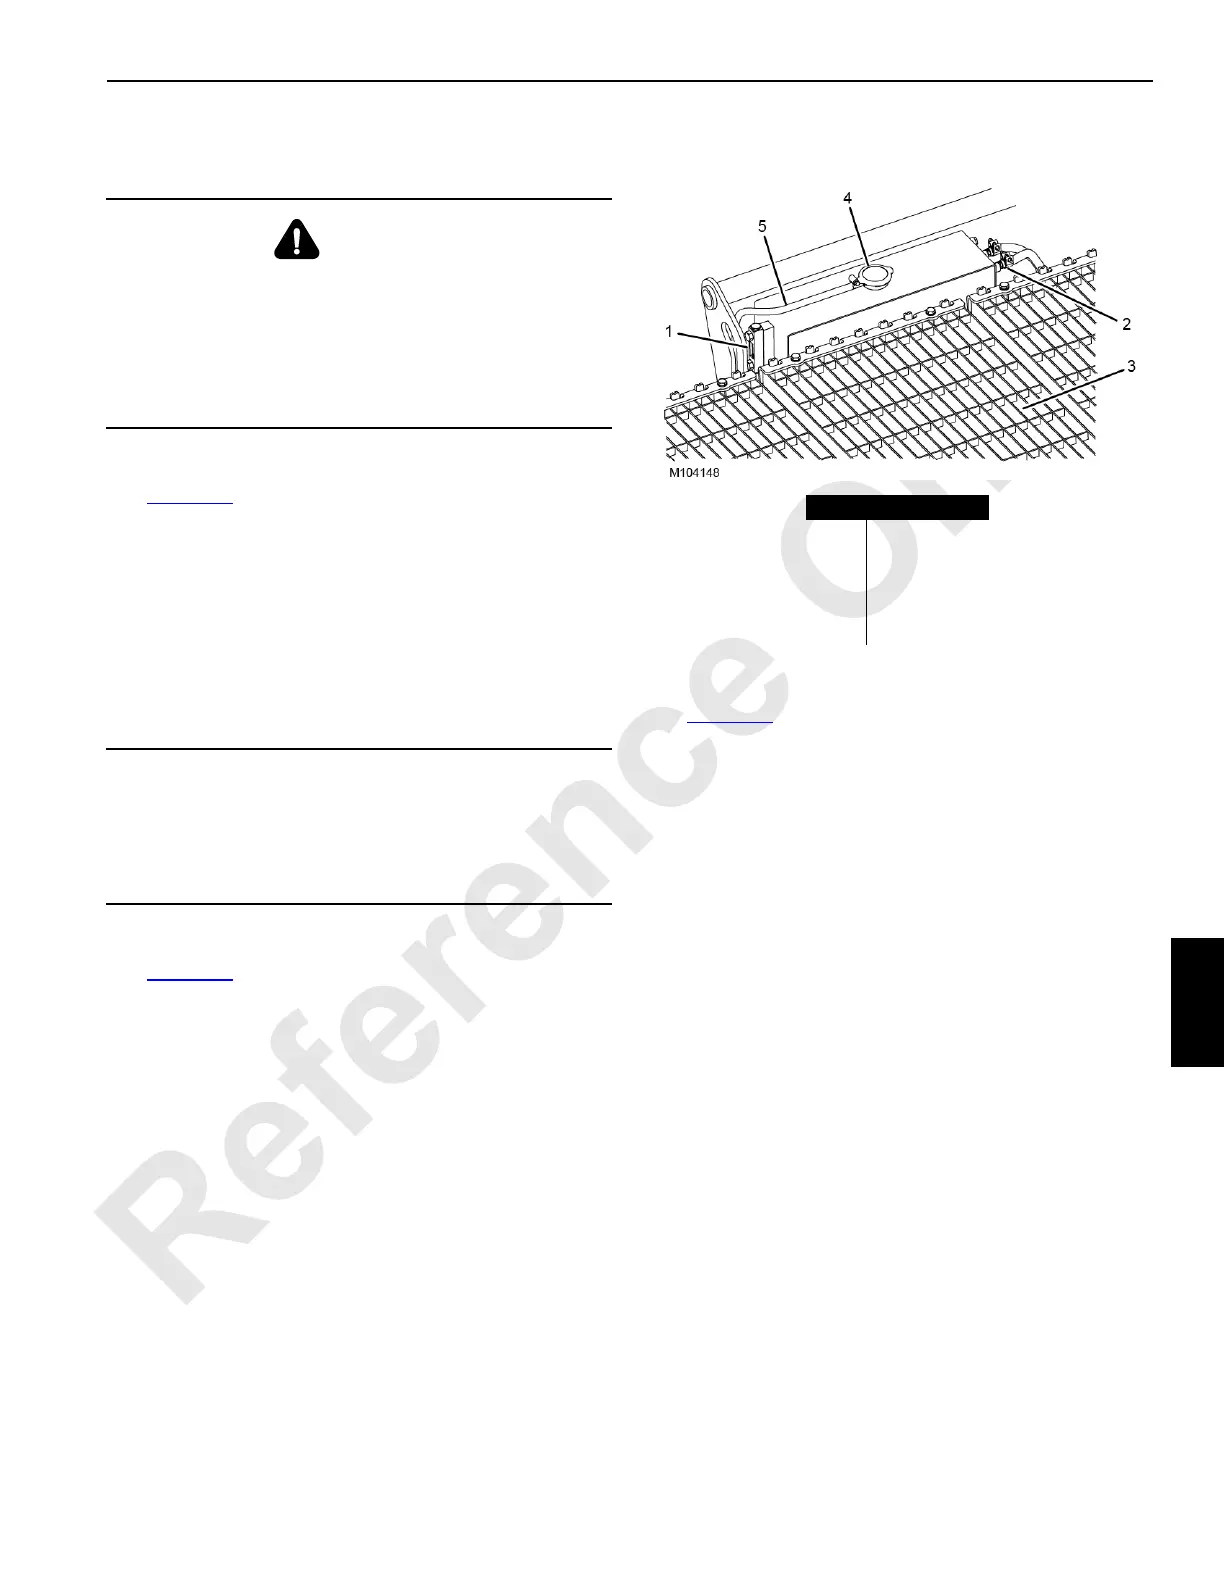
Removal of the Radiator Cap
See Figure 7-6 for the following procedure.
1. Place a protective covering over the fill cap (4).
2. Slowly turn the fill cap counterclockwise until it stops at
the safety detent.
3. Wait until the pressure (indicated by hissing sound) is
completely relieved.
4. Depress the fill cap and turn it counterclockwise to
remove.
Daily Maintenance (start of each shift)
See Figure 7-6 for the following procedure.
Before the start of each shift, perform the following.
1. Check the coolant level when the coolant is cold. The
coolant should be at the Full Cold mark on the level
gauge (1).
2. Fill the cooling system as required with coolant. To
ensure an adequate fill, do not add coolant at a rate
greater than 19 L/min (5 gpm).
See the engine manufacturer’s manual for antifreeze
and coolant additive recommendations.
3. Look for coolant leaks while the engine is running and
correct causes of leaks if any are found.
Semiannual Checks
See Figure 7-6 for the following procedure.
1. Inspect the fill cap (4) and thermostat for proper
operation and replace any worn parts. Verify the
following:
- The fill cap relieves at 1 bar (16 psi).
- The thermostat closes at 82°C (180°F) and opens
fully at 94°C (202°F).
2. Inspect the water pump belts for wear and proper
adjustment (see the engine manufacturer’s manual).
3. Inspect the cooling system hoses for deterioration and
other defects. Replace as necessary.
4. Tighten the hose clamps.
5. Clean all dirt and other debris from the outside of the
radiator.
6. Make sure the overflow line (5) on the tank is open.
WARNING
Burn Hazard!
Prevent personal injury. Hot coolant, coolant spray, and
coolant steam can cause serious injury.
Do not remove the radiator cap from a hot engine. Stop
the engine and wait until the coolant temperature is below
50°C (120°F).
CAUTION
Engine Damage!
Inadequate coolant level will cause the engine to overheat.
Do not allow the coolant level to go below the low level on
the gauge.
Item Description
1 Level Gauge
2 Vent Line
3Radiator
4 Fill Cap
5Overflow Line
FIGURE 7-6

 Loading...


