CHAPTER 6 – Projects OMRON
Page 98 Release 2.0
2. Type the full name of the new user in the Full Name: field.
3. Type a login name in the Login Name: field.
4. Type a user password in the Password: field. The password must be at
least four characters in length.
5. Select a level of privilege from the Security Level: drop down list.
6. Click the Store pushbutton to add the new user to the Configured Users:
list, or the Cancel pushbutton to abort the operation.
To modify an existing user:
1, 2, 3…
1. Select a user from the Configured Users: list and click the Modify
pushbutton. The User Attributes: fields and buttons become enabled, with
the contents of all the fields filled with the attributes of the selected user.
2. Amend the full name, login name, password and level of privilege in the
same way as adding a new user.
3. Click the Store pushbutton to update the user in the Configured Users: list,
or the Cancel pushbutton to abort the operation.
To remove a user from the Configured Users: list:
1, 2, 3…
1. Select a user from the Configured Users: list and click the Delete
pushbutton.
2. A confirmation dialog is displayed. Click the Yes pushbutton to
remove the selected user or the No pushbutton to abort the operation.
When all user amendments are complete, click the Close pushbutton.
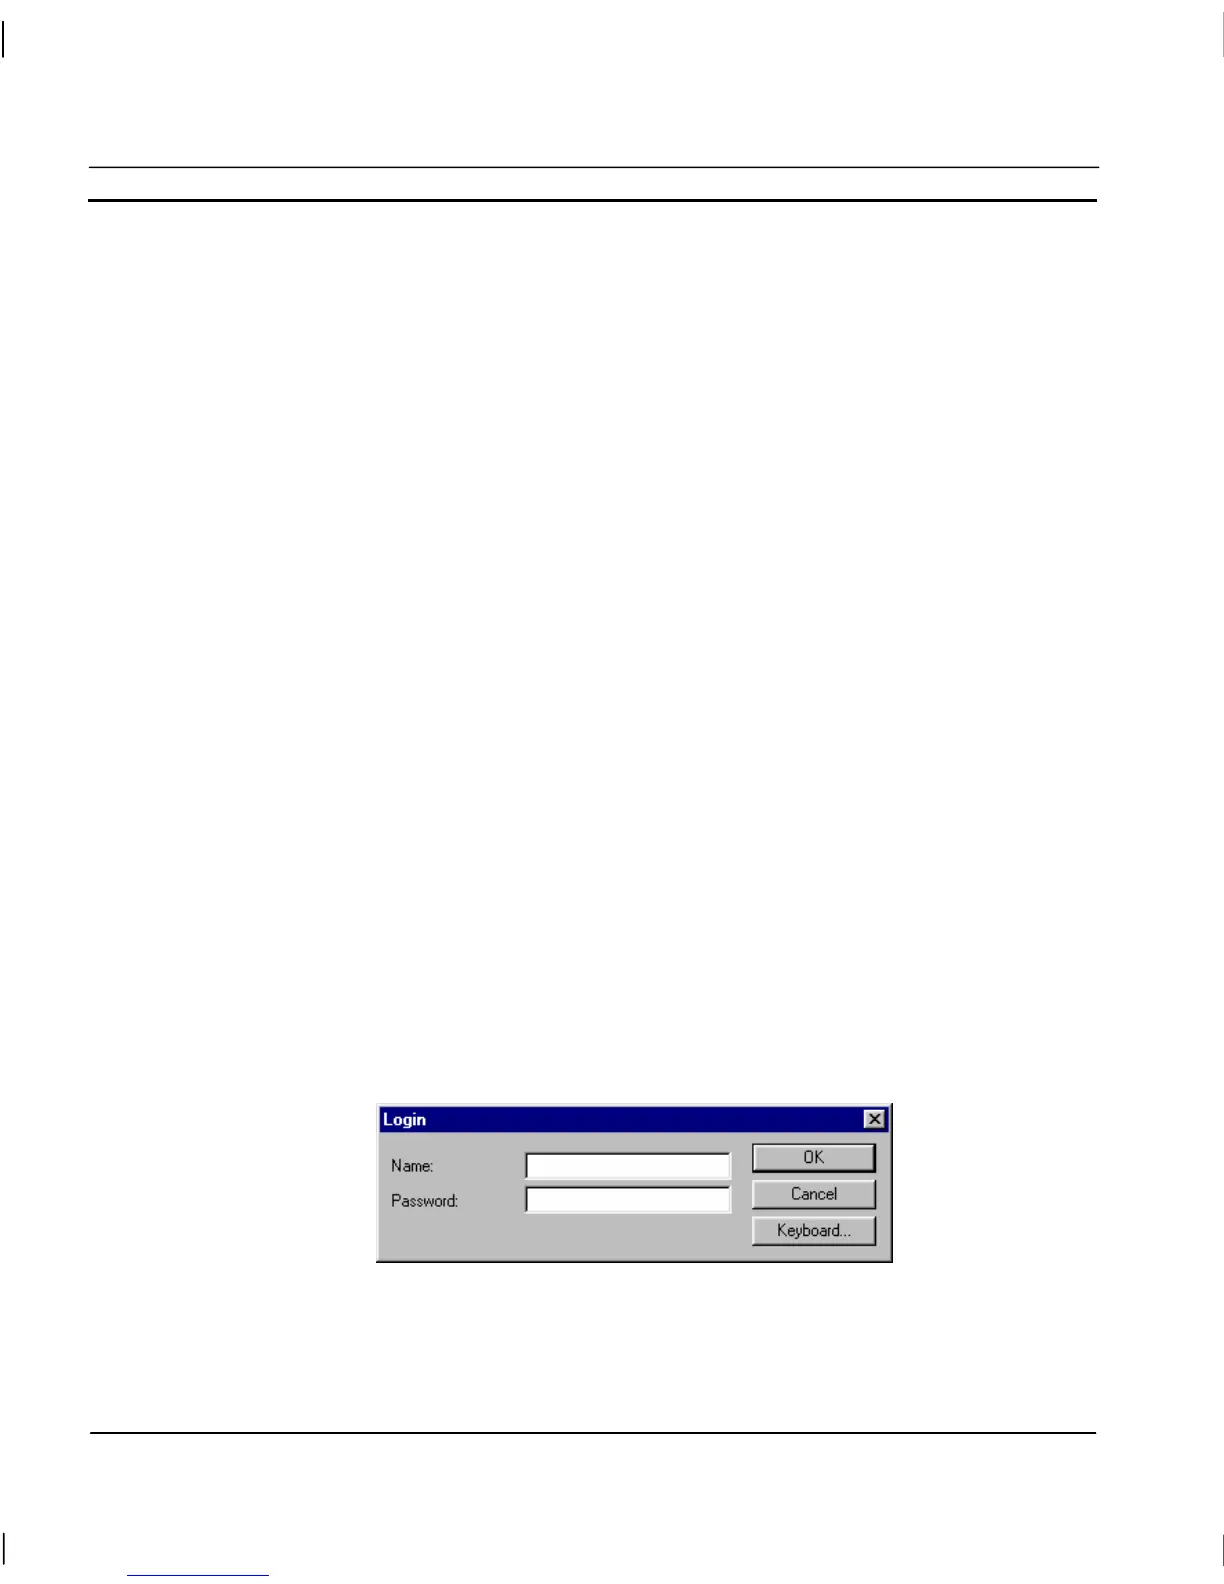
In the runtime application, to make use of the designated privilege, the user must log in. Login can
be accessed in a variety of ways, and so is dependent on the setup of the runtime application. Some
applications may require login as soon as the application is run, others may allow login from a
context-sensitive floating menu. Refer chapter 9, Animation for further information. The Login User
dialog is as follows:
To log in, enter the login name (not the full name) in the Login Name: field and the associated
password in the Password: field. Any characters typed in the Password: field are disguised by a ‘*’
symbol for each character typed. Click the OK pushbutton to log in or the Cancel pushbutton to
abort.