90 / 374
SOCT User Manual Version 10.0 rev. A
8.3.10.2 Fundus Mode
Fundus exam is similar to the examination of the posterior segment of the eye.
1. Prepare the patient as explained in chapter 8.1 Preparation for examination.
2. Ask the patient to look at the center of the green cross and blink freely if the sound support
is mute or disabled. If required, use the large fixation target.
3. Verify the scanning program and change to the required FUNDUS mode.
4. Follow the procedure depending on the Acquisition mode similarly to the OCT scanning
modes.
Fundus Photo Semi Auto mode
NOTE: With some patients the system may not take an optimal fundus image
automatically. In this case use the Manual or the Semi Auto mode.
1. Prepare the patient’s position chapter 8.1 Preparation for examination.
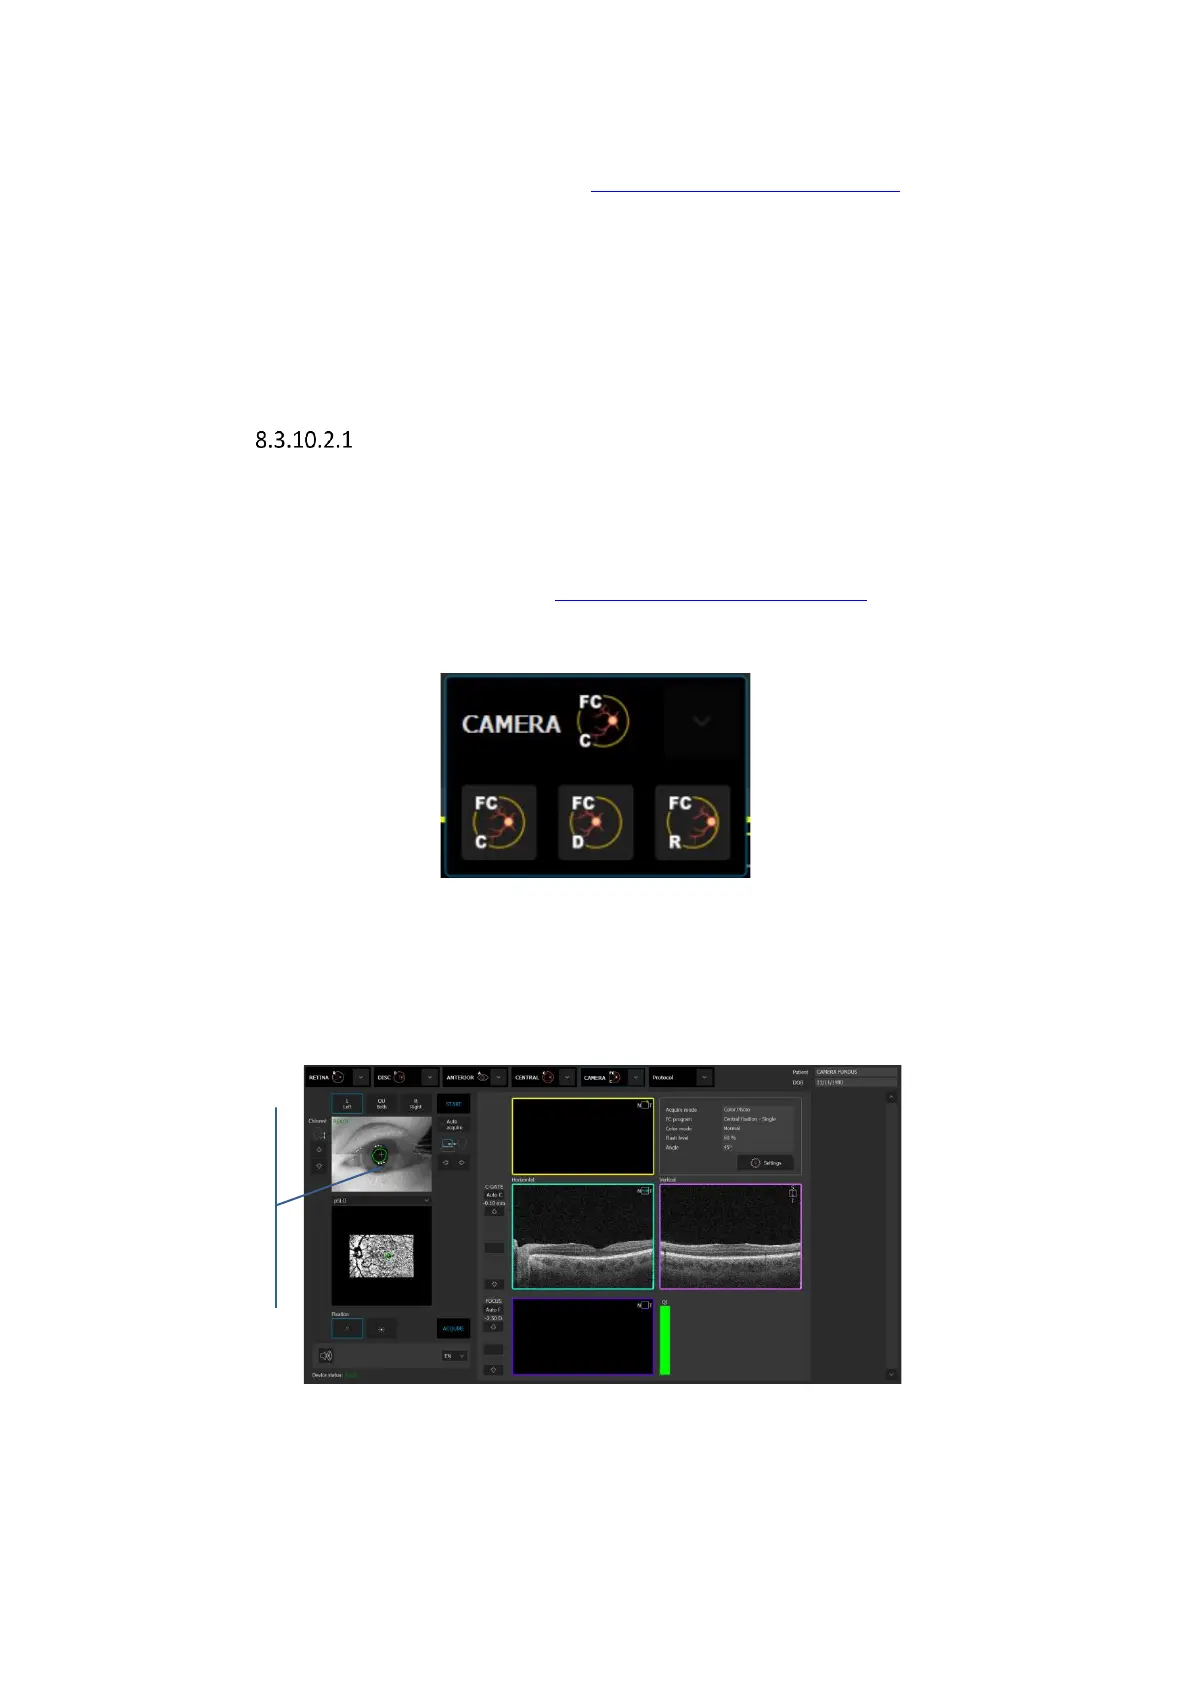
2. Choose one of the desired Fundus Camera modes.
Figure 52. Fundus Camera modes
3. Uncheck [Auto Acquire] and press [START]. The system will automatically align and
optimize the device position (align XYZ head position, Optimize Focus based on OCT signal)
and then correct the position on the basis of the OCT signal.
Figure 53. Aligned pupil position in Fundus Camera mode
 Loading...