5.46
BODY / STEERING / SUSPENSION
9924125 - 2013 RANGER RZR / RZR S / RZR 4 Service Manual
© Copyright 2012 Polaris Sales Inc.
DECAL REPLACEMENT
The side panels, front and rear fender cabs are plastic
polyethylene material. Therefore, they must be “flame
treated” prior to installing a decal to ensure good
adhesion. A bonus of the flame treating procedure is it can
be used to reduce or eliminate the whitish stress marks
that are sometimes left after a fender or cab is bent, flexed,
or damaged.
To flame treat the decal area:
1. Pass the flame of a propane torch back and forth
q
uickly over the area where the decal is to be applied
until the surface appears slightly glossy. This should
occur after just a few seconds of flame treating. Do
not hold the torch too close to the surface (2-3 inches
from the flame tip is recommended). Keep the torch
moving to prevent damage.
2. Apply the decal on one edge fi
rst. Slowly lay down
remainder of the decal while rubbing lightly over the
decal surface to eliminate any air bubbles during the
application.
SHOCKS / SPRINGS / FASTENERS
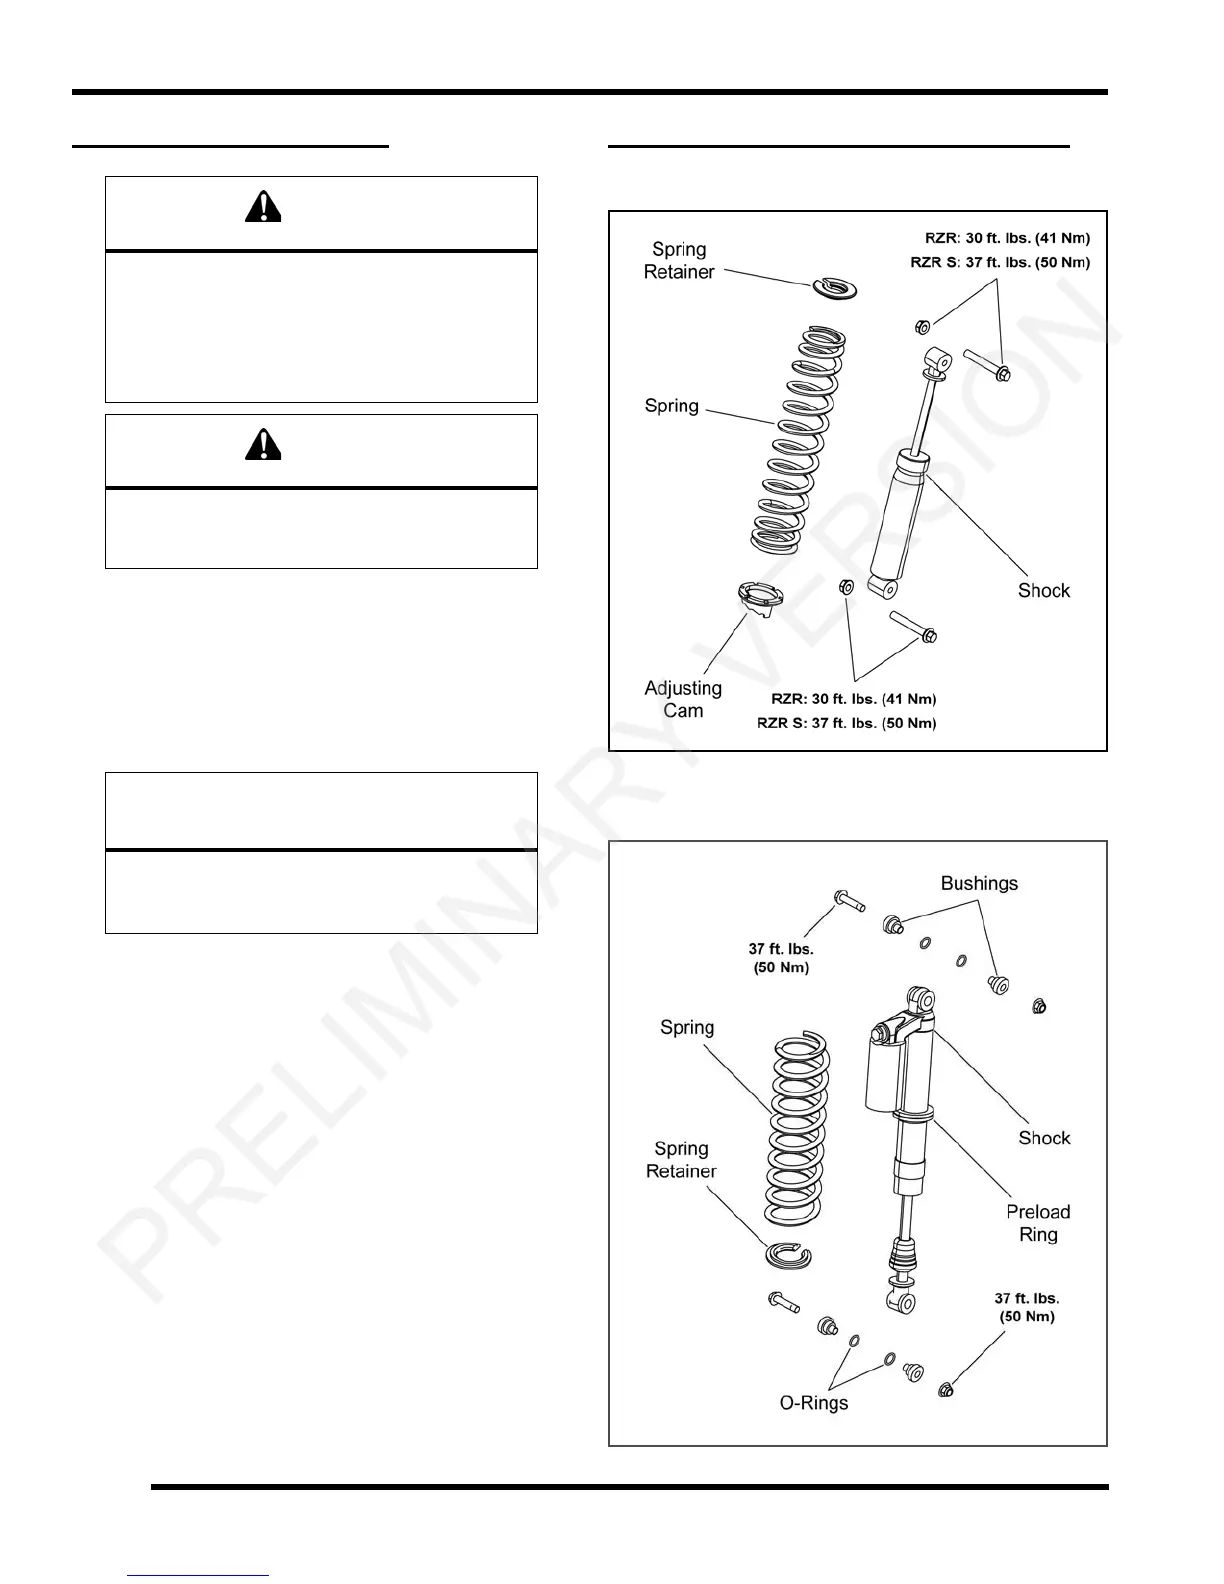
Exploded View (RZR / RZR S)
Exploded View (RZR S / RZR S INT’L)
The following procedure involves the use of an
open flame. Perform this procedure in a well
ventilated area, away from gasoline or other
flammable materials. Be sure the area to be
flame treated is clean and free of gasoline
or flammable residue.
Do not flame treat components that are installed
on the vehicle. Remove the component from the
vehicle before flame treating.
Do not flame treat painted plastic components.
Painted plastic surfaces should only be wiped
clean prior to decal adhesion.
Retainer gap
should be 180°
from spring end
Retainer gap
should be 180°
from spring end
 Loading...