6.10
CLUTCHING
9924125 - 2013 RANGER RZR / RZR S / RZR 4 Service Manual
© Copyright 2012 Polaris Sales Inc.
DRIVE BELT (NON-EBS)
Belt Removal
1. Remove outer PVT cover as described in “PVT
SYSTEM SERVICE - PVT Disassembly”.
2. Mark the drive belt direction of ro
tation so that it can
be installed in the same direction.
NOTE: Belt is normally positioned so that the part
numbe
r can be easily read.
3. To remove drive belt, place the transmission in “Park”
and
push down on the belt firmly to open the clutch
sheaves.
4. Then lift upward on the belt while pulling it out
and
down over the driven clutch outer sheave.
Belt Inspection
1. Inspect belt for hour glassing (extreme circular wear
in at least one spot and on both sides of the belt).
Hour glassing occurs when the drive train does not
move and the drive clutch engages the belt.
2. Inspect belt for loose cords, mis
sing cogs, cracks,
abrasions, thin spots, or excessive wear. Compare
belt measurements with a new drive belt. Replace if
necessary.
3. Belts with thin spots, burn marks, etc., should be
r
eplaced to eliminate noise, vibration, or erratic PVT
operation. See the Troubleshooting Chart at the end
of this chapter for possible causes.
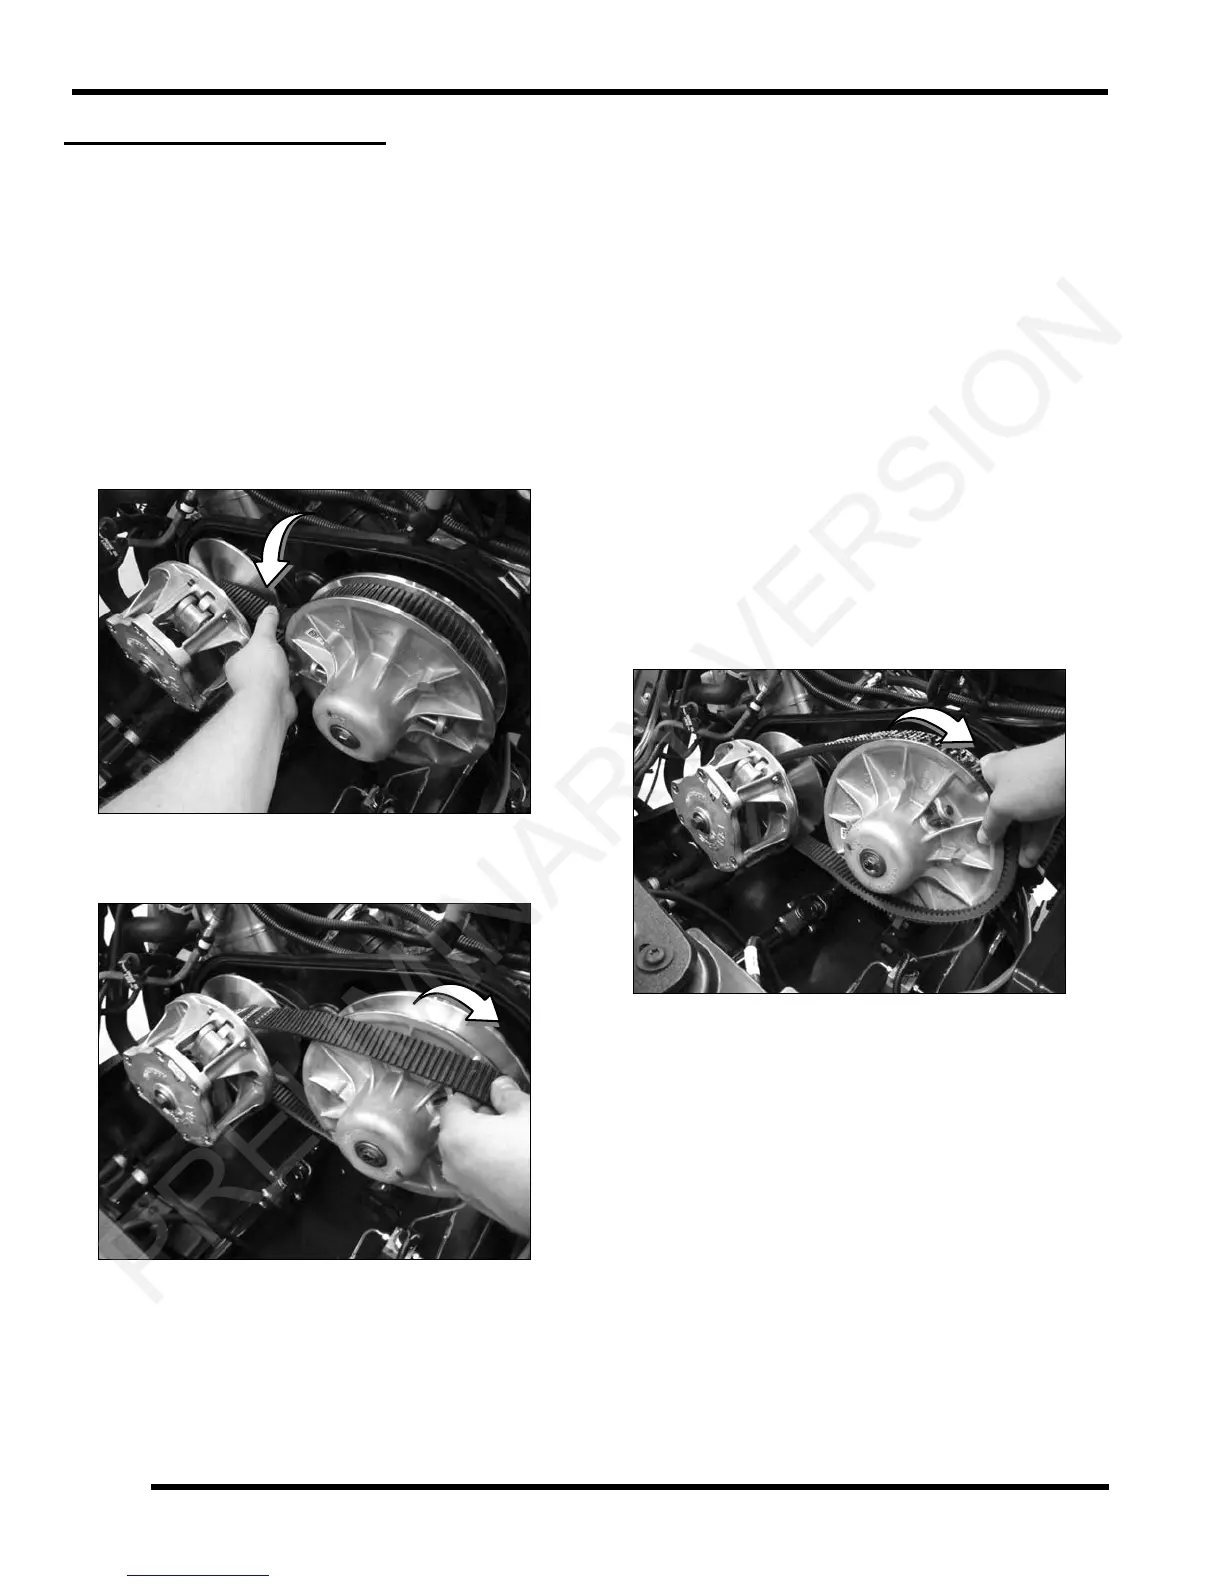
Belt Installation
NOTE: Be sure to install belt in the same direction
as it was removed.
1. Loop belt over drive clutch and over driven sheave.
2. While pushing down on top of belt, turn the back, or
m
oveable driven sheave, clockwise.
3. The belt then should be able to be pushed down into
an
d between the sheaves.
4. Continue rotating the driven clutch and belt clockwise
until the belt is
fully installed.
5. Install outer PVT cover as described in “PVT SYSTEM
SERVICE - PVT Assembly”.
6. See “PVT Break-In (Drive
Belt / Clutches)” on
page 6.3.
 Loading...