6.20
CLUTCHING
9924125 - 2013 RANGER RZR / RZR S / RZR 4 Service Manual
© Copyright 2012 Polaris Sales Inc.
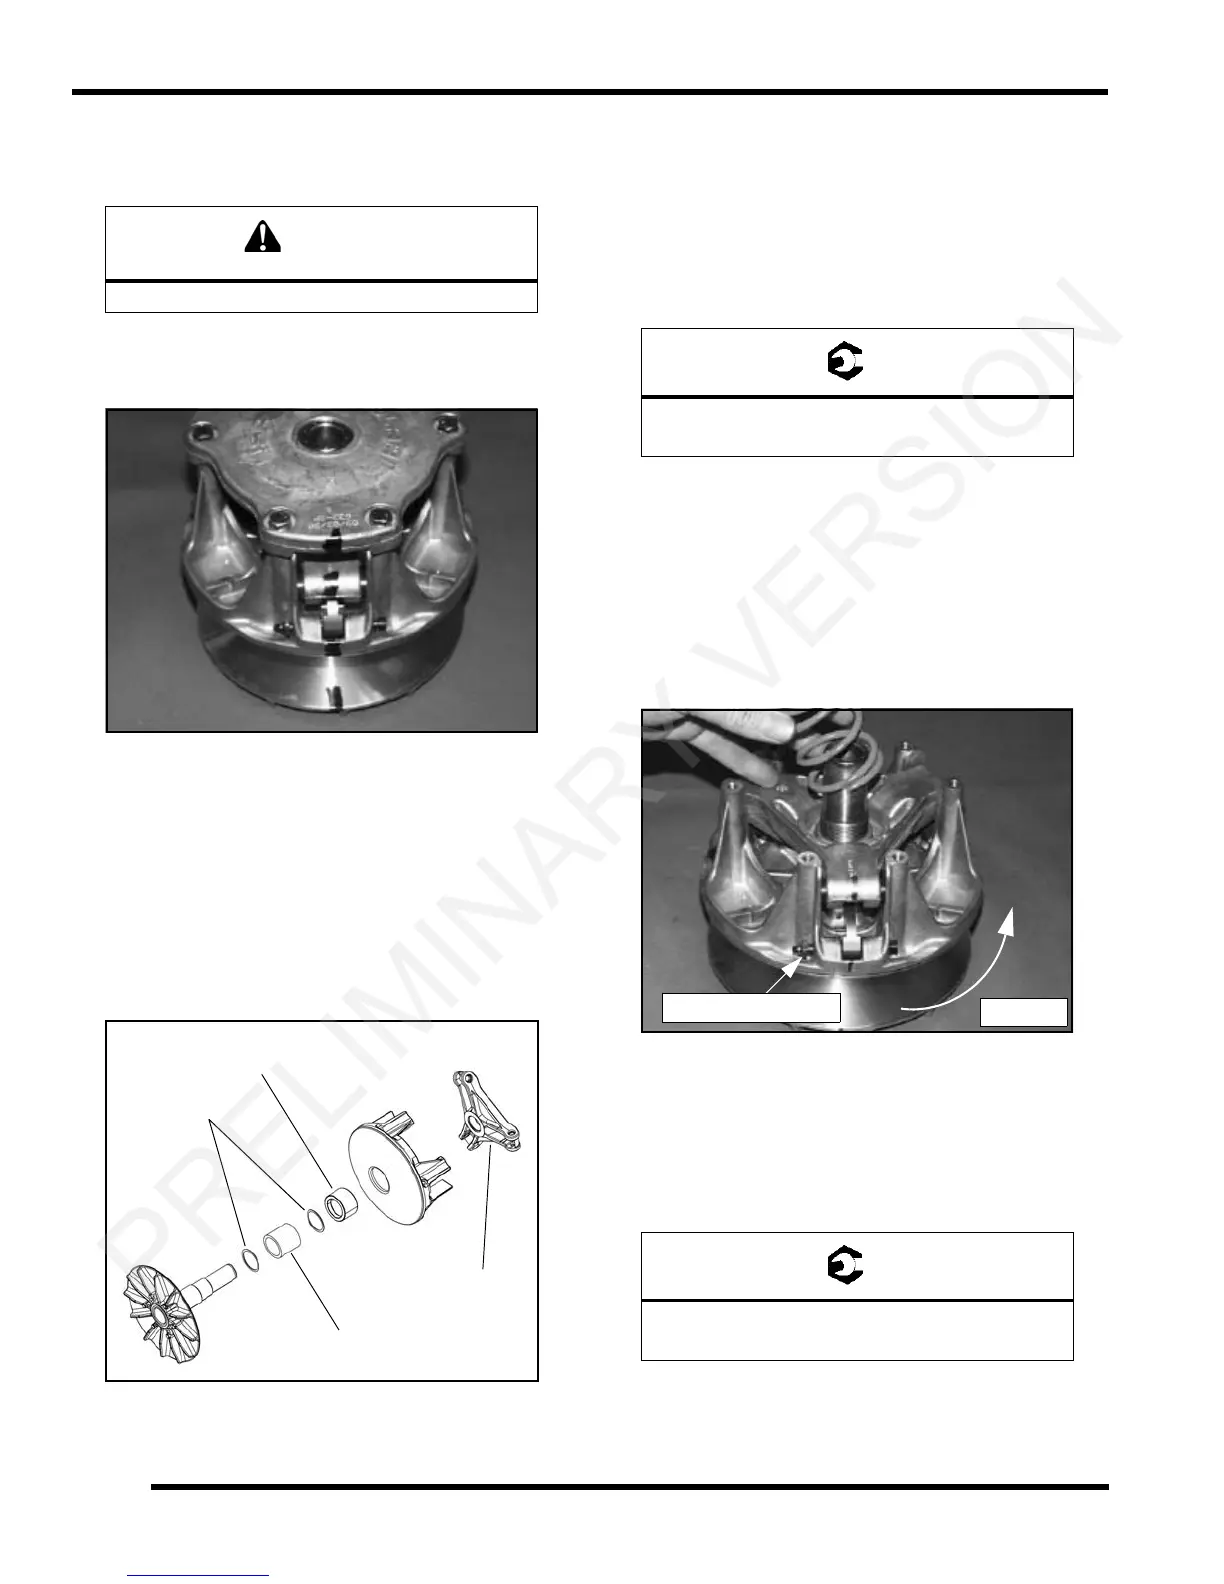
Clutch Assembly
NOTE: The Teflon™ bushings are self-lubricating.
Reassemble the drive clutch in the following sequence. Be
sur
e the “X”, or the marks that were made earlier are
aligned during each phase of assembly.
1. Install the PTFE washers and bearing over the clutch
sha
ft. There should be one PTFE washer on each
side of the bearing.
2. Install the moveable sheave and spacer onto the
clutch s
haft.
NOTE: To maintain proper clutch balance and belt-
t
o-sheave clearance, be sure to reinstall the original
quantity and thickness of washers/spacers beneath
the spider during assembly.
3. Compress spider buttons for
each tower and install
spider, making sure that “X” or the marks that were
made earlier on the spider, aligns with “X” or the marks
that were made earlier on the moveable sheave.
4. Torque spider to specification using the holding fixture
an
d spider tool. Torque with smooth motion to avoid
damage to the stationary sheave.
5. After the spider has been torqued, remove the clutch
assemb
ly from the holding fixture and inspect the
shaft and sheave alignment marks made during
disassembly.
IMPORTANT: If the marks are no longer in alignment,
th
e clutch will not be in balance and the drive clutch
assembly must be replaced.
6. Install shift weight
s using new lock nuts on the bolts.
7. Reinstall clutch spring.
8. Reinstall cover, making sure t
hat “X” or the marks that
were made earlier the on spider, aligns with “X” or the
marks that were made earlier on the cover.
9. Torque cover bolts evenly to specification.
Do not apply oil or grease to the bushings.
Spider
Washers
Spacer
Bearing
Spider:
200 ft-lbs (271 Nm)
Cover Screw:
90 in-lbs (10.4 Nm)
Rotation
Nut on trailing side
 Loading...