7.7
FINAL DRIVE
7
9924125 - 2013 RANGER RZR / RZR S / RZR 4 Service Manual
© Copyright 2012 Polaris Sales Inc.
Drive Shaft / CV Joint Handling Tips
Care should be exercised during drive shaft removal or
when servicing CV joints. Drive shaft components are
precision parts.
Cleanliness and following these inst
ructions is very
important to ensure proper shaft function and a normal
service life.
• The complete drive shaft and joint should be
han
dled by getting hold of the interconnecting
shaft to avoid disassembly or potential damage to
the drive shaft joints.
• Over-angling of joints beyond their capacity could
resu
lt in boot or joint damage.
• Make sure surface-ground areas and splines of
sh
aft are protected during handling to avoid
damage.
• Do not allow boots to come int
o contact with sharp
edges or hot engine and exhaust components.
• The drive shaft is not to be used as a lever arm to
position
other suspension components.
• Never use a hammer or sharp tools to remove or
to
install boot clamps.
• Be sure joints are thoroughly clean and that the
pro
per amount and type of grease is used to refill
when joint boots are replaced and when joints are
cleaned. Refer to text for grease capacity of CV
joints and CV joint boots.
Outer CV Joint / Boot Replacement
NOTE: Refer the “Electronic Parts Catalog” for the
required parts to service the drive shaft. Some drive
shafts have “Boot Replacement Kits” that include a
new boot, clamps, and the required amount of
grease.
1. Remove clamps from rubber boot using the proper
b
oot clamp pliers.
2. Remove the large end of the boot from the CV joint
a
nd slide the boot back.
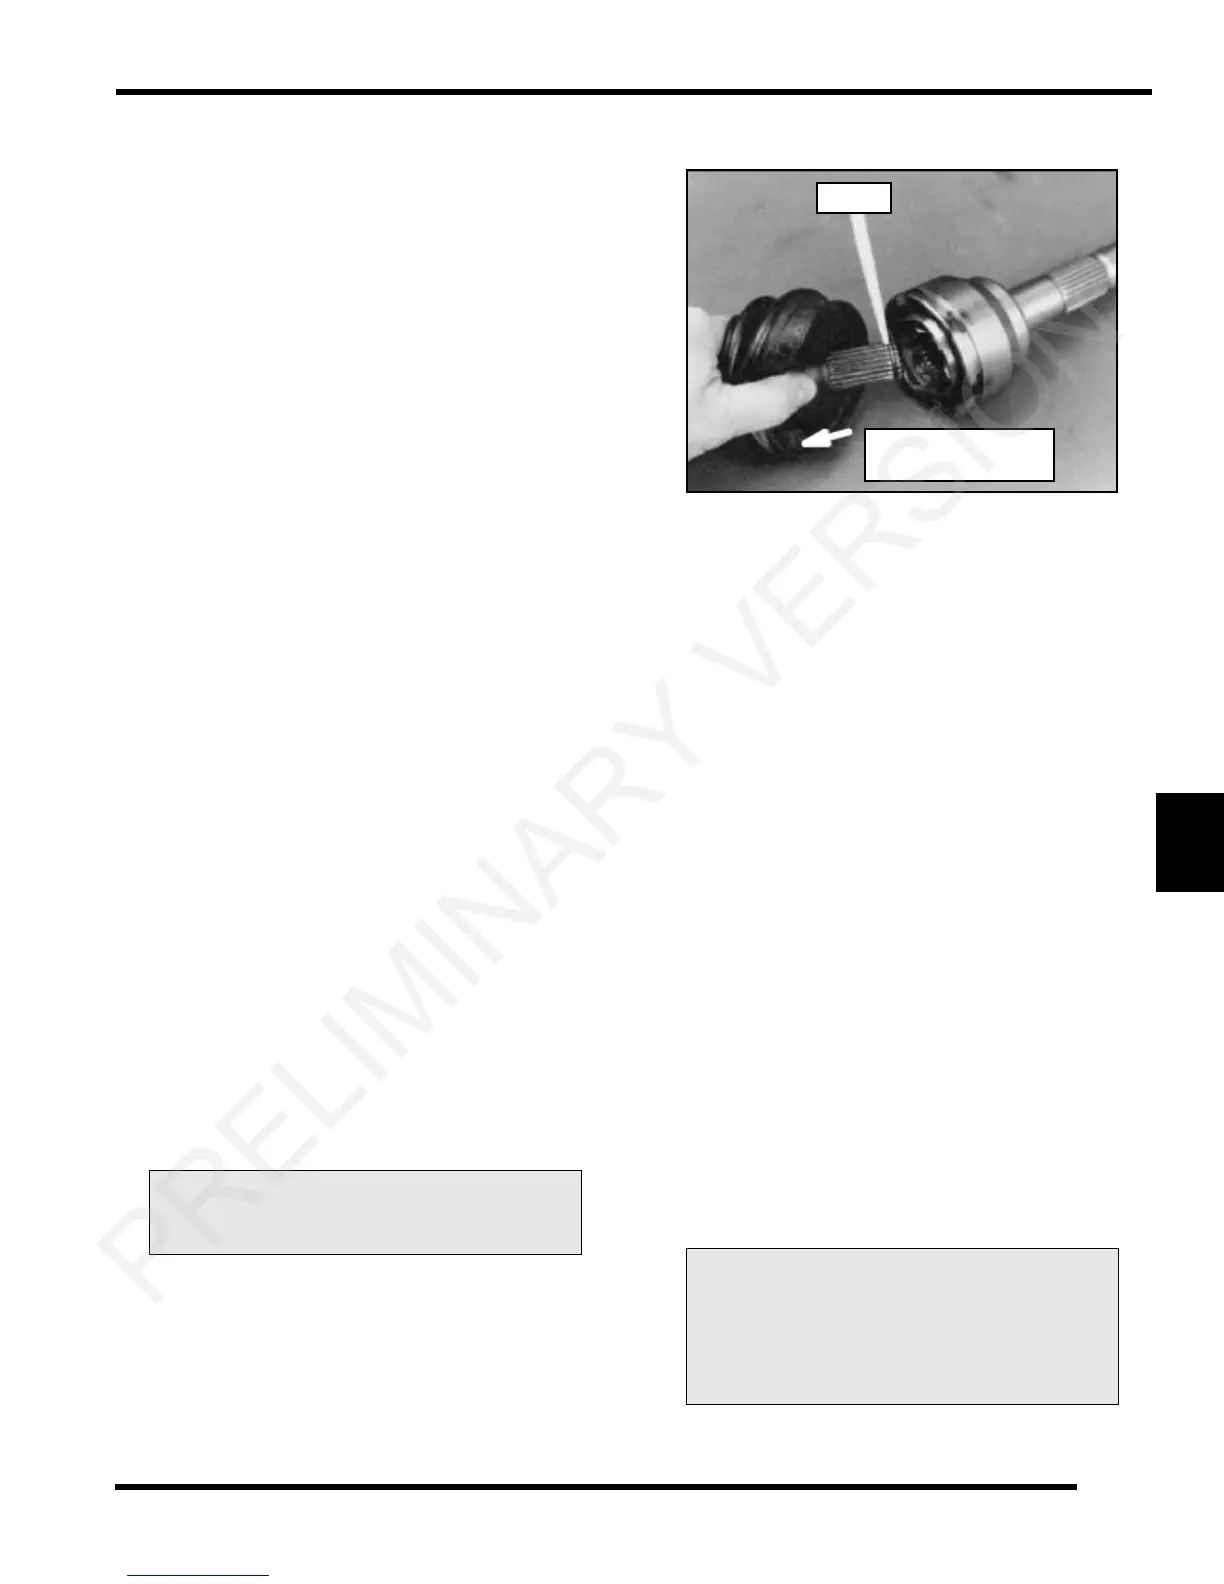
3. Use a soft-faced hammer or brass drift to separate the
outer CV
joint from the drive shaft.
NOTE: If using a brass drift, be sure to tap on the
inne
r race of the joint only.
4. Make sure the circlip remains on the shaft and not left
i
n the joint. Discard the circlip as it will be replaced.
5. Remove small clamp and boot from the drive shaft.
IMPORTANT: If the grease in the joint is obviously
cont
aminated with water and/or dirt, the joint should
be replaced.
6. Thoroughly clean the joint with an appropriate solvent
a
nd dry the joint to prevent any residual solvent from
being left in the joint upon reassembly.
7. Visually inspect the joint by tilting the inn
er race to one
side to expose each ball. Severe pitting, galling, play
between the ball and its cage window, any cracking
or damage to the cage, pitting or galling or chips in
raceways call for joint replacement.
8. Apply a light coat of grease to the end of the drive shaft
a
nd slide the new clamp and boot (small end first) over
the shaft and position the boot in its groove machined
in the shaft.
9. Install a NEW circlip on the end of the shaft.
10. Grease the joint with the s
pecial CV joint grease
provided in the boot replacement kit. Fill the cavity
behind the balls and the splined hole in the joint’s inner
race. Pack the ball tracks and outer face flush with
grease. Place any remaining grease into the boot.
Install small boot clamp.
NOTE: It is very important to use the correct type
and qu
antity of grease by using all the grease
included with the boot kit. DO NOT use a substitute
grease and DO NOT overfill or under fill the CV joint.
CV Boot Clamp Pliers:
Earless Type - 8700226
Boot Replacement Grease Requirement:
Outer CV Joint Capacity: 80g
Grease Service Kit: PN 1350047 (50g)
Circlip
Pull shaft to remove
from CV joint
 Loading...