7.11
FINAL DRIVE
7
9924125 - 2013 RANGER RZR / RZR S / RZR 4 Service Manual
© Copyright 2012 Polaris Sales Inc.
8. Torque wheel hub nut to specification and install a
new cotter pin. Tighten nut slightly if necessary to
align cotter pin holes.
9. Install brake caliper mounting bolts and torque to
spec
ification.
10. Install wheel and (4) wheel nuts. Torque wheel nuts
to specification.
11. Rotate wheel and check for smooth operation. Bend
b
oth ends of cotter pin around end of spindle in
different directions.
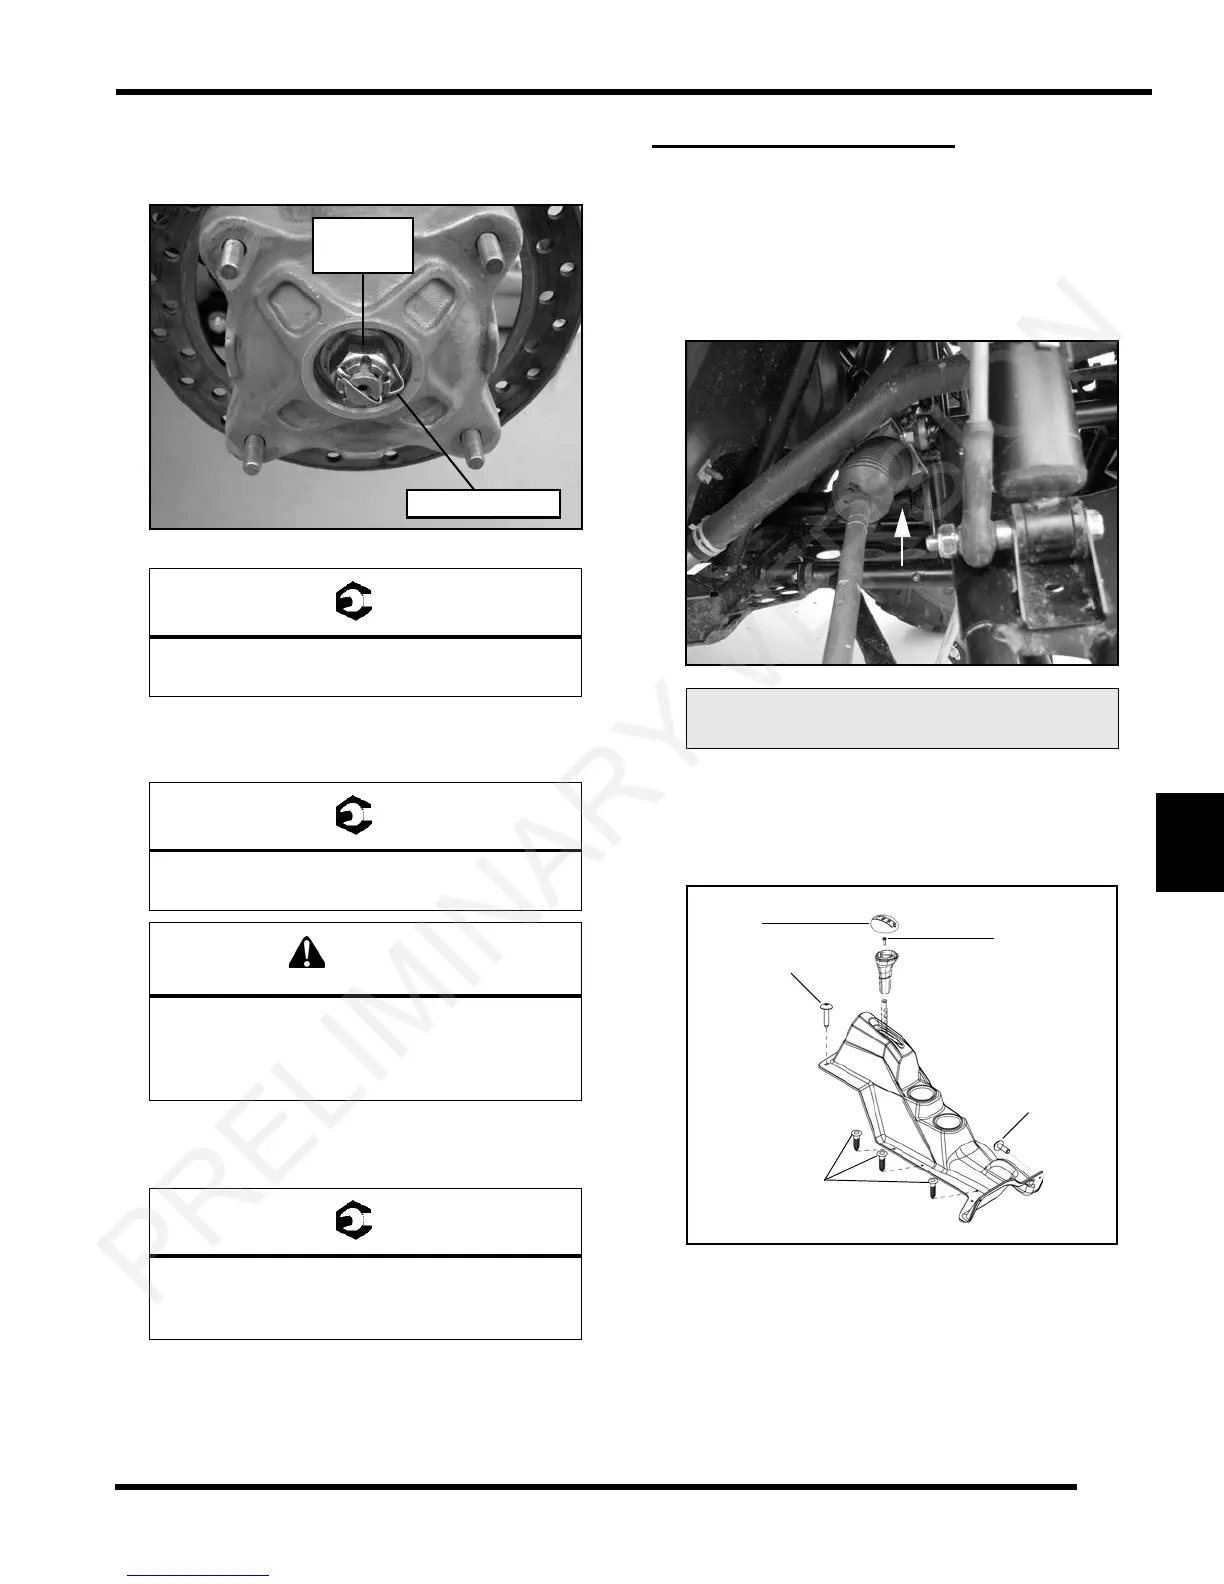
PROPSHAFT SERVICE
Removal / Installation (RZR / RZR S)
1. Locate the propshaft roll pin and use the Roll Pin
Removal Tool (PN 2872608) to remove the roll pin.
NOTE: Front wheel can be removed to gain better
acc
ess to the propshaft roll pin.
2. Remove the gear selector cap and the retaining
scre
w. Remove the shift handle from the lever.
3. Remove the Torx screws retaining the center console
to
access the propshaft.
4. Slide prop shaft back far enough to remove it from the
fr
ont gearcase input shaft.
5. Pull sharply forward to remove it from transmission
shaft
.
NOTE: You may have to loosen the front gearcase
mo
unting bolts to allow for propshaft removal.
Wheel Hub Castle Nut:
80 ft-lbs (108 Nm)
Front Caliper Mounting Bolts:
31-34 ft-lbs (42-46 Nm)
New bolts have a pre-applied locking agent
which is destroyed upon removal. Always use
new brake caliper mounting bolts
upon assembly.
Wheel Nuts:
Steel Wheels: 27 ft-lbs (37 Nm)
Aluminum Wheels: 30 ft-lbs + 90° (1/4 turn)
80 ft-lbs
NEW Cotter Pin
(108 Nm)
Roll Pin Removal Tool: PN 2872608
Screw
Torx Screws
Cap
Torx Screws
Torx Screws
 Loading...