Because RFL™ and Hubbell® have a policy of continuous product improvement, we reserve the right to change designs and specifications without notice.
7.4 ADDING CHANNEL MODULES TO EXISTING SYSTEMS
To install new channel modules into existing systems, without affecting other in-service channels, do
the following:
1. Make sure there is enough power available in the shelf for the module.
2. Make sure there are enough T1 time slots available for the module.
3. Using the information in the channel module Instruction Data Sheet, set its time slot and
channel direction.
Refer to Section 3 for additional information on channel modules. Also refer to the Instruction data
Sheets in Sections 11 through 16 of this manual.
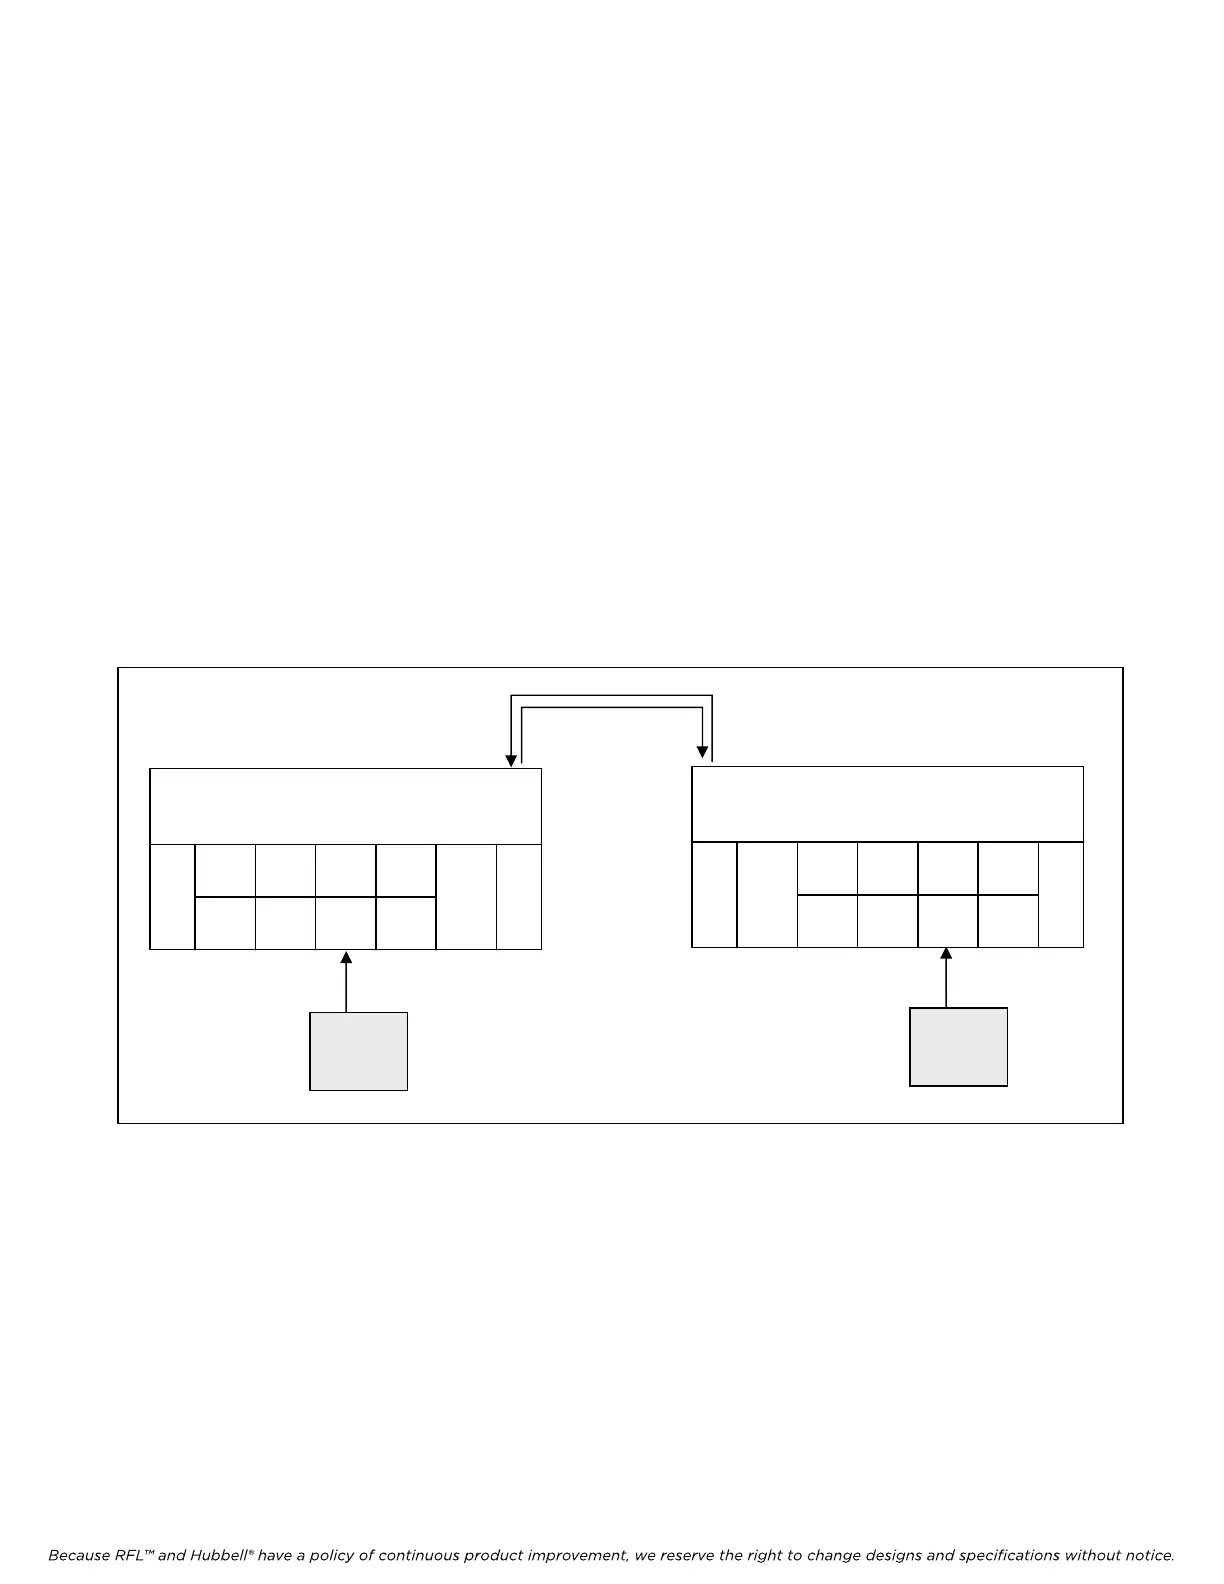
Use the following setup hints and installation procedures as a general guide when adding new channel
modules to existing (in-service) IMUX 2000 M-DACS systems. (See Figure 7-10.)
T1 CIRCUIT
5
6
1
MA-
235
CM4
D/I-A
IMUX 2000 M-DACS
MULTIPLEXER
CM4
D/I-B
LOCATION 1
DATA
1
DATA
I/O 1
DATA
2
DATA
I/O 2
VOICE
I/O 1
New
Channel
Module
5
6
1
MA-
235
CM4
D/I-A
IMUX 2000 M-DACS
MULTIPLEXER
CM4
D/I-B
LOCATION 2
DATA
1
DATA
I/O 1
DATA
2
DATA
I/O 2
1
VOICE
I/O 1
New
Channel
Module
Figure 7-10. Adding a new channel module to an existing system
7.4.1 PHYSICAL SLOT SELECTION
The new channel module can be placed into any available physical slot (Slot 6 through Slot 18) on the
Shelf.
7.4.2 SETTING CHANNEL MODULE DIRECTION
Set the channel module transmit/receive direction, using the guidelines given in Section 3 of this
manual.
M-DACS-T1 RFL Electronics Inc.
October 25, 2004 7-21 (973) 334-3100