Monthly Maintenance Clean/Inspect Tip Wipe Assemblies
Page 179
© Copyright 2021 Stratasys. All rights reserved.
To clean the tip wipe assembly and inspect its components:
1. Ensure that the printer is stopped (idle) and is not building.
2. Open the oven door.
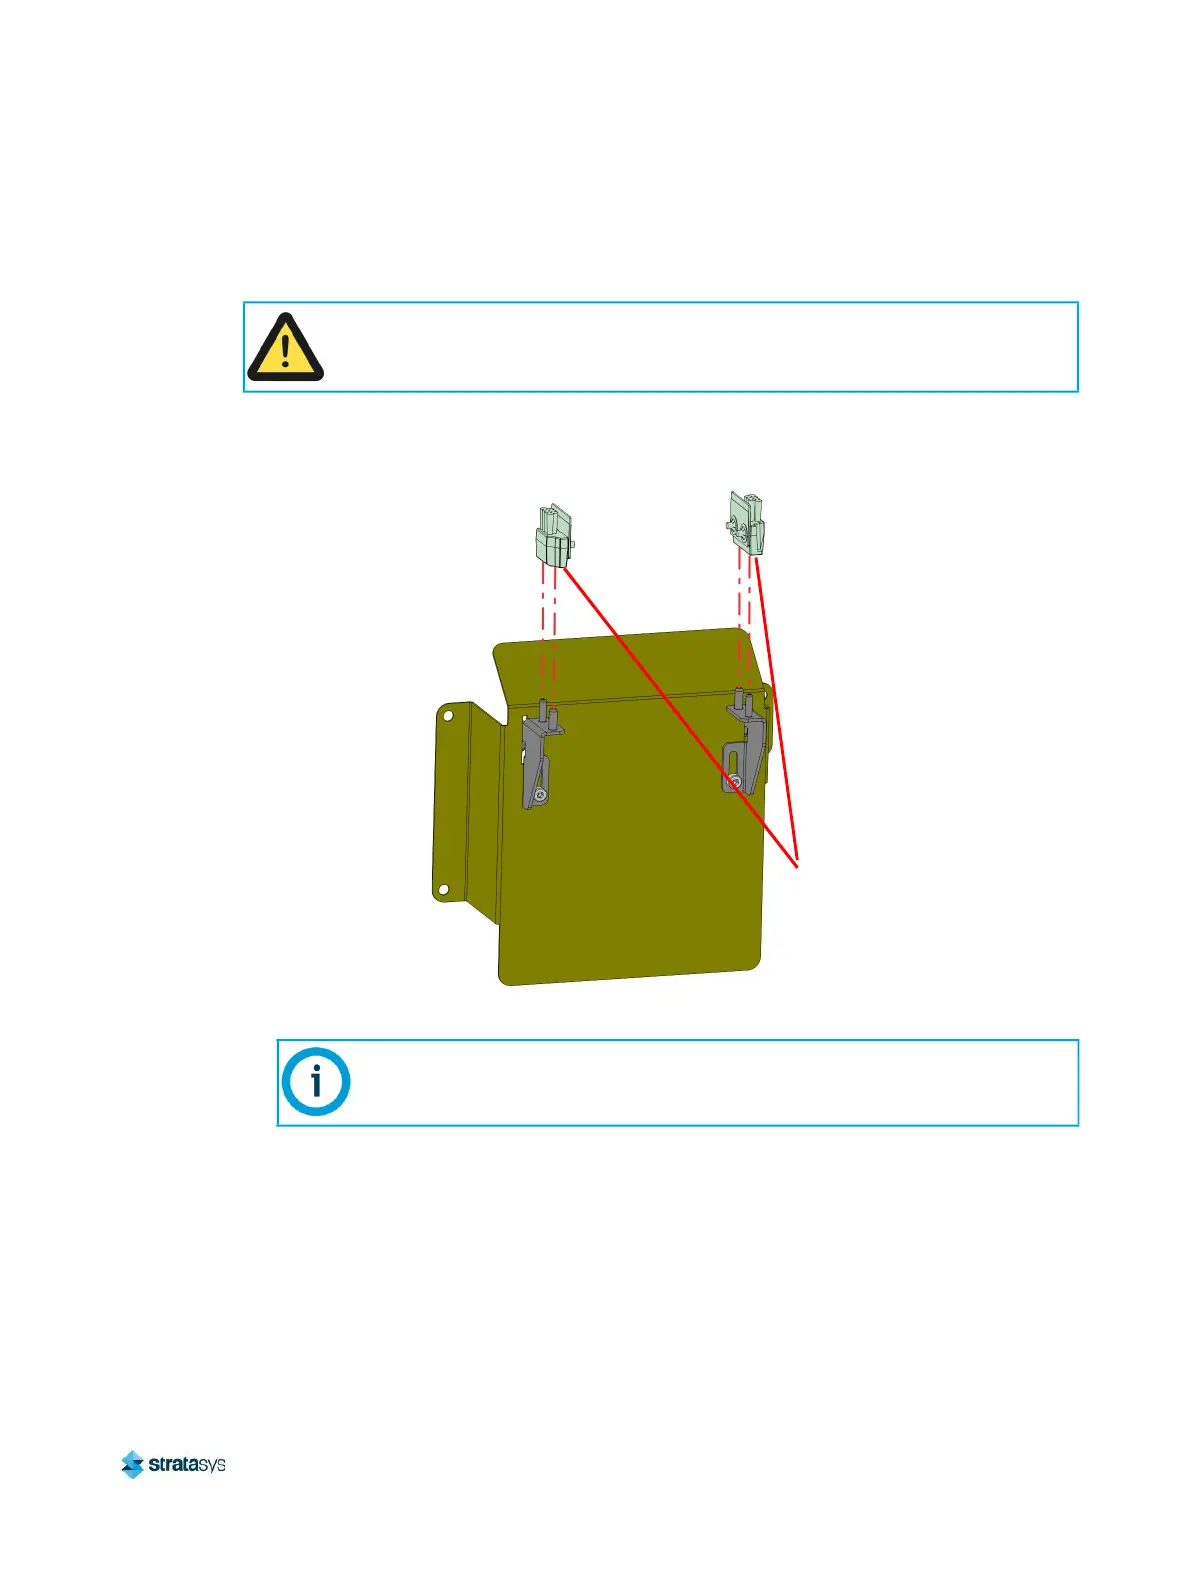
3. Remove the model side tip wipe assembly by lifting it upward until it clears its locating pins.
Figure 19: Tip Wipe Assembly Removal
4. Repeat step 3 above to remove the support side tip wipe assembly.
5. Clean and inspect the surface around the locating pins. Make sure that the tip wipe
assemblies can sit flush on the surface.
6. Inspect the flicker portion of the tip wipe assemblies. The top edge of the flicker should be
straight and must not contain excessive notching/wear.
7. Inspect the brush portion of the tip wipe assemblies. Brush bristles must not show evidence
of wear (i.e. no notches in bristle pattern) and should not contain significant bristle
clumping. Frayed bristles are acceptable as long as the top edge is even across all of the
bristles.
Caution:
Depending on how long the oven has been allowed to cool, components may be hot.
Wear the safety gloves provided in the Welcome Kit to perform all remaining steps.
If the head is positioned above the purge area it may impede your ability to
remove the tip wipe assemblies. Open the top cover and manually move the head
away from the purge area.
Tip Wipe
Assembly