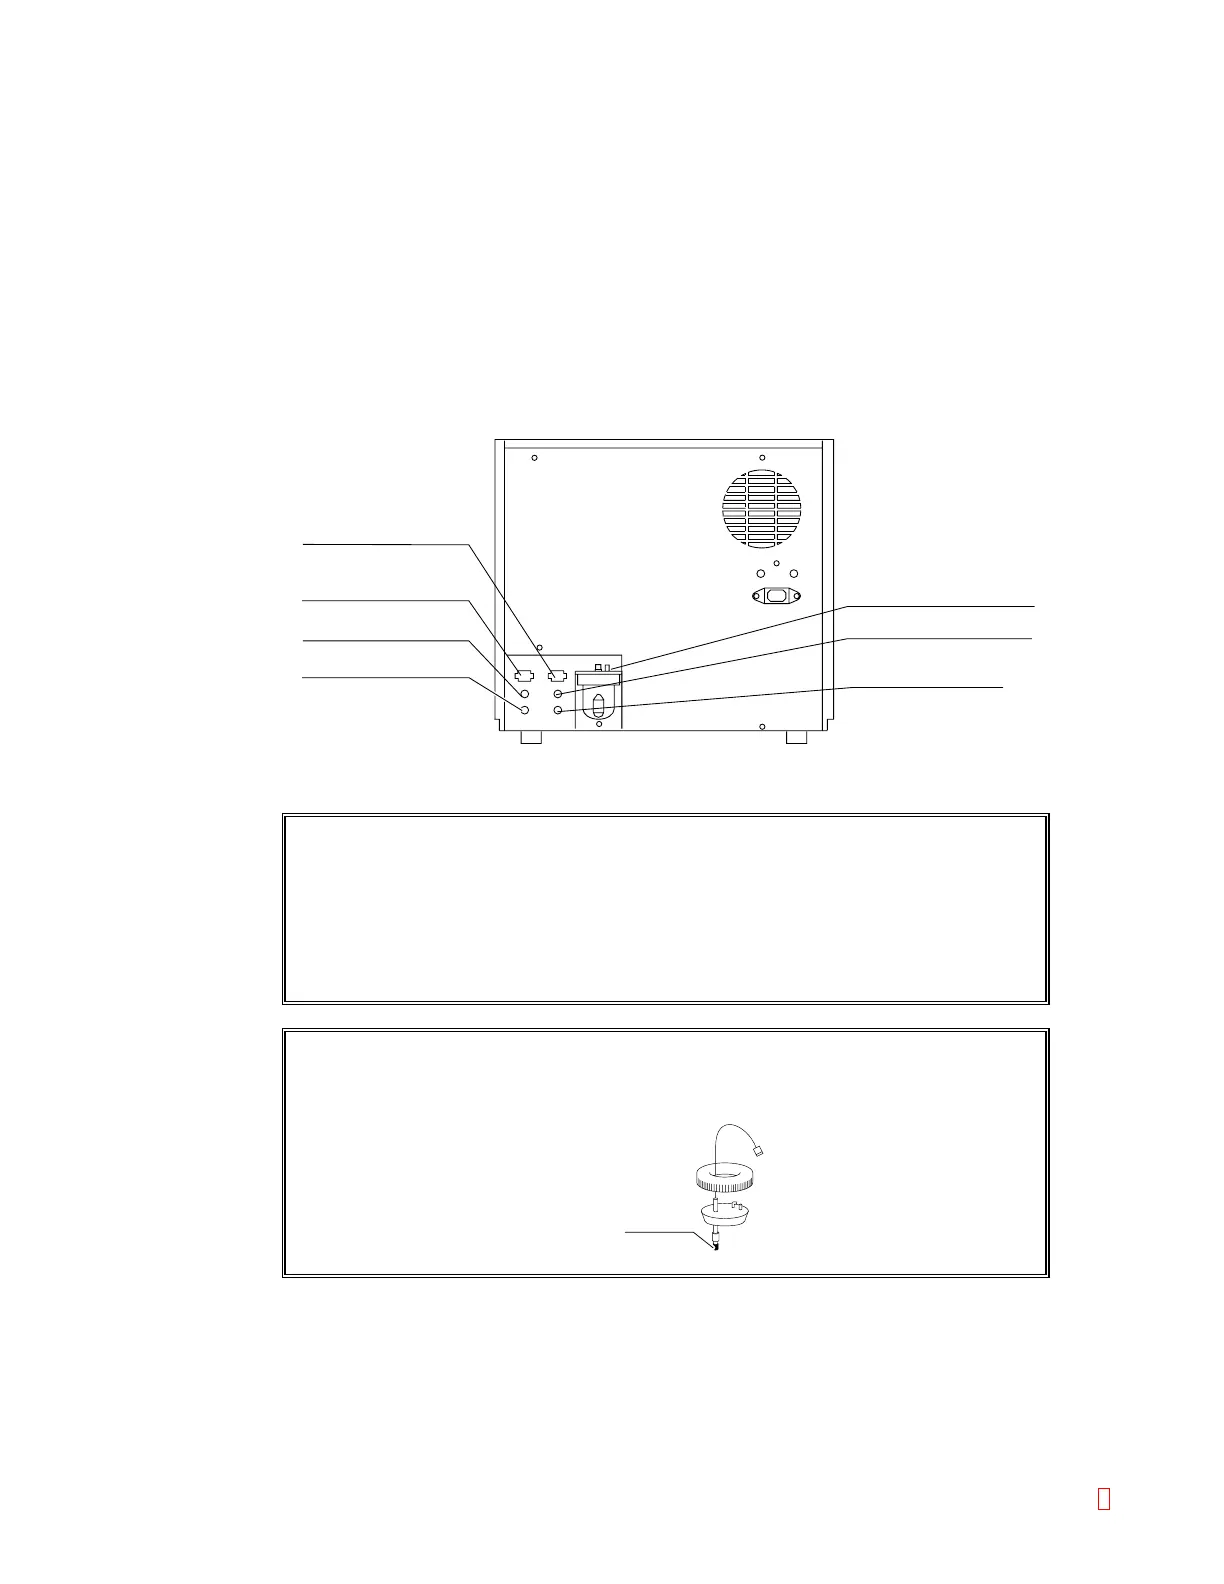
B.5 Connect Rinse Bottle and Waste Bottle
Connect the rinse bottle and the waste bottle to the nipples on the instrument rear panel.
(1) Connect Rinse Bottle.
1) Connect the rinse bottle to the pressure supply nipple (black), and rinse aspiration nipple
(blue) on the rear panel, at places where the color matches with the bottle.
2) Connect the level-detecting float switch to the float switch connector on the rear panel.
(2) Connect Waste Bottle.
1) Connect the waste bottle tube (red) to the waste drain nipple (red) on the rear panel.
Connect the waste bottle tube (yellow) to the trap chamber nipple (yellow).
2) Connect the level-detecting float switch to the float switch connector on the rear panel.
Pressure Supply Nipple (Black)
Rinse Float Switch Connector
Waste Float Switch Connector
Rinse Aspiration Nipple (Blue)
Waste Drain Nipple (Red)
Waste Vacuum Nipple (Green)
Trap Chamber Nipple (Yellow)
Rubber tube
Figure B-6: Connecting the Bottles
CAUTION: • Even at a facility equipped with the waste channel (drain system),
the waste bottle should be connected.
• Also, put the rinse bottle and the waste bottle at the same level as
the instrument. Be sure not to use any other tube than the
furnished one; otherwise, the instrument's hydraulic system may fail
to operate properly.
CAUTION: • Remove the rubber tube that locks the float switch in the rinse bottle
and waste bottle. This rubber tube served to prevent vibration in
transit.
CA-500 Series S/M B-6 Revised December 2001 8