C.2 Cooler Unit Assembly
(1) Remove Light Shield Cover with Hinge from Top Cover. (Also remove the screws for the stop bar for
Light Shield Cover.)
8
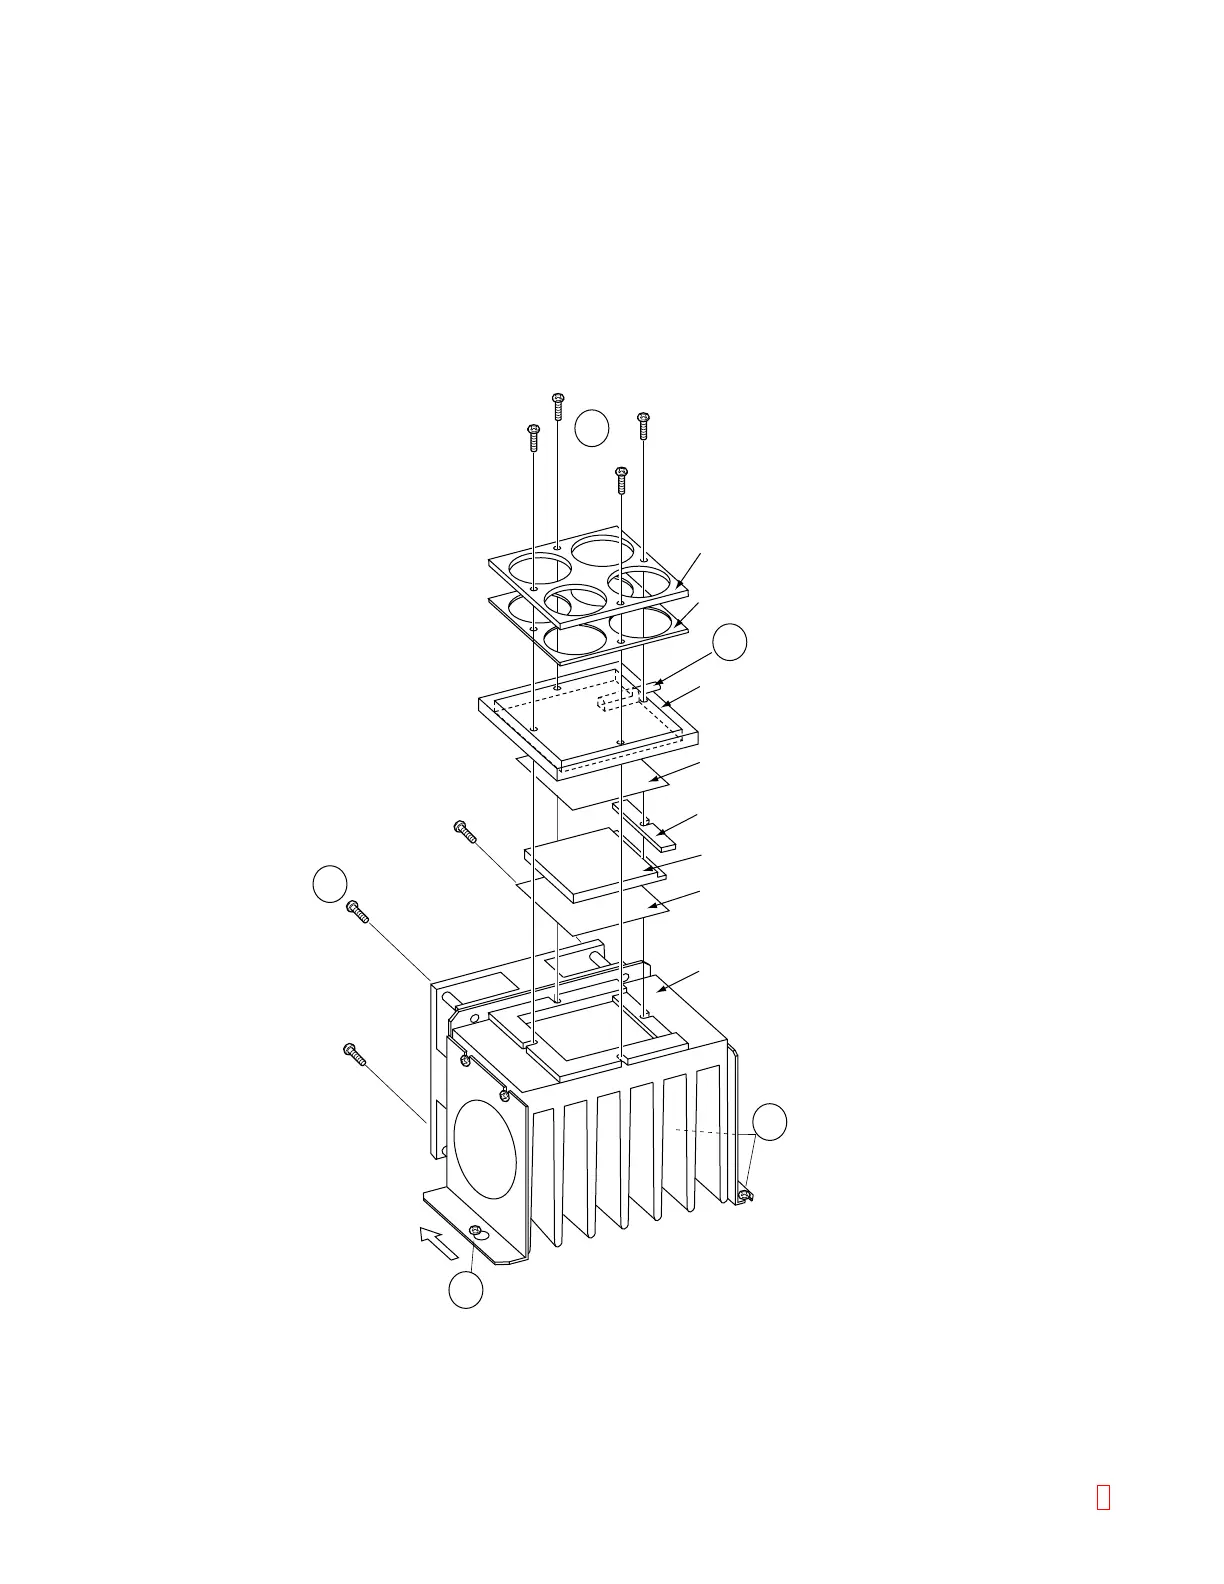
(3) Remove Reagent Stage. (by removing 4 screws)
(2) Remove two screws fixing Left Side Cover and remove the cover by lifting upward.
(4) Slide and remove Cooler Unit by loosening a screw on the left side and two screws on the right. (item 4)
4
5
6
4
7
Holding Plate
Holding Sponge
Cooler Plate
Sarcon®
Heat Isolation Sponge
Pertier
Sarcon®
Heat Sink
Slide
(5) Remove four plastic screws (item 5) on Holding Plate to remove the Pertier Element.
(6) Thermal Sensor is inserted in the Cooler Plate. (item 6)
(7) Cooler Fan is fixed by four fixing screws with spacers.
Figure C-3: Disassembling Cooler Unit
CA-500 Series S/M C-3 Revised December 2001