CA-500 Series S/M 4-16 Revised December 2001
4.3.5 Position Adjustment Procedure of Pipette (“[4]reag 1”) (“[5]reag 9”) (“[6]reag 10”)
Continuous Z position adjustment is possible on software version 00-14 or later. Refer to 4.3.6-2 11
(1) XYZ Adjustment
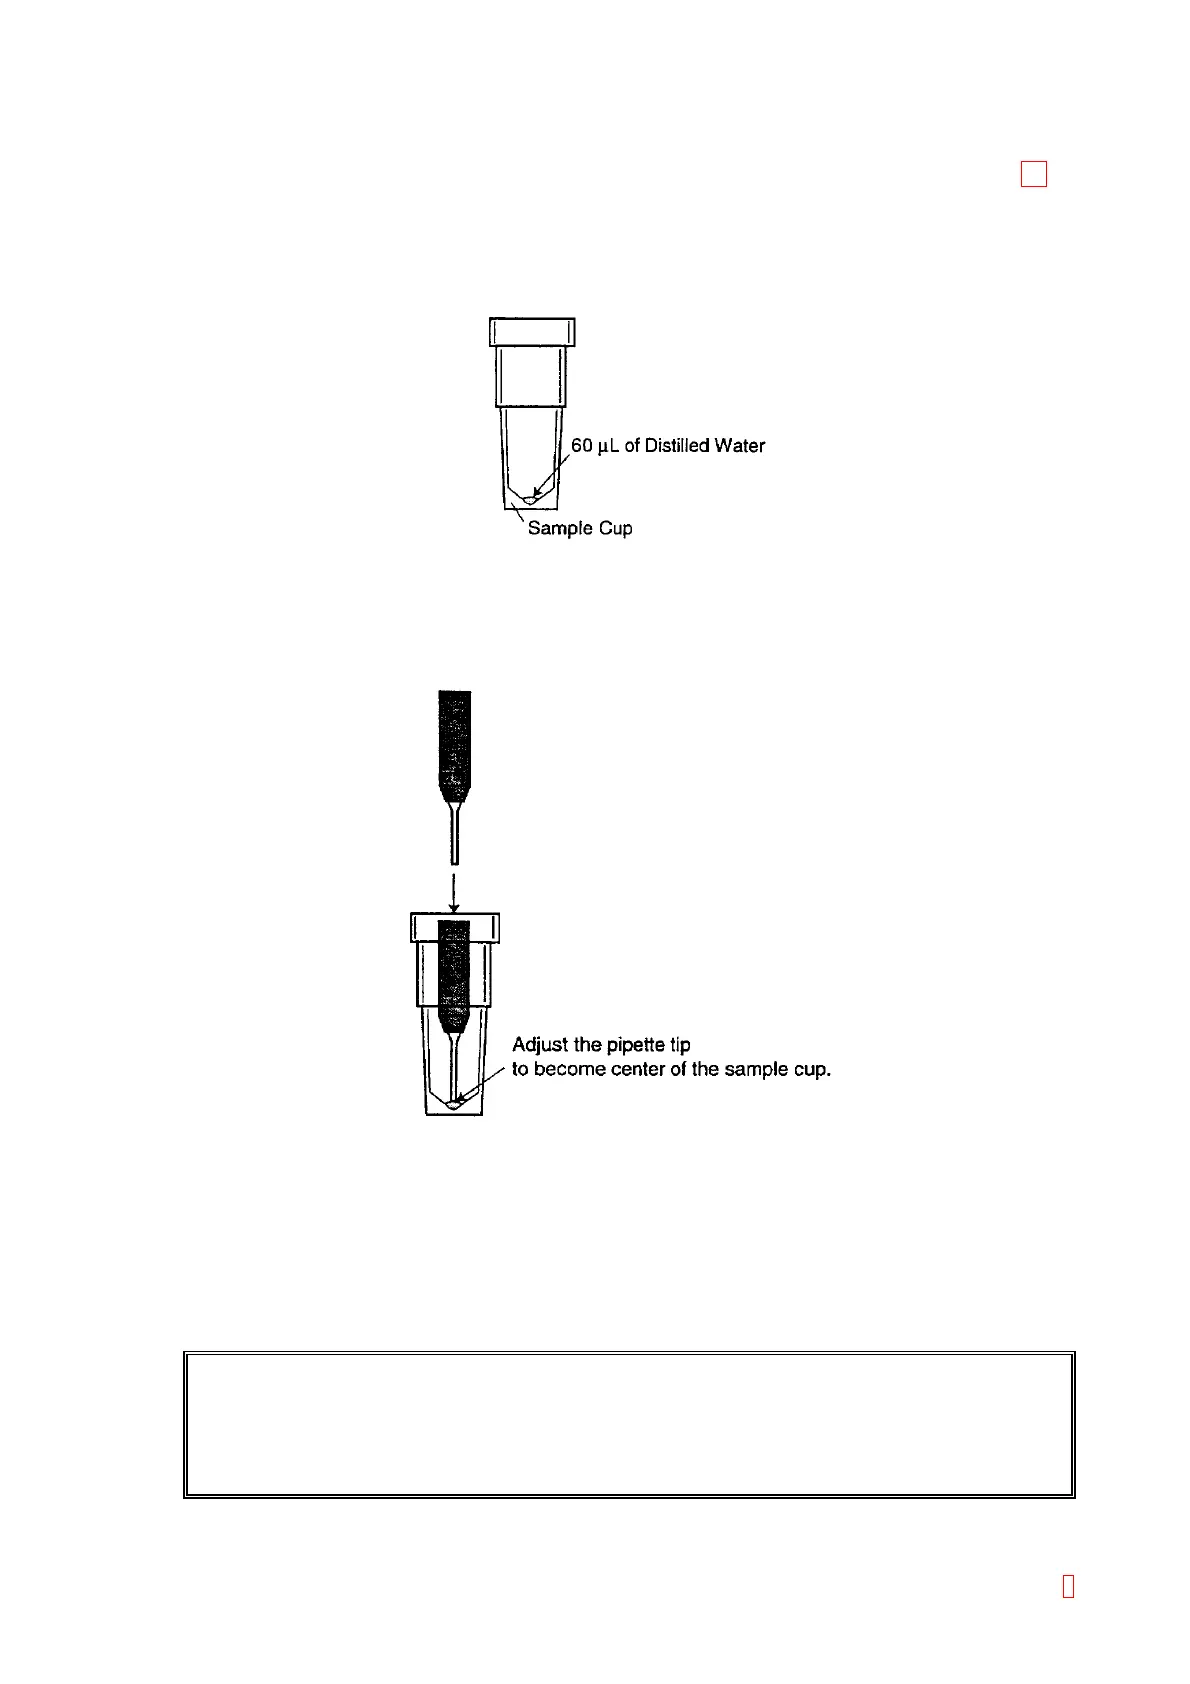
1) Set the sample cup holder to the reagent rack No. 1. Place 60 µL of distilled water into the 4 mL
sample cup.
Figure 4-3-8: Sample Cup with 60 µL Distilled Water
2) Verify that the “[4]reag 1” is shown on the left center of the screen. If not, change to “[4]reag 1” by
using [Pos. -] and [Pos. +] keys.
3) Move the pipette to the setting position by using [XY TEST] key.
4) Use [n], [p], [m], and [Æ] keys to adjust the pipette tip to become the center of the sample cup.
Figure 4-3-9: Pipette Tip Position
5) Press [Z TEST] key to descent the pipette. The pipette detects the 60 µL of distilled water and stops.
6) Use [n], [p], [m], and [Æ] keys to adjust the pipette tip to become the center of the sample cup.
7) Press [Z ADJUST] key to ascend and descend the pipette. Verify the pipette is placed at the center
of the sample cup.
8) Press [XY ORG] key to return the pipette (head) to the home position.
9) Adjust “[5]reag 9” and “[6]reag 10” in the same way.
CAUTION: 1) Descent the pipette lower limit to the lowest for Z axis adjustment value. Adjust
after executing Section 4.3.4: Position Adjustment Procedure of Pipette, (3)
Pipette Lower Limit Adjustment when it stops before detecting liquid surface.
Set “650” pulse for the pipette lower limit of the reagent rack.
8