CA-500 Series S/M 4-8 Revised December 2001
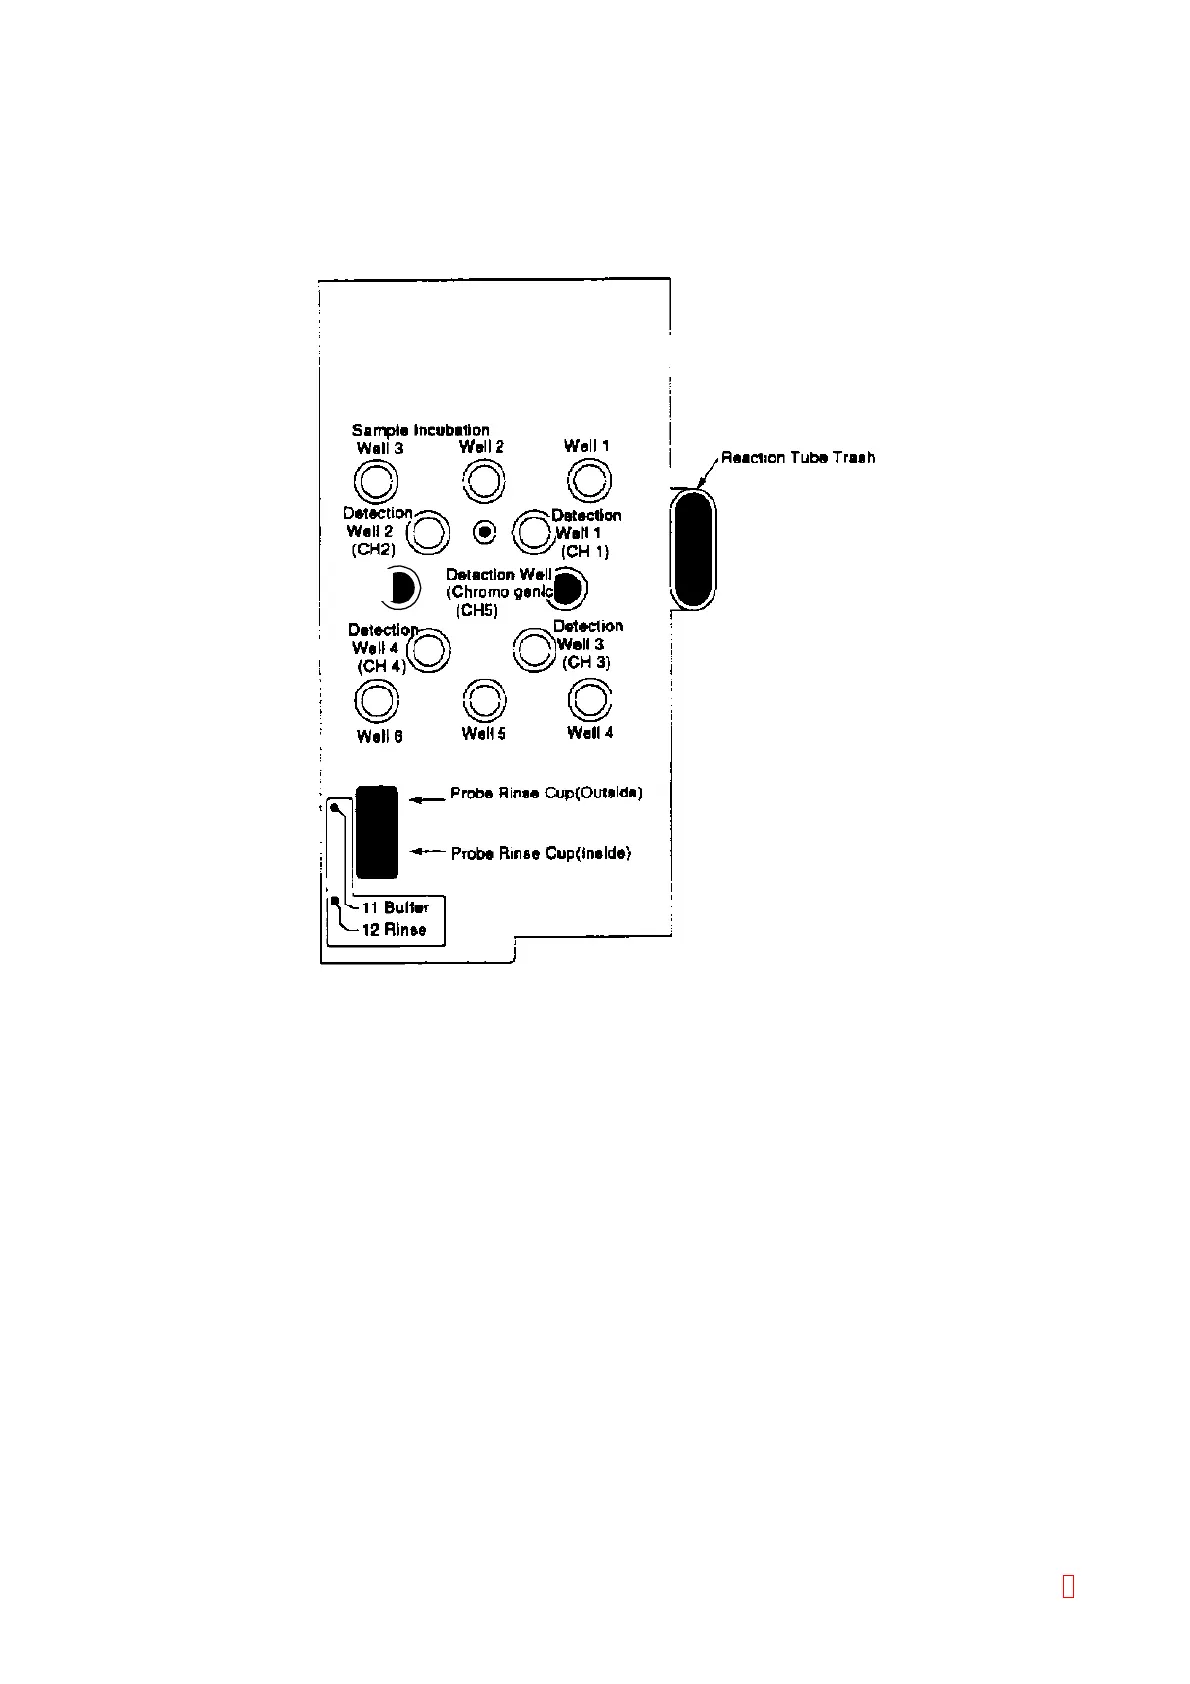
4.2.4 Adjustment of Detector Well for analyzing the transmitted light
(Chromogenic and Immunoassy)
(1) Offset adjustment
1) Insert the ebonite stick for adjusting the offset value in the channel 5 of the detector well.
Detection Well
(Immunoassy)
(CH6)
Figure 4-2-4: Detector Well Positions (Chrom, Immunoassy)
2) Close the light shield cover.
3) Select [CH5] by using [Channel Change] key and select [Offset] position by pressing [n] or [p] key.
(Low Gain is fixed and cannot be changed.)
4) Press [Auto Adjust] key to start the automatic offset adjustment, and when the adjustment is
completed, the alarm sounds.
5) Execute Steps 1) to 4) for channel 6.
(2) Gain adjustment (Dynamic Range adjustment)
1) Dispense 200 µL of distilled water or buffer (OV-30) into a reaction tube in advance, set it into the
transmitted light detector well (channel 5), and heat it up for approximately 10 minutes.
2) Close the light shield cover.
3) Select [CH5] by using [Channel Change] key and select [Gain] position by pressing [n] or [p] key.
(Low Gain is fixed and cannot be changed.)
4) Press [Auto Adjust] key to start the gain adjustment, and when the adjustment is completed, the alarm
sounds.
5) Open the light shield cover, rotate the reaction tube set in the channel 5 detector well and verify that
the indicated A/D value does not exceed 4,000. At this time, avoid the external light as much as
possible. If the A/D value exceeds 4,000, set the reaction tube at the position where the indicated A/D
value is the biggest and press [Auto Adjust] key again to start the adjustment.
6) Execute Steps 1) to 5) for channel 6.
8