PROCEDURE
1 Remove the piston rod gland together with the piston, refer to the related procedure.
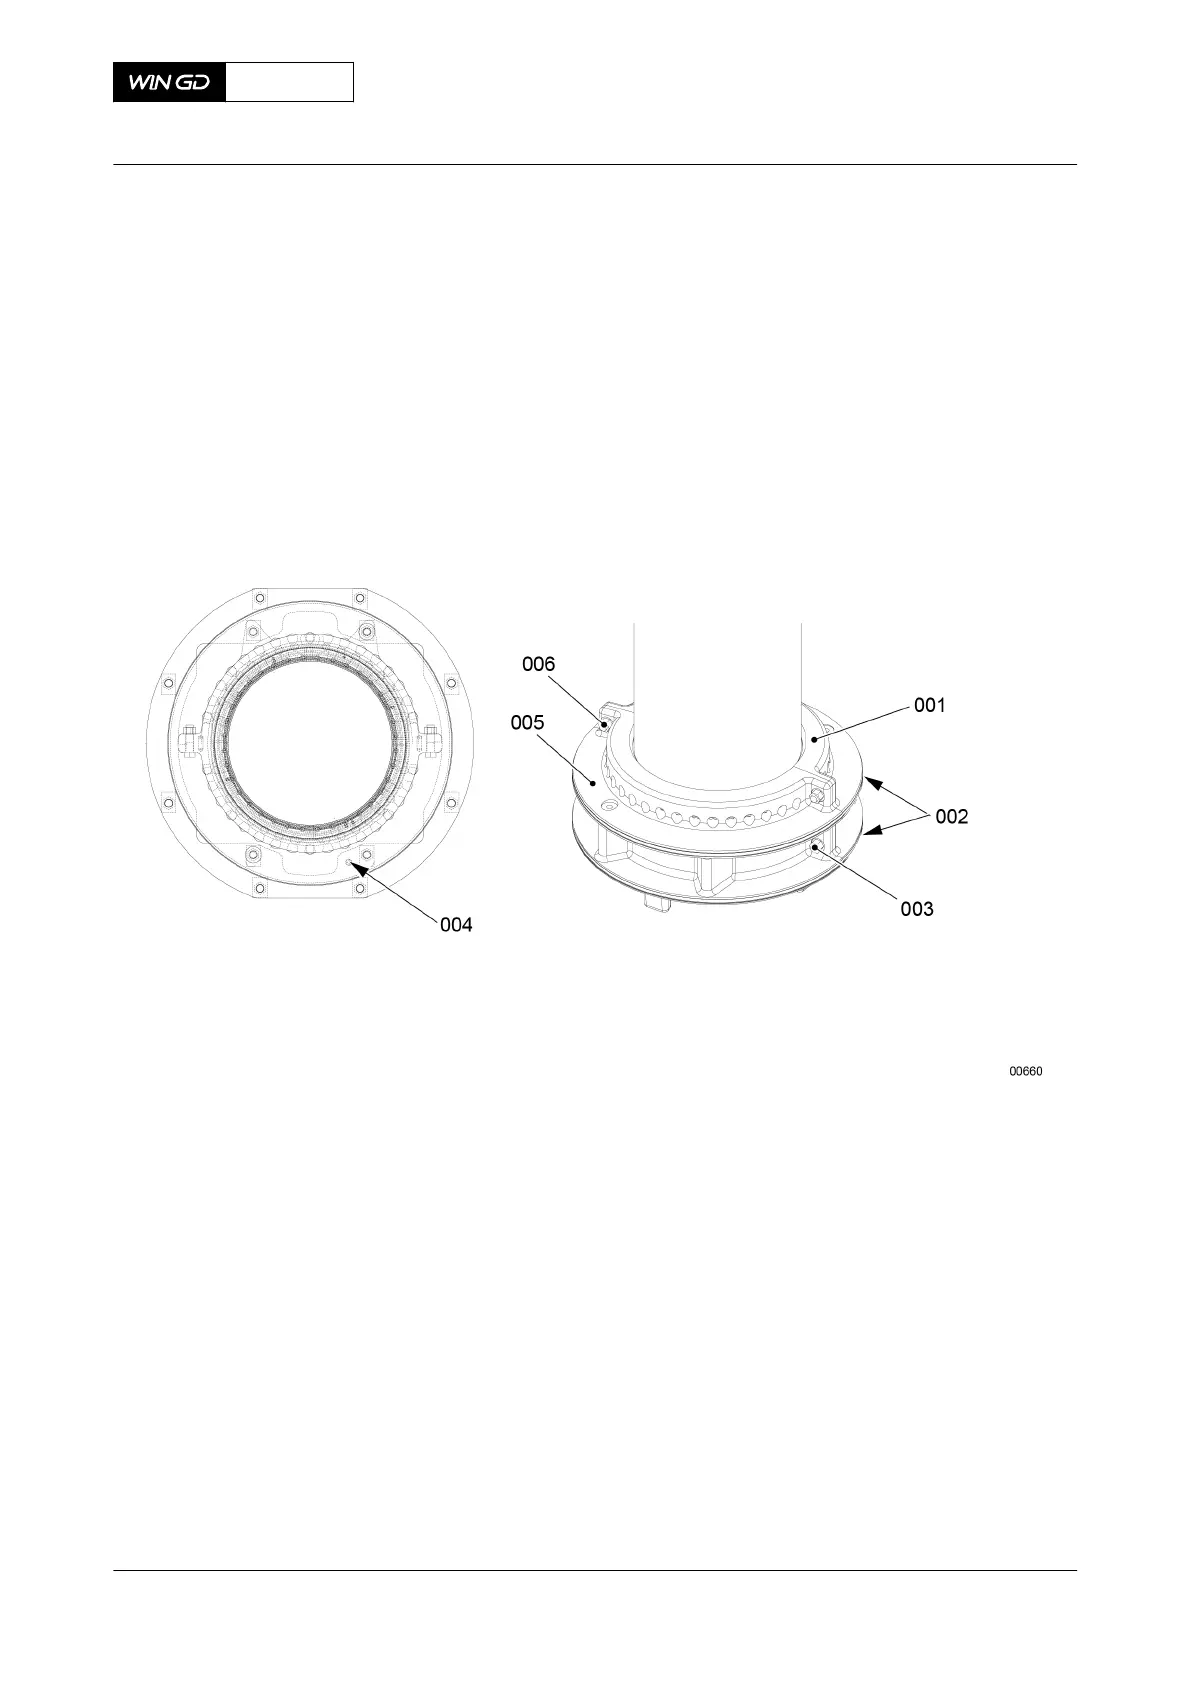
2 Remove and discard the two O-rings (002, Figure 7-27).
3 Remove the four screws and nuts (003, 006).
4 Push the two parts of the housing (001, 005) away from the piston rod.
5 Remove the two parts of the housing (001, 005).
Fig 7-27 Piston rod gland - remove and install
6 Remove the parts that follow:
•
Tension springs (002 and 005, Figure 7-28)
•
Scraper rings (001, 007)
•
Gaskets (003, 004)
•
Ring supports (006).
X62DF
AA00-2303-00AAA-520A-A
Maintenance Manual Piston rod gland - remove
Winterthur Gas & Diesel Ltd.
- 225 - Issue 002 2020-10