PROCEDURE
1 Put the pilot injection valve in position in the valve holder of the test bench.
NOTE: For the use of the test bench refer to the related section.
2 Attach the pilot injection valve to the valve holder.
3 Turn the valve holder through 180° so that the nozzle tip points up.
4 Safety the valve holder in that position on the test bench.
5 Loosen the nozzle nut of the pilot injection valve.
6 Carefully remove the nozzle nut.
NOTE: If necessary you can use an applicable tool to remove the nozzle nut.
7 Remove and discard the two O-rings from the inner side of the nozzle nut.
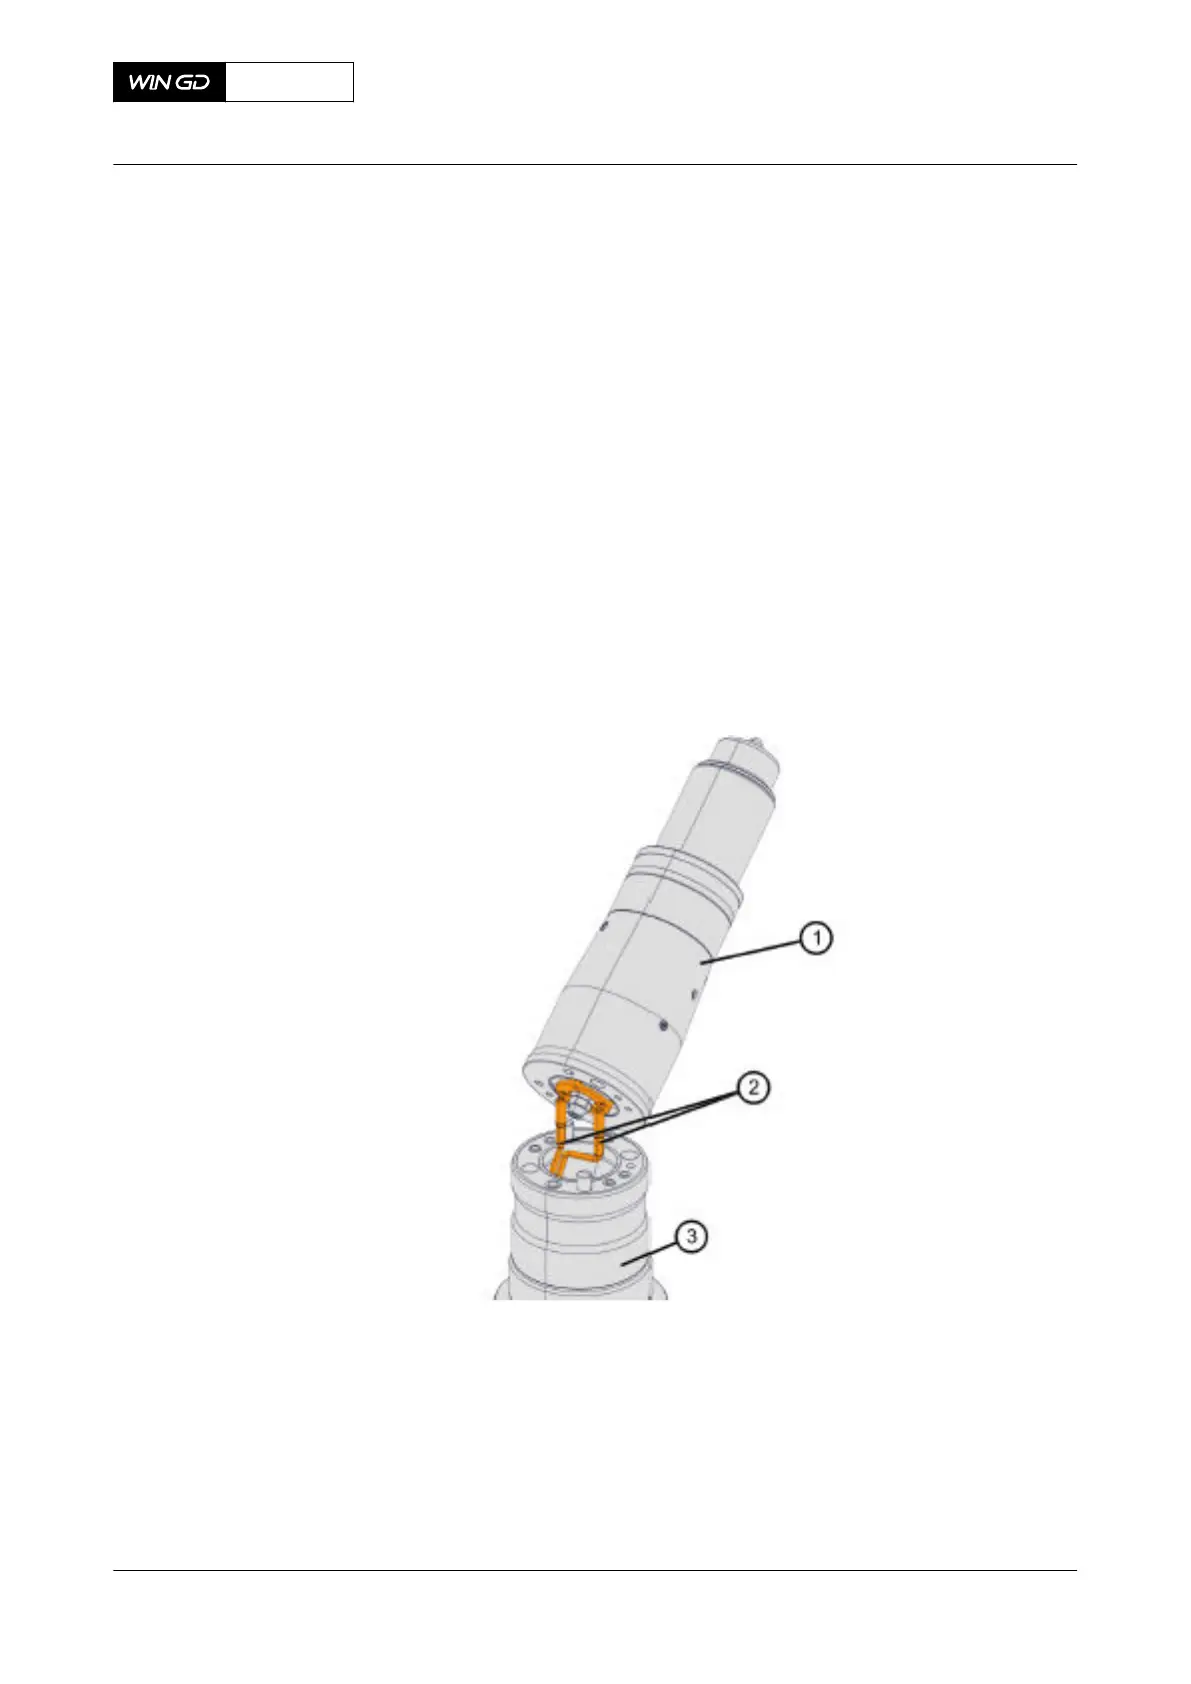
8 Carefully lift the injection module (1, Figure 7-74) some centimeters above the distributor
piece (3).
9 Disconnect the two cables (2).
10 Fully remove and discard the injection module (1).
Fig 7-74 Pilot fuel valve - remove the injection module
CLOSE UP
• None
X62DF
AA00-2790-00AAC-520A-A
Maintenance Manual Pilot injection valve - remove the injection module
Winterthur Gas & Diesel Ltd.
- 331 - Issue 002 2020-10