PROCEDURE
1 Prepare the exhaust valve for removal.
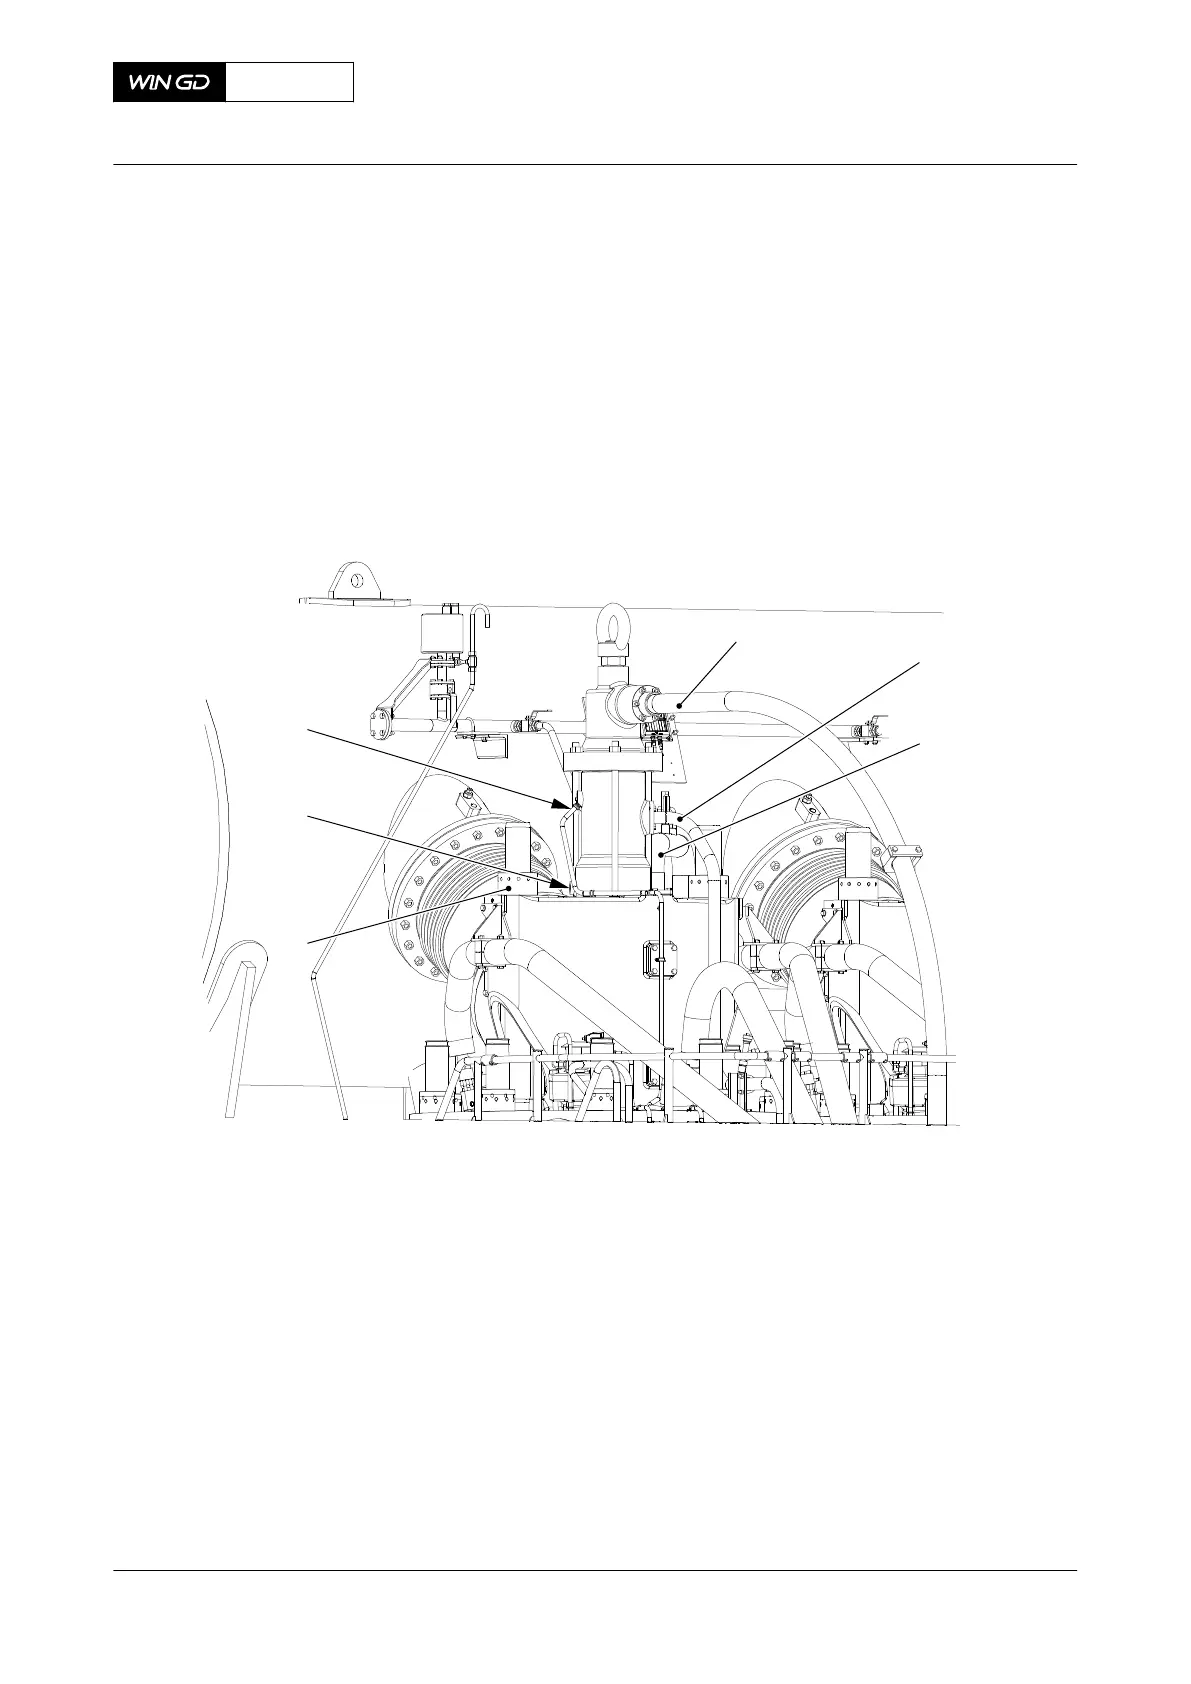
1.1 Remove the hydraulic pipe (001, Figure 7-57) from the exhaust valve, refer to
13.2.1 Hydraulic pipe exhaust valve - remove.
1.2 Remove all other pipes from the exhaust valve.
1.3 Disconnect the plug (005) from the valve stroke sensor.
1.4 Remove the round nuts (004), refer to 4.3 Loosen a round nut with a pre-
tensioner.
Fig 7-57 Exhaust valve - preparation
2 Remove the expansion piece (004, Figure 7-58).
2.1 Put the two slings (006) in position around the expansion piece (004) as shown.
2.2 Attach the two slings (006) to the engine room crane.
2.3 Operate the engine room crane to put a light tension on the slings (006).
2.4 Remove the screws (005).
2.5 Remove the nuts (003) and the bolts (001).
2.6 Move the expansion piece (004) to one side.
2.7 Lower the expansion piece on to an applicable surface.
3 Remove the exhaust valve.
3.1 Attach the crane hook to the eye bolt (007).
3.2 Operate the engine room crane to lift the exhaust valve (008) from the cylinder
cover.
3.3 Carefully lower the exhaust valve on to a wooden support.
X62DF
AA00-2751-00AAA-520A-A
Maintenance Manual Exhaust valve - remove
Winterthur Gas & Diesel Ltd.
- 293 - Issue 002 2020-10