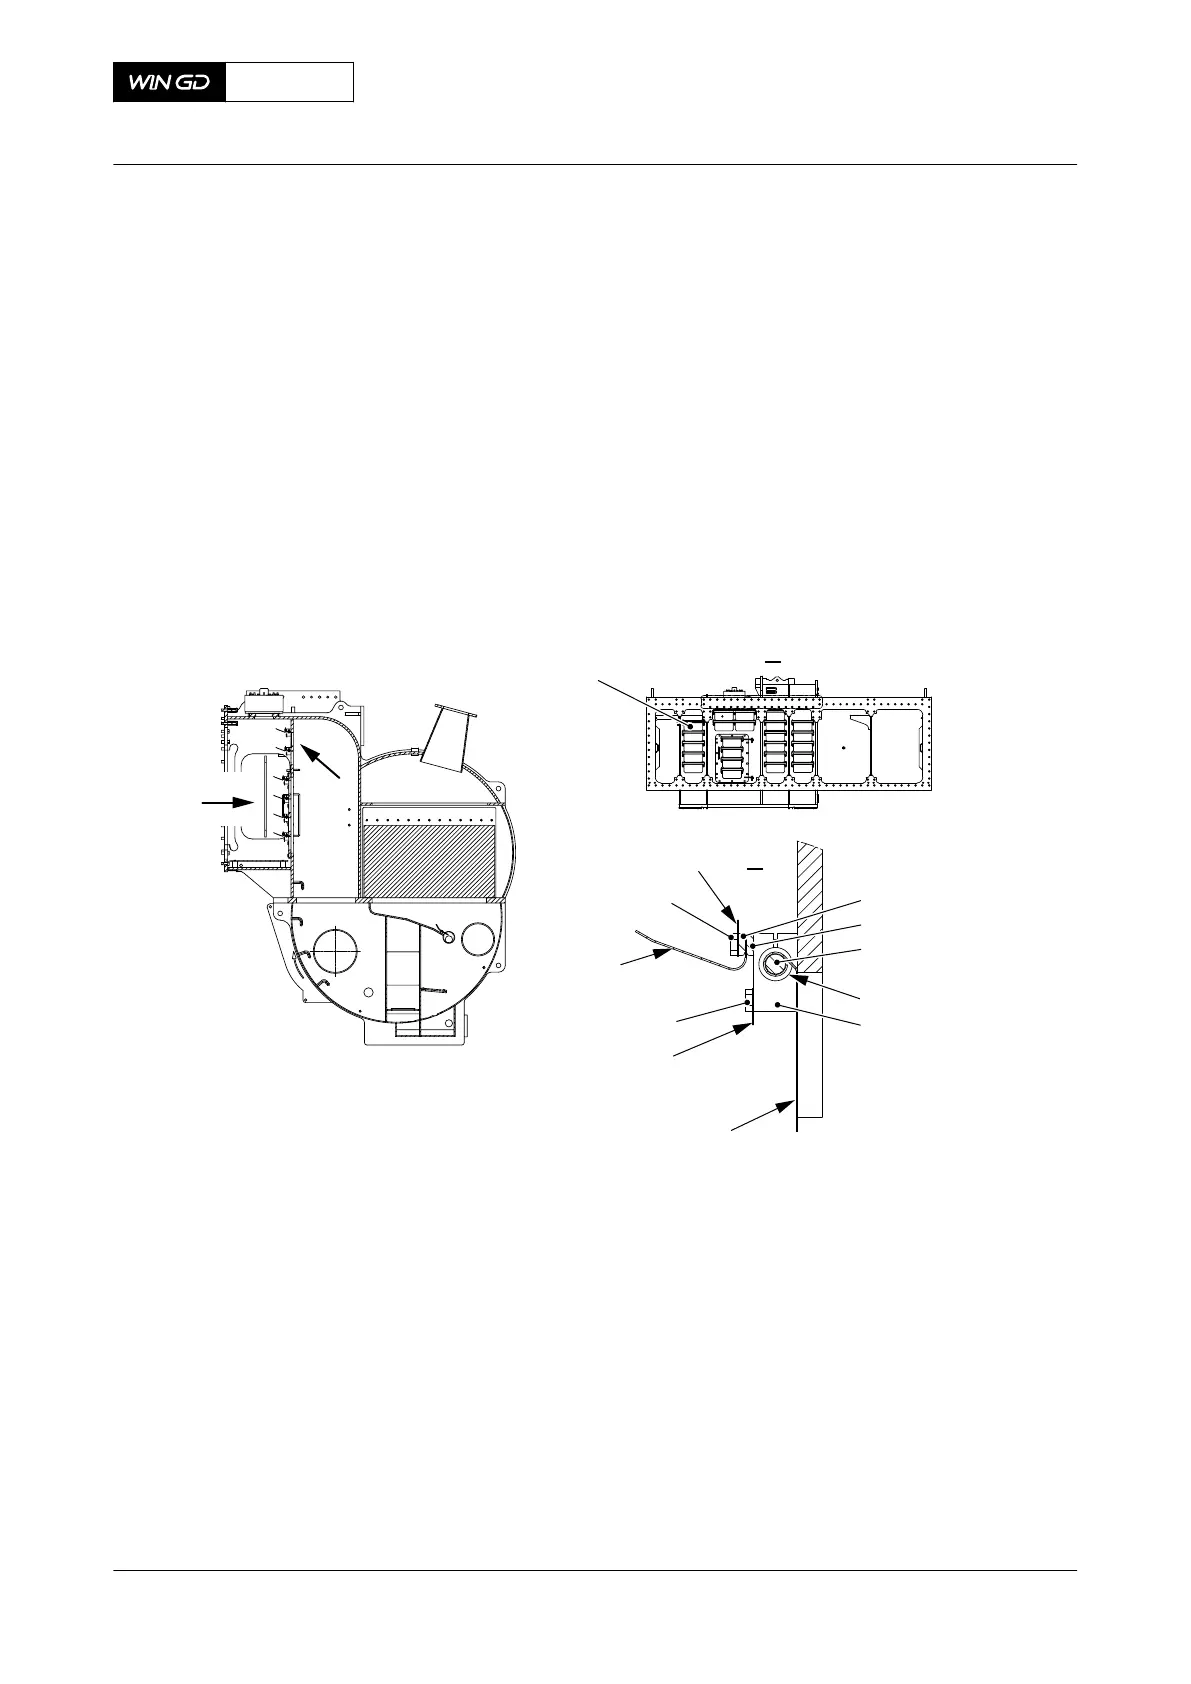
PROCEDURE
1 Put the guide (006), distance ring (005), shaft (004), and the flap (001) in position
(Figure 11-5).
2 Put the flat bar (003), stop plate (009), flat bar (002) new tab washers (011), and screws
(010) in position. Do not tighten the screws at this step.
3 Put the screws (008) and new tab washers (007) in position. Do not tighten the screws
at this step.
4 Make sure that the shaft (004) and the flap (001) move freely.
5 Tighten the screws (008, 010).
6 Bend the tab washers (007, 011) to lock the screws (008, 010).
Fig 11-5 Flaps - install
I
00536
001
I
II
II
001
003
005
008
009
011
002
010
007
004
006
CLOSE UP
• None
X62DF
AA00-6420-00AAA-720A-A
Maintenance Manual Scavenge air receiver - install the flaps
Winterthur Gas & Diesel Ltd.
- 633 - Issue 002 2020-10