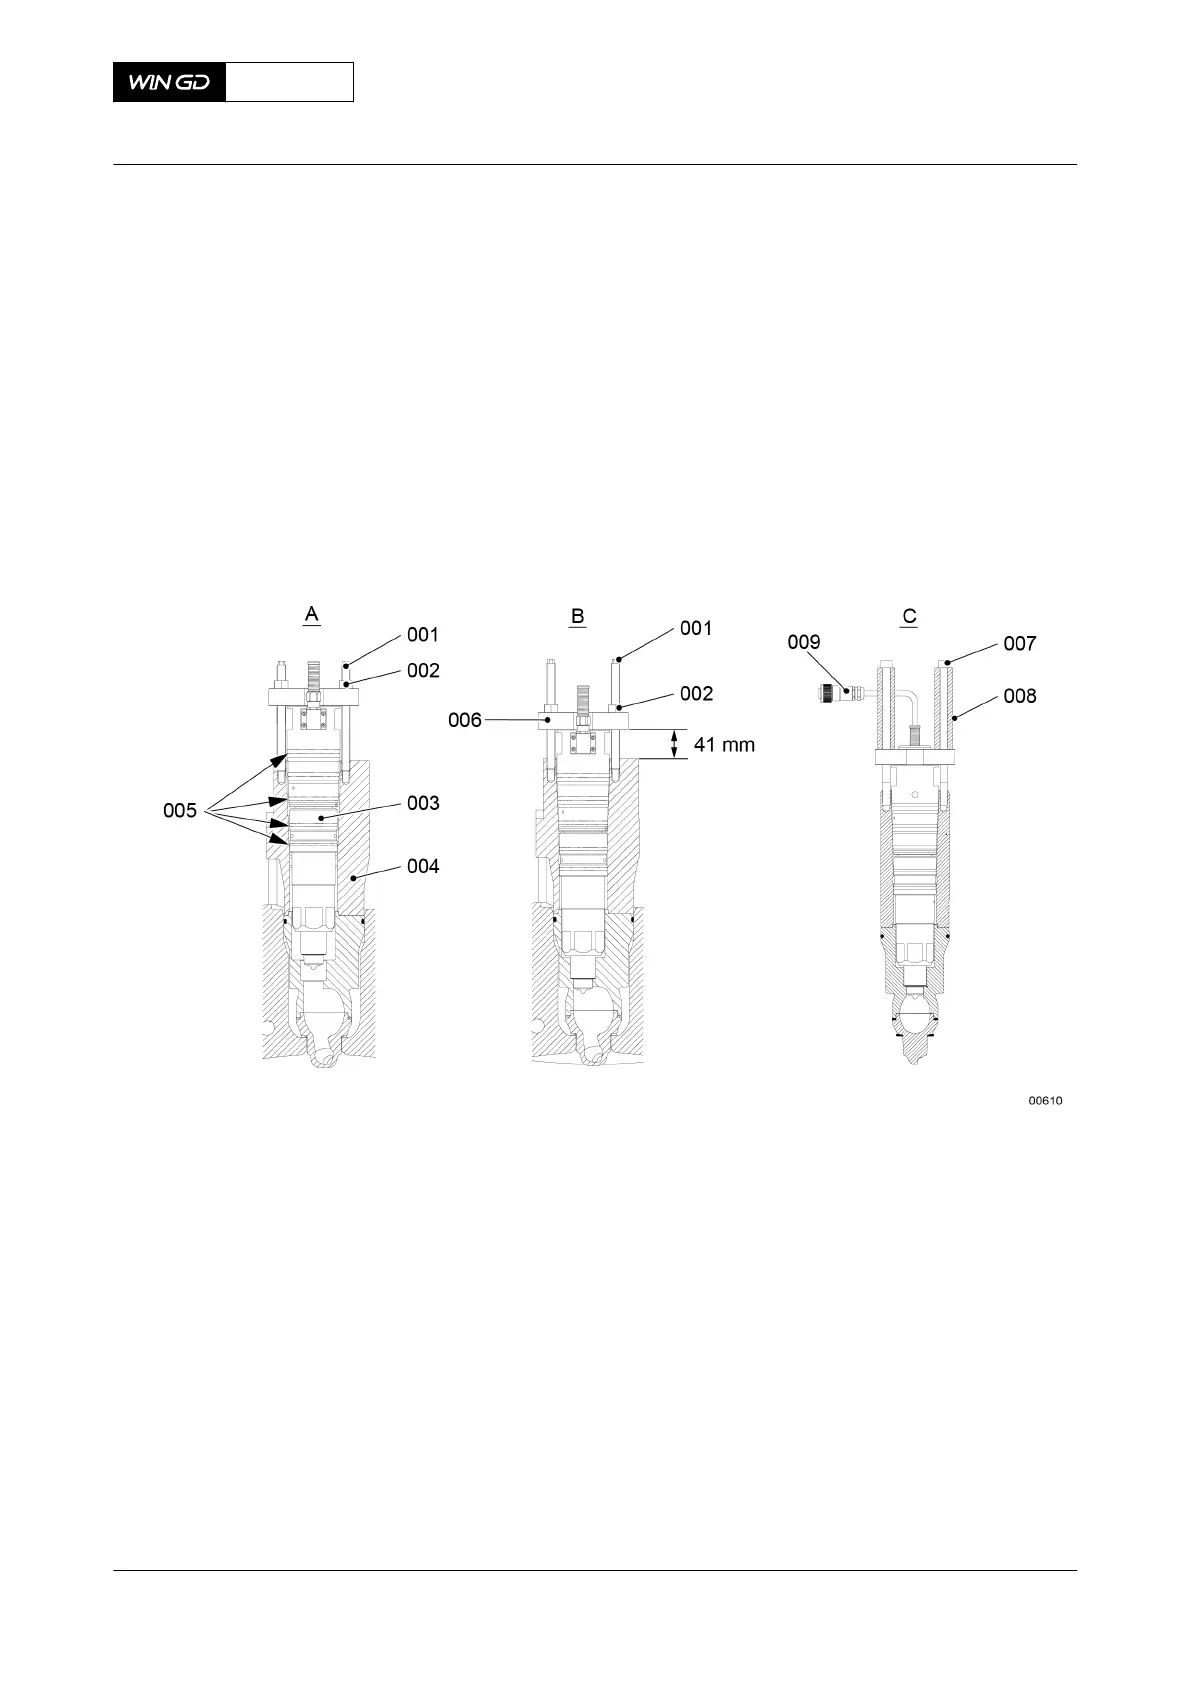
10 Turn down equally the two nuts (002) until you get a distance of 41 mm between the
flange (006) and the valve holder (004).
11 Remove the stud bolts (001).
12 Apply Never Seez NSBT to the threads and surfaces that touch on the two Allen screws
(007).
13 Attach the two distance pieces (008) to the pilot injection valve with the two Allen screws
(007).
14 Torque the two Allen screws (007) to the correct value, refer to section 16.1 Tightening
instructions.
Fig 7-81 Pilot injection valve - install
15 Install the applicable HP pilot fuel pipe (001, Figure 7-82), refer to section 13.4.2 HP
pilot fuel pipe - install.
16 If necessary, install the pipes (003, 004, 005 and 006).
17 Connect the electrical cable (002) to the solenoid valve.
X62DF
AA00-2790-00AAA-720A-A
Maintenance Manual Pilot injection valve - install
Winterthur Gas & Diesel Ltd.
- 346 - Issue 002 2020-10