04/2016
4-25
Phaser 4600/4620/4622 Printer Service Manual
REP 7.0
4 Repairs and Adjustments
Revised
REP 7.0 Tray 1 Feeder Assembly
Parts List on PL 8.10 Item 14
Removal
WARNING
Switch off the electricity to the machine. Disconnect the power cord from the customer
supply while performing tasks that do not need electricity. Electricity can cause death or
injury. Moving parts can cause injury.
CAUTION
Cover the Drum Cartridge to prevent light exposure.
1. Remove Tray 2.
2. Open the Top Door.
3. Remove the Toner Cartridge.
4. Remove the Drum Cartridge.
5. Remove the Duplex Unit, REP 10.1.
6. Remove the Right Cover, REP 28.1.
7. Remove the Front Cover, REP 28.4.
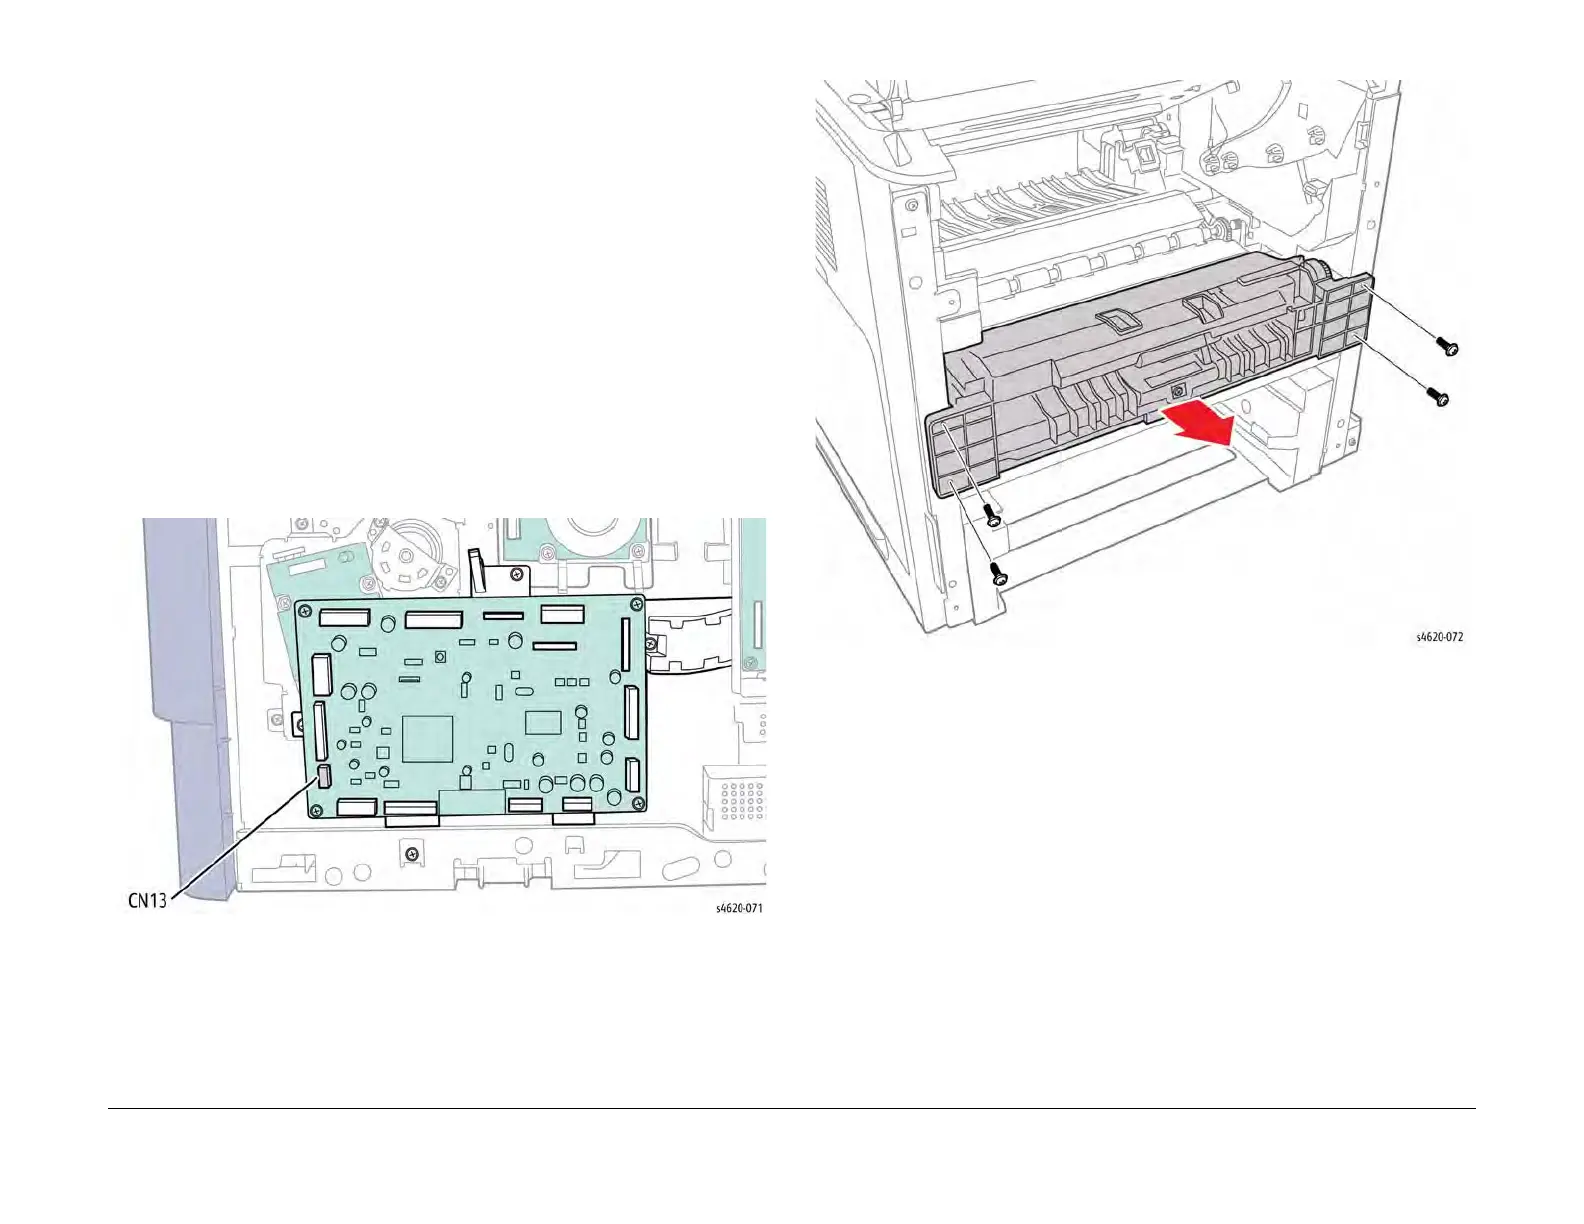
8. Disconnect CN13 from the MCU Board and feed the harness through the hole into the
chassis, Figure 1.
Figure 1 Disconnect the Tray 1 Feeder harness from the MCU Board
9. Remove 4 screws (metal) that secure the feeder to the chassis, Figure 2.
Figure 2 Remove the Feed Assembly screws
Replacement
Feed the harness into the tray cavity, install the feeder, then feed the harness behind the tray
guide through the hold to reconnect CN13 to the MCU Board, Figure 3.