Service Parts Disassembly 8-5
Front Door (Tray 1) Assembly
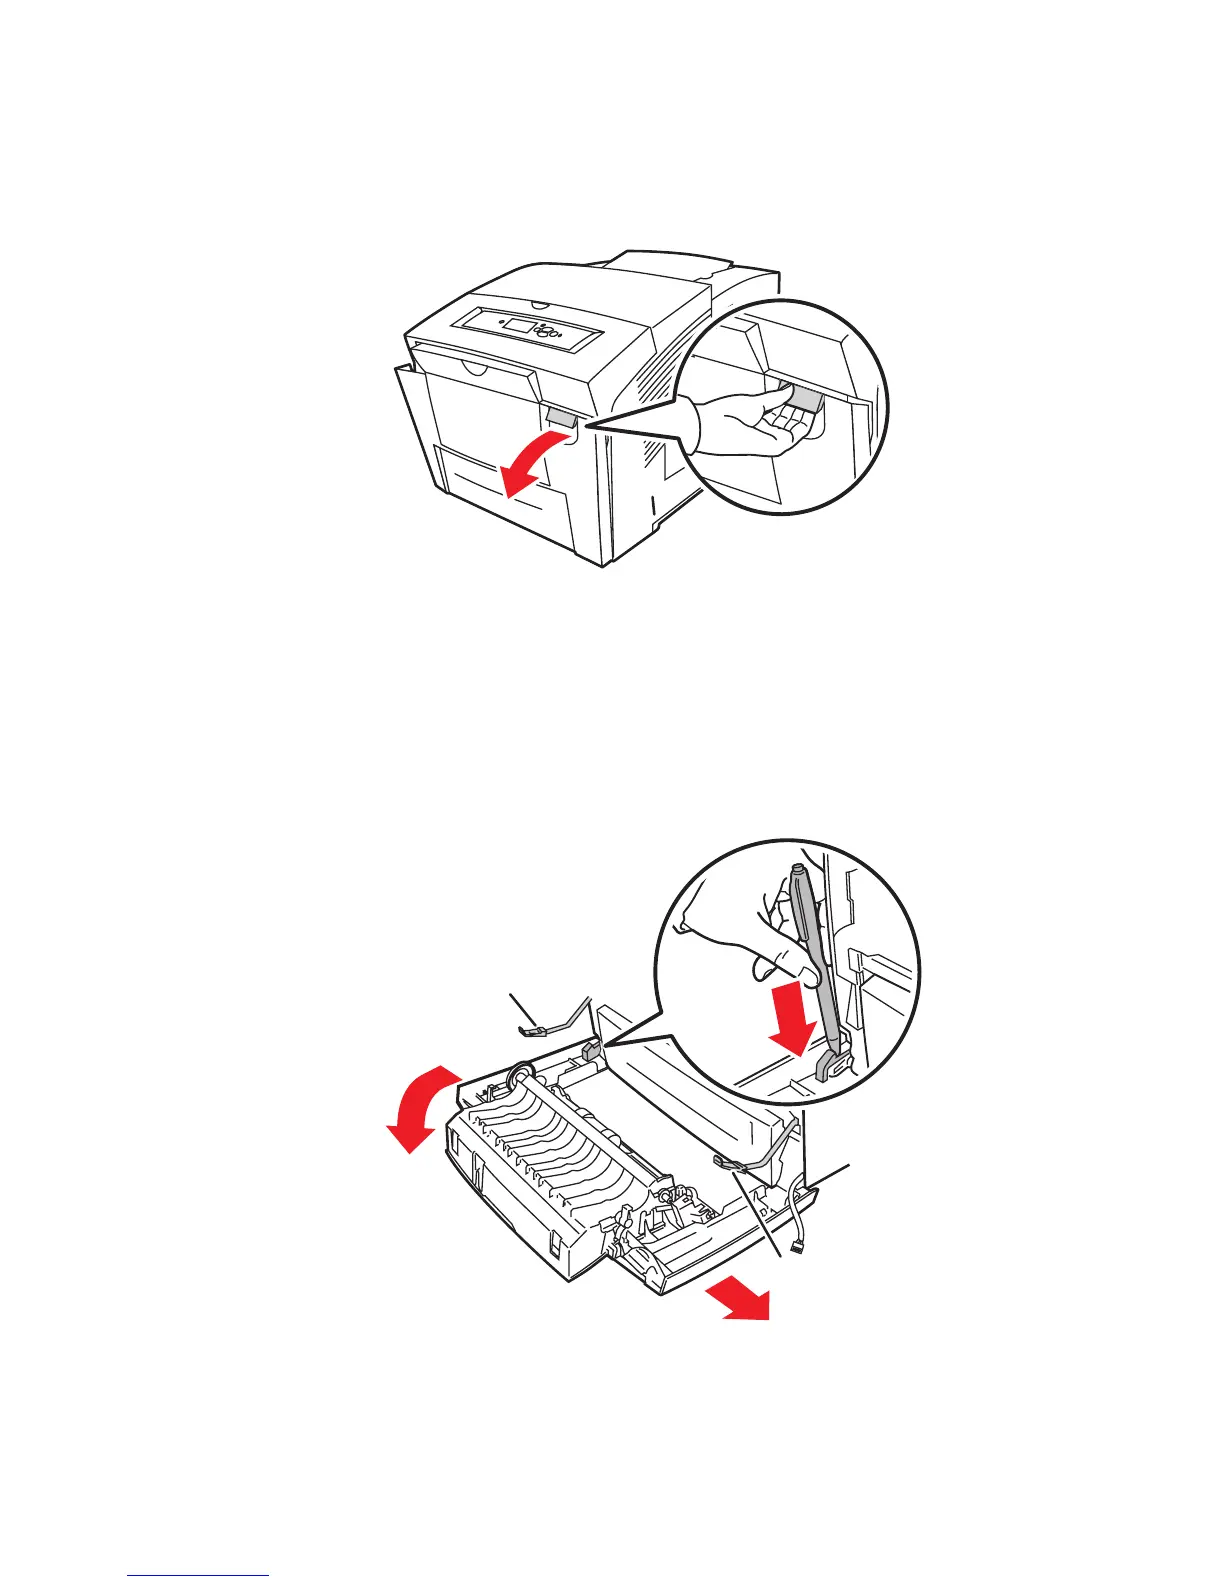
(PL 1.1)
1. Open the Front Door assembly (Tray 1) by pulling out on the handle to the right
side of the door.
2. Remove the right and left stay retainers from the Front Door (MPT).
3. Open the plug cover and disconnect the plug from the right side of Front Door
(Tray1/MPT).
4. Free the plug wiring from cable retainer on the right side of Front Door (MPT).
5. Carefully remove the Front Door (Tray 1/MPT) assembly (PL1.3), by releasing
the left hinge pin (PL1.4) from the printer frame and sliding the assembly to the
right to remove it.
Note
Do not lose the hinge pins or stay retainers for the front door.
s8500-065
1
3
2
s8500-066
Stay Retainer
Stay Retainer

 Loading...


