Service Parts Disassembly 8-9
Replacement Note:
Note
For the Phaser 8400, the gray cable from the side chassis must be routed
between the Ink Loader and the printer side. The cable from the ink loader
must be routed towards the left side (see inset). For the Phaser 8500/8550,
the cable comes from the side of the chassis and plugs directly into the
inkloader. After replacing the Phaser 8500/8550 ink loader, use the hidden
Service menu to reset the ink stick count.
Imaging
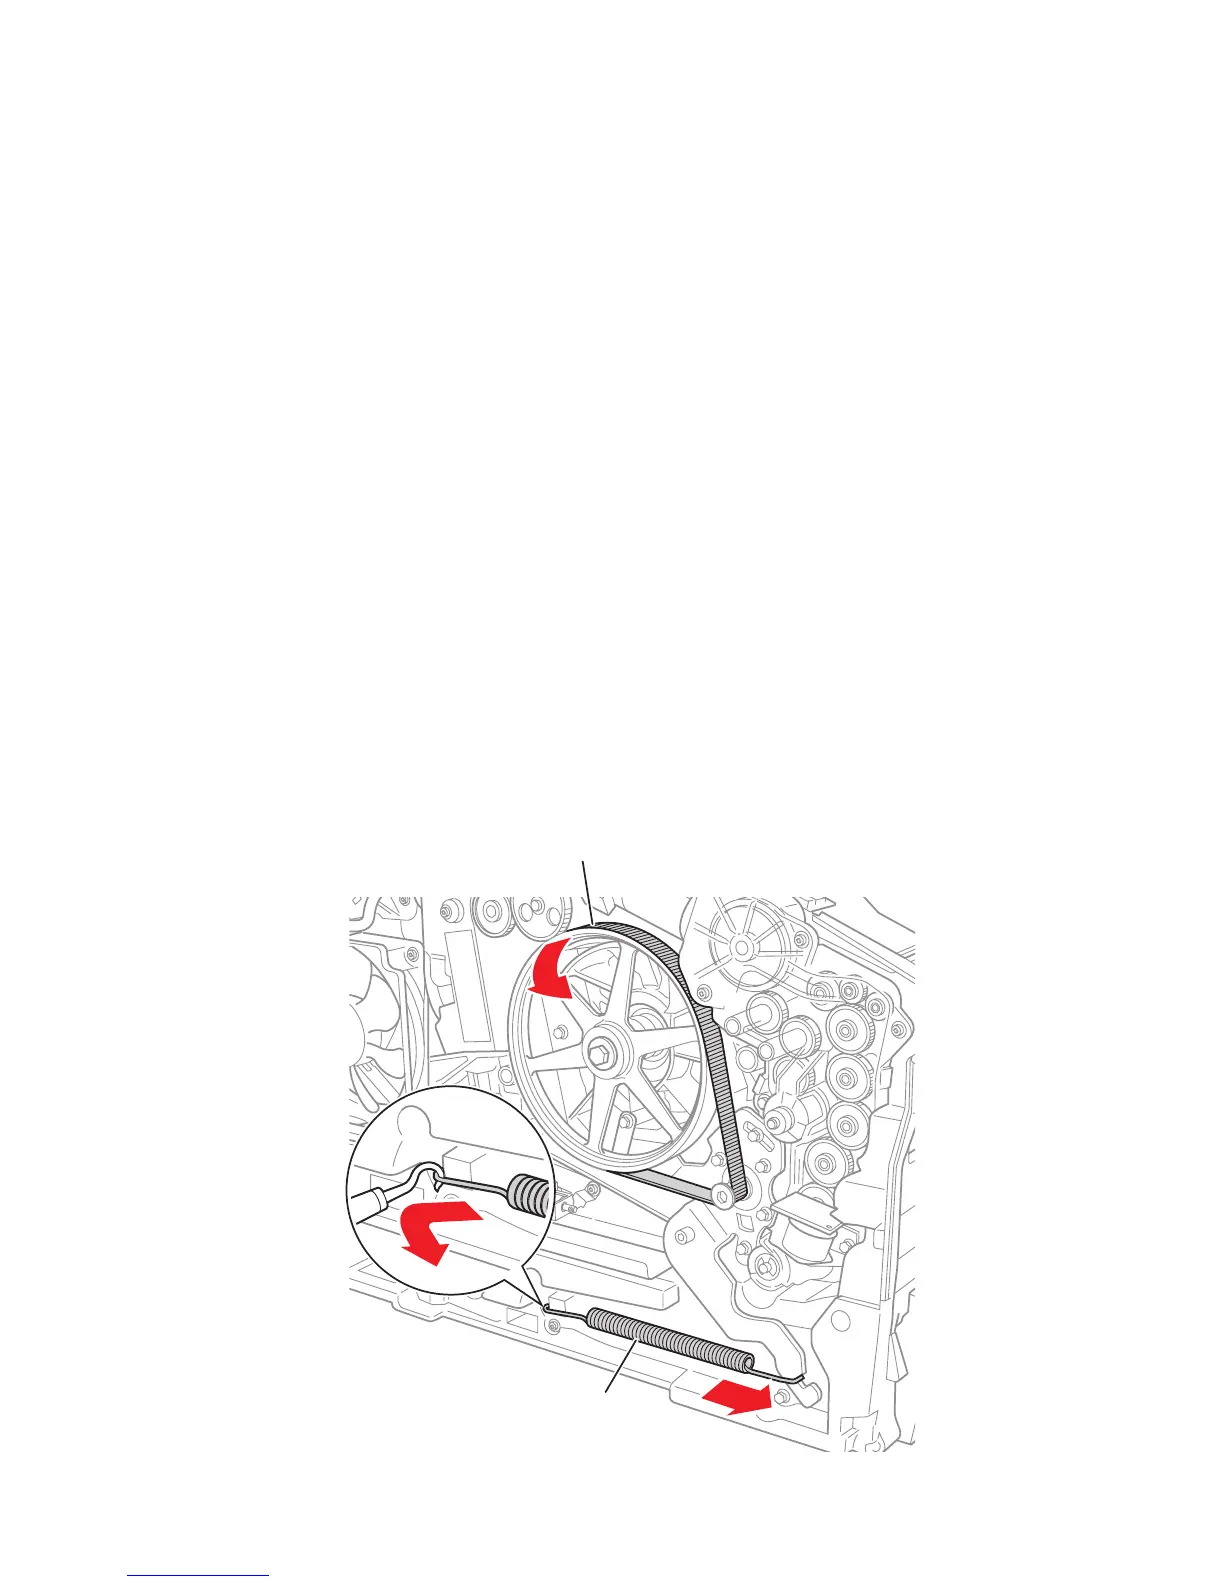
Y-Axis Belt, Y-Axis Tension Spring, and Y-Axis Motor
Assembly
(PL 2.4) (PL 2.14) (PL 4.4)
1. Remove the left side cover (see page 8-7).
2. Relieve tension on the belt by pulling the end of the spring arm toward the front
of the printer using your fingers.
3. Slide the belt off the pulley.
s8500-070
3
4
2
Y-Axis Belt
Y-Axis Tension Spring

 Loading...


