Service Parts Disassembly 8-55
Electronics
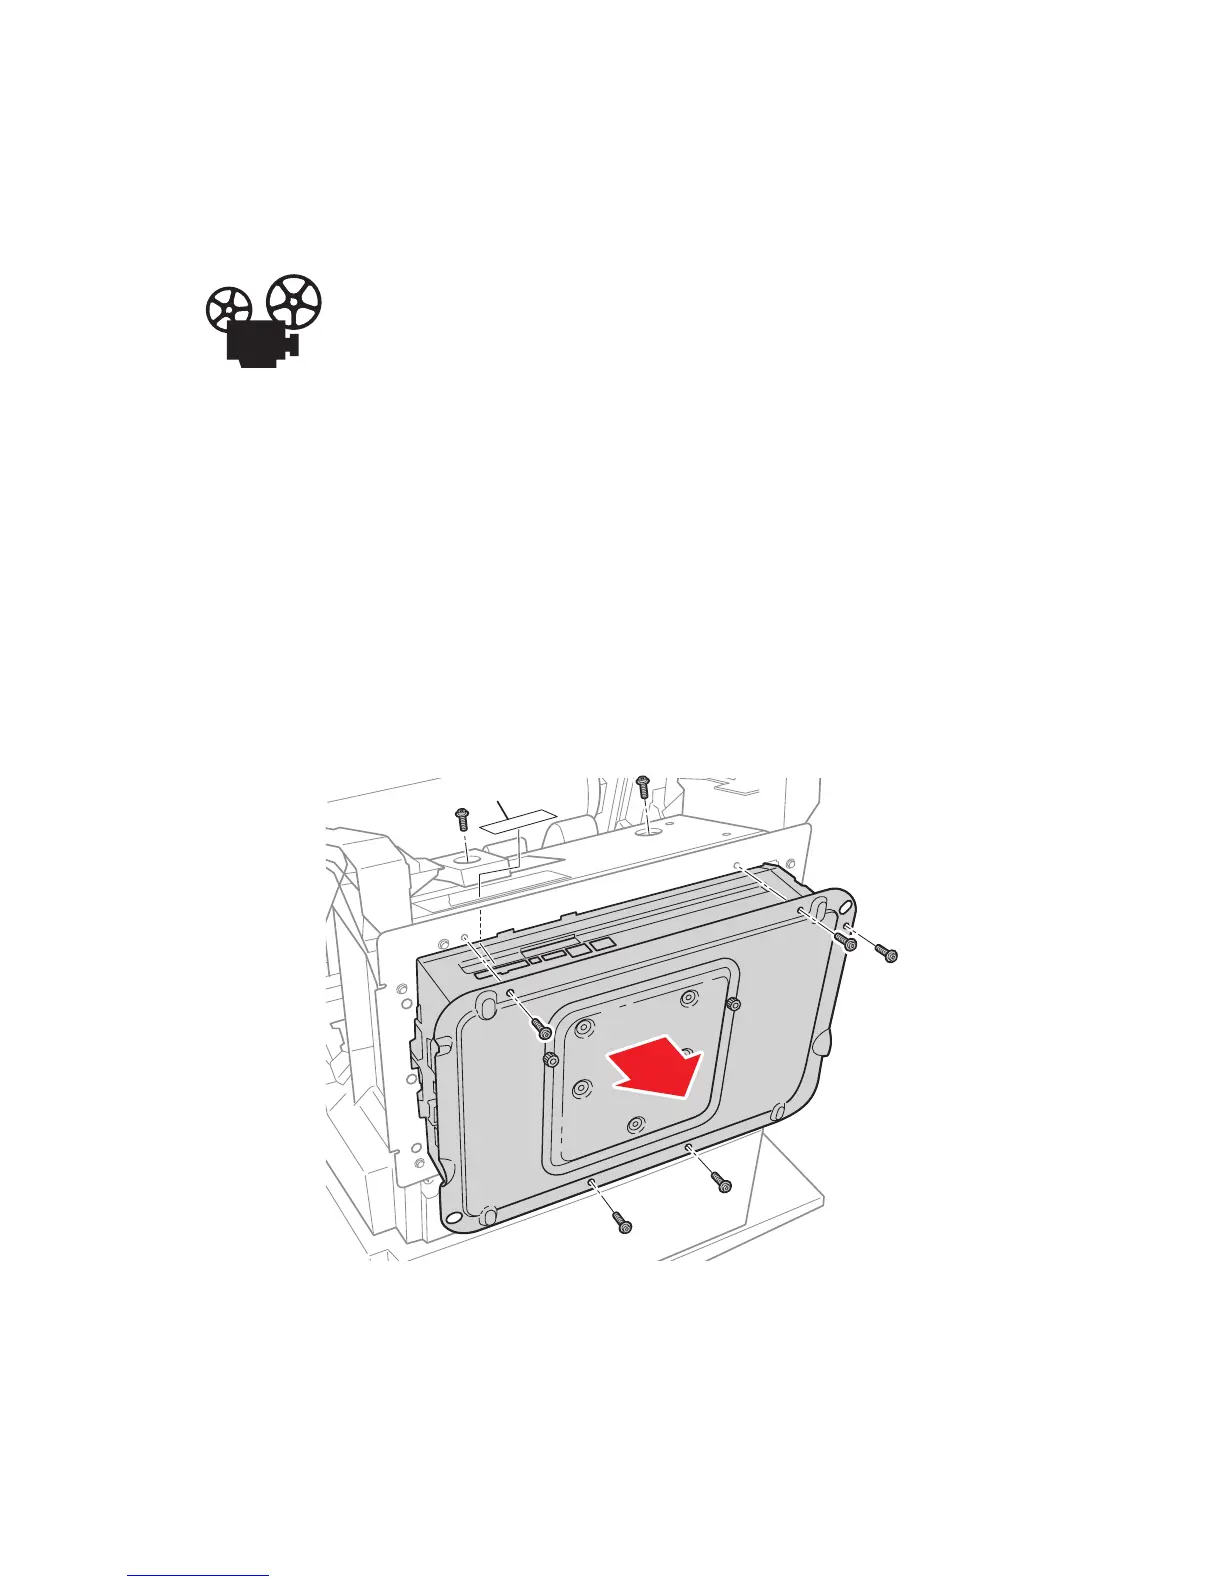
Electronics Module
(PL 5.1)
Videos are available with instructions for replacing the Electronics
Module. Videos are located on the Phaser 8400/8500/8550 Product
Training CD-ROM. Select Service and then select Replacement
Videos).
Caution
Touch the back of the Electronics Module before starting this procedure to
discharge any electrostatic charge present on the case. Also, do not
completely remove EMI tape, if added to a connector.
1. Disconnect the power cord and all cables to the Electronics Module. On the
8500/8550 you need to peel back the EMI tape from the printhead data cable.
2. Remove the Ink Loader Assembly and Door (see page 8-8).
3. Remove five screws from the back of the Electronics Module and two screws
from inside the printer chassis.
4. Remove the Electronics Module.
Replacement Note:
Note
When replacing the electronics module, transfer the Configuration Card,
NVRAM, SODIMM RAM, and hard drive (if installed) to the new module.
s8500-110
EMI Tape (8500/8550)

 Loading...


