8-40 Phaser 8400/8500/8550 Color Printer
Paper Path
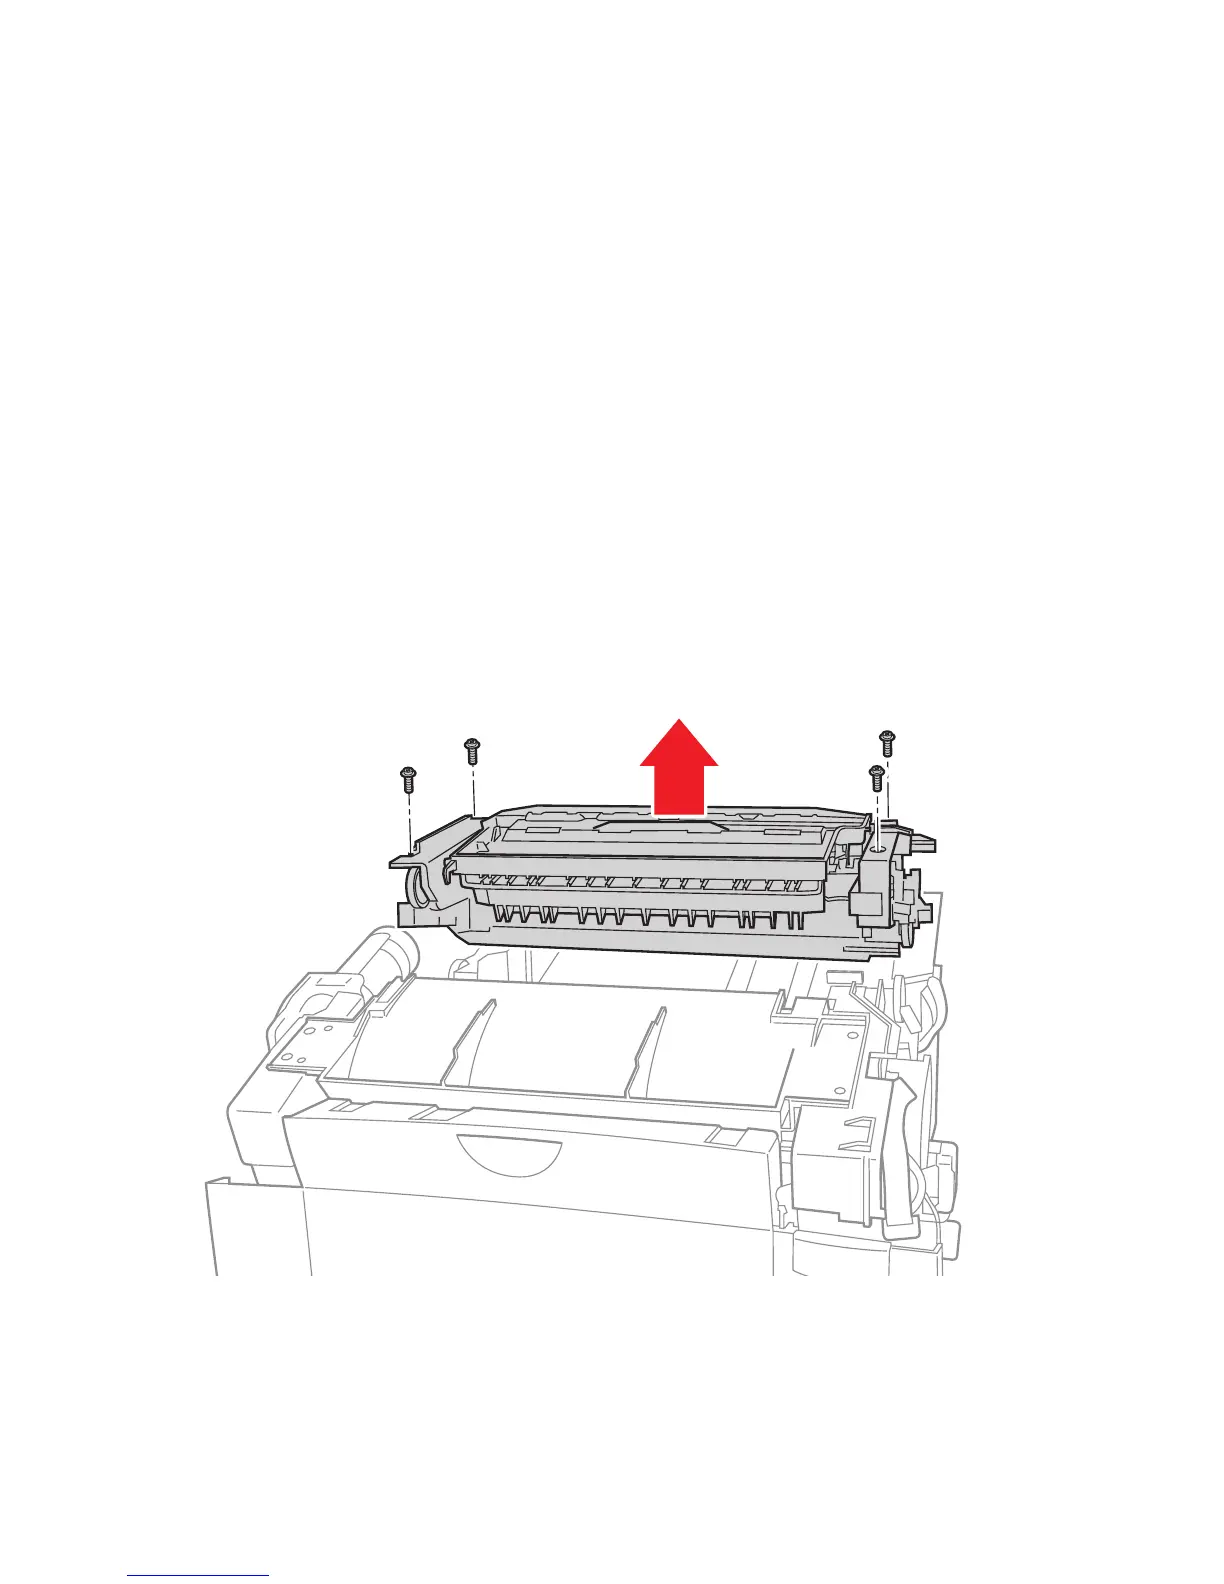
Exit Module Assembly
(PL 3.15)
1. Remove the Exit Cover and both side covers (see page 8-7).
2. Remove the three screws securing the media drive motor, and let the motor hang.
3. Disconnect three connectors: two on the right (I/O Board J680 and J870) and one
on the left.
Caution
The Drum thermal and sensor cable (J870) passes through the Exit Module.
Do not damage this cable during removal. The cable must be re-routed
through the Exit Module during installation.
4. Remove the four screws holding the Exit Module Assembly to the printer chassis
and remove the Exit Module Assembly.
Note
You may need to remove the paper path motor to access the screw.
Replacement Note:
After installing the Exit Module, perform the Wiper Alignment (see page 6-2).
The printer may report error code 7,009.4x if the wiper assembly is misaligned.
s8500-132

 Loading...


