Service Parts Disassembly 8-61
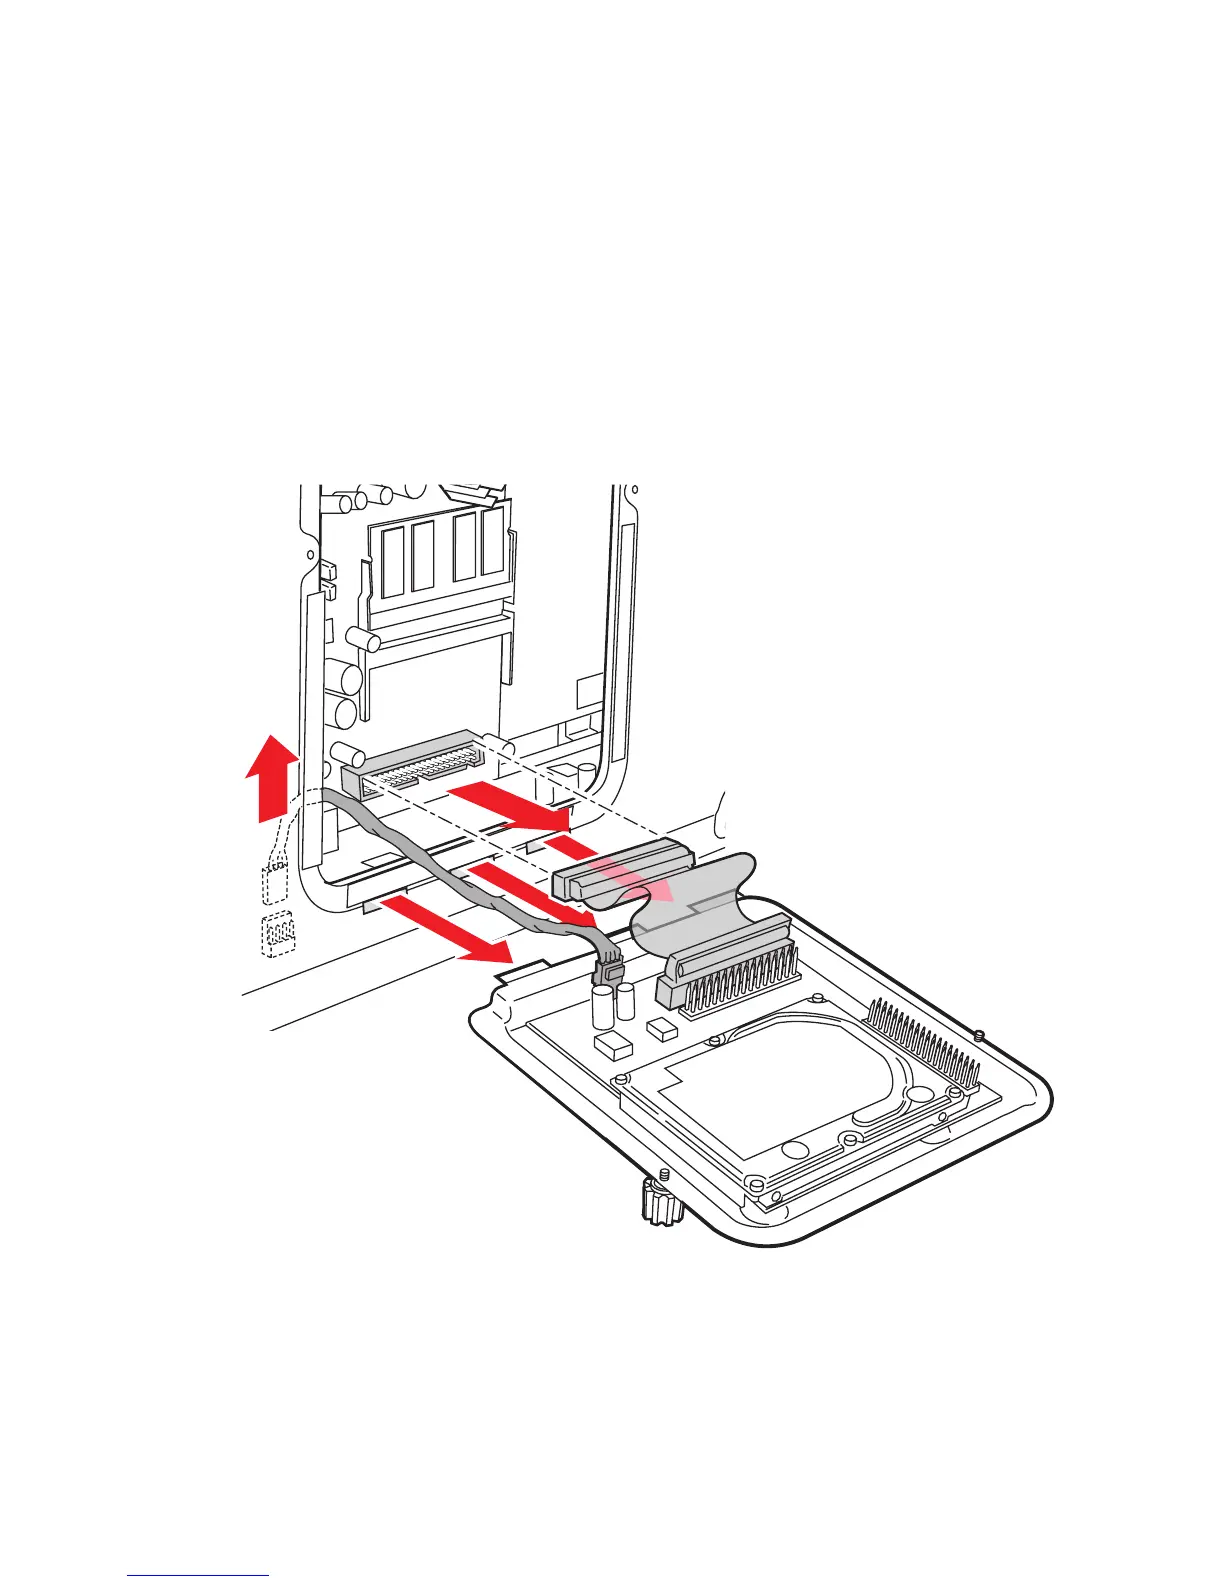
Hard Drive Replacement
(PL 5.2)
1. Remove the back cover from the Electronics Module.
Caution
Some semiconductor components, such as the NVRAM chip, are vulnerable
to damage by Electrostatic Discharge (ESD). Review the “Electrostatic
Discharge (ESD) Precautions” on page v before continuing with this
procedure.
2. Disconnect the two connectors from inside the Electronics Module.
3. Pull out and replace the entire unit, including chassis holder, hard drive, and
board.
4. Reattach the two connectors to the new hard drive unit.
5. Close the new unit with the hand screws.
3
3
3
2
1
s8500-116

 Loading...


