8-60 Phaser 8400/8500/8550 Color Printer
DIMM Replacement
(PL 5.7)
1. Remove the back cover from the Electronics Module.
2. Remove the two finger screws of the Electronics Module and swing the door
down to the full open position.
Caution
Some semiconductor components, such as the DIMM chips, are vulnerable
to damage by Electrostatic Discharge (ESD). Review the "Electrostatic
Discharge (ESD) Precautions" on page 1-v before continuing with this
procedure.
Note
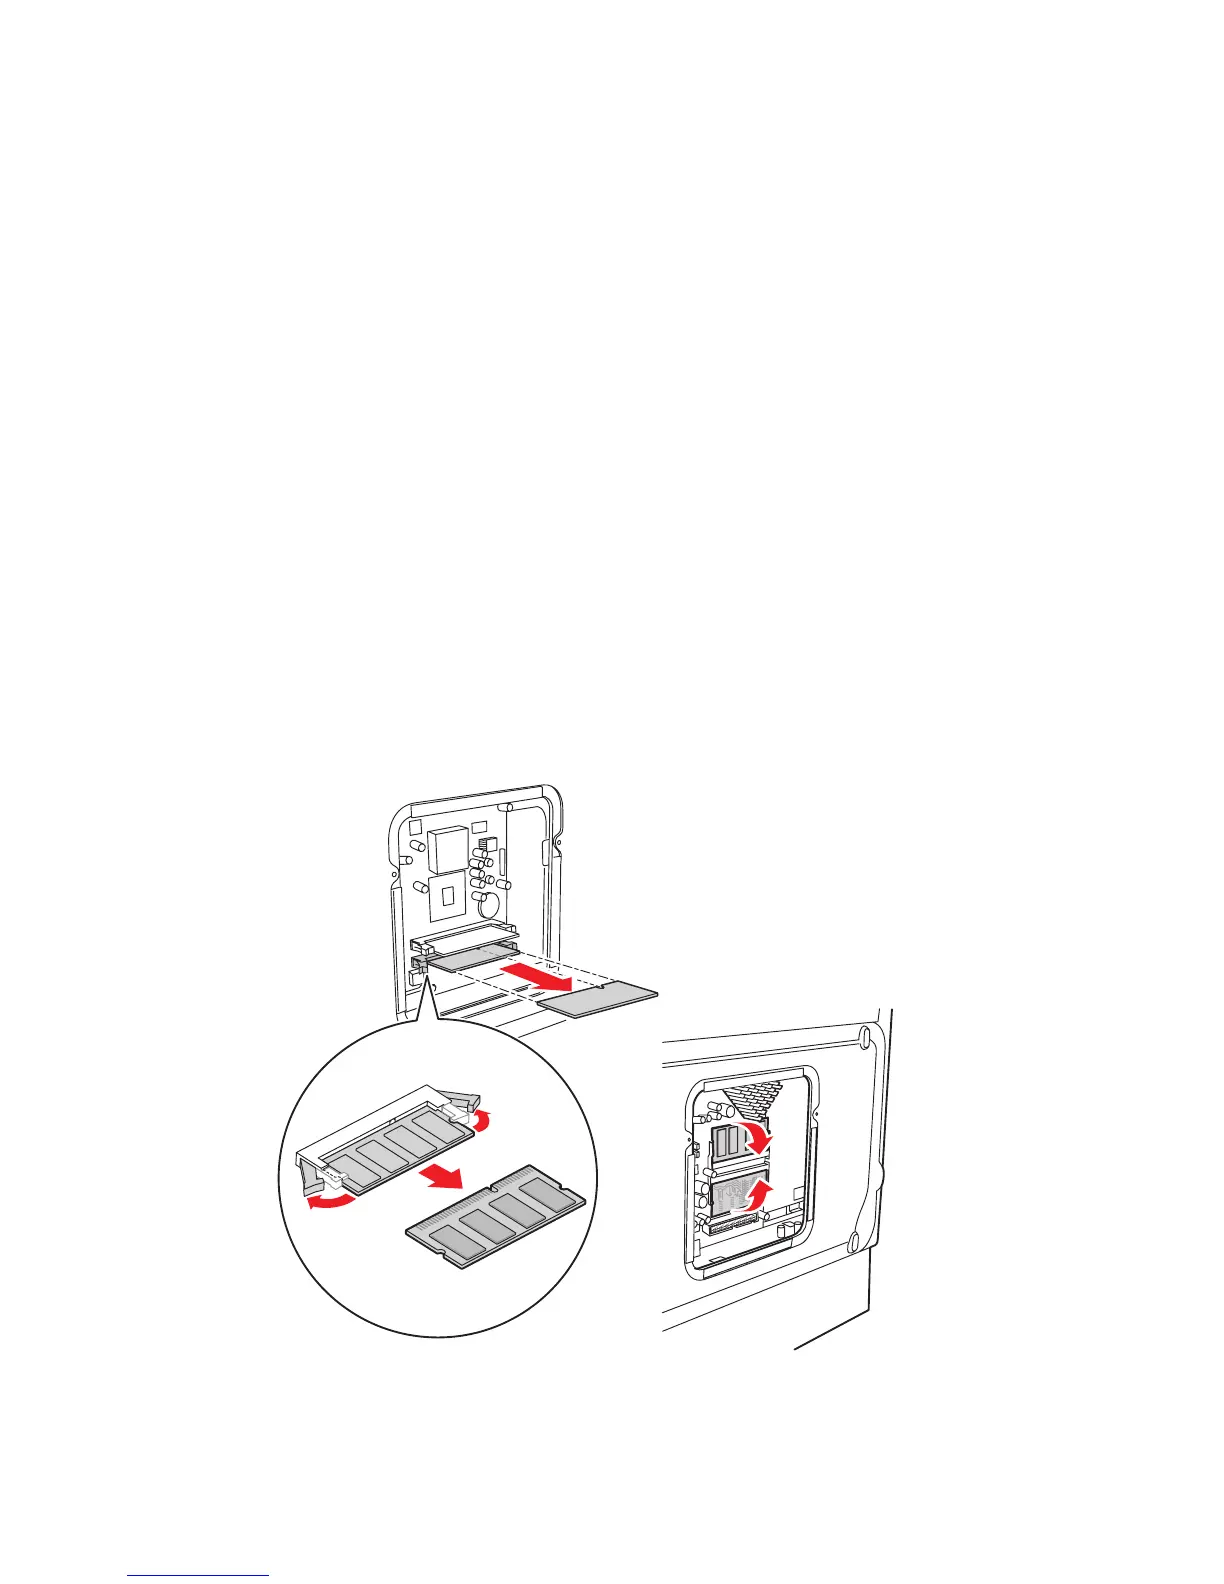
Observe the orientation of the DIMM (Dual-in-Line Memory Module) chips
before removing them and use this as a guide for proper replacement. Notice
that the DIMM boards are inverted to each other.
3. Pull the connector release tabs away from the DIMM’s to release (see
illustration). The Phaser 8400 includes a clip that secures the Dimms in place.
For the 8500/8550 DIMM’s, the top DIMM swings down and the bottom DIMM
swings up in the removal position, while they clip in place in the flat position.
4. Remove the old DIMM chips from their sockets in the Electronics Module.
5. Insert the new DIMM chips into the sockets.
6. Swing the DIMM chips to their secure position against the electronics module
and snap them into their respective connectors.
s8500-115
8400
8500/8500

 Loading...


