8-10 Phaser 8400/8500/8550 Color Printer
4. Using a spring hook or pliers, remove the Y-Axis tension spring from the chassis
retainer and the spring arm. Brace the printer to keep it from moving during
removal of the spring.
ng
Safety glasses recommended for Step 4.
Caution
This is a strong spring that can cause damage if it slips during removal; use
extreme caution when removing.
5. Move the wires out of the way.
6. Disconnect the motor wiring harness connector from the printer.
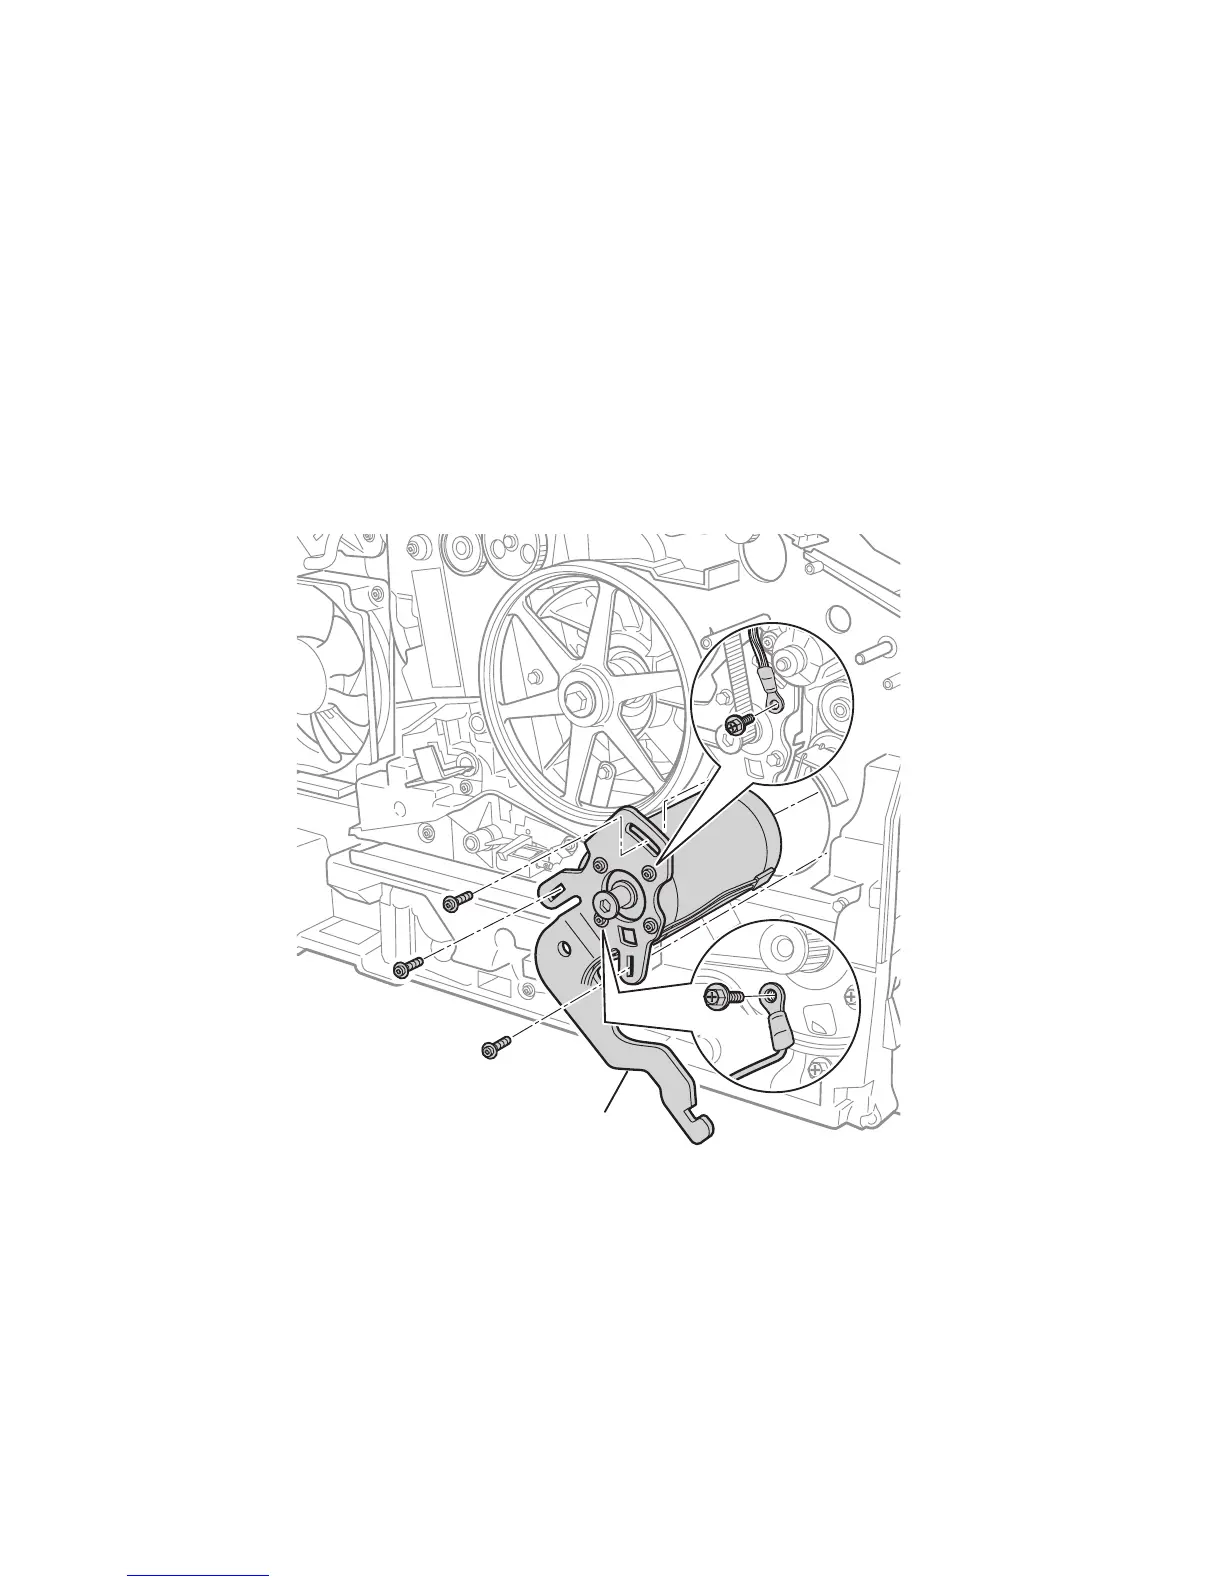
7. Remove four screws (three coarse thread and one fine thread) from the spring
arm. The three screws securing the arm to the motor remain in place.
8. If replacing the motor, remove 3 motor screws to separate the motor from the arm
and remove the spring arm.
s8500-071
20 in-lbs.
Y-Axis Motor Assembly

 Loading...


