20.
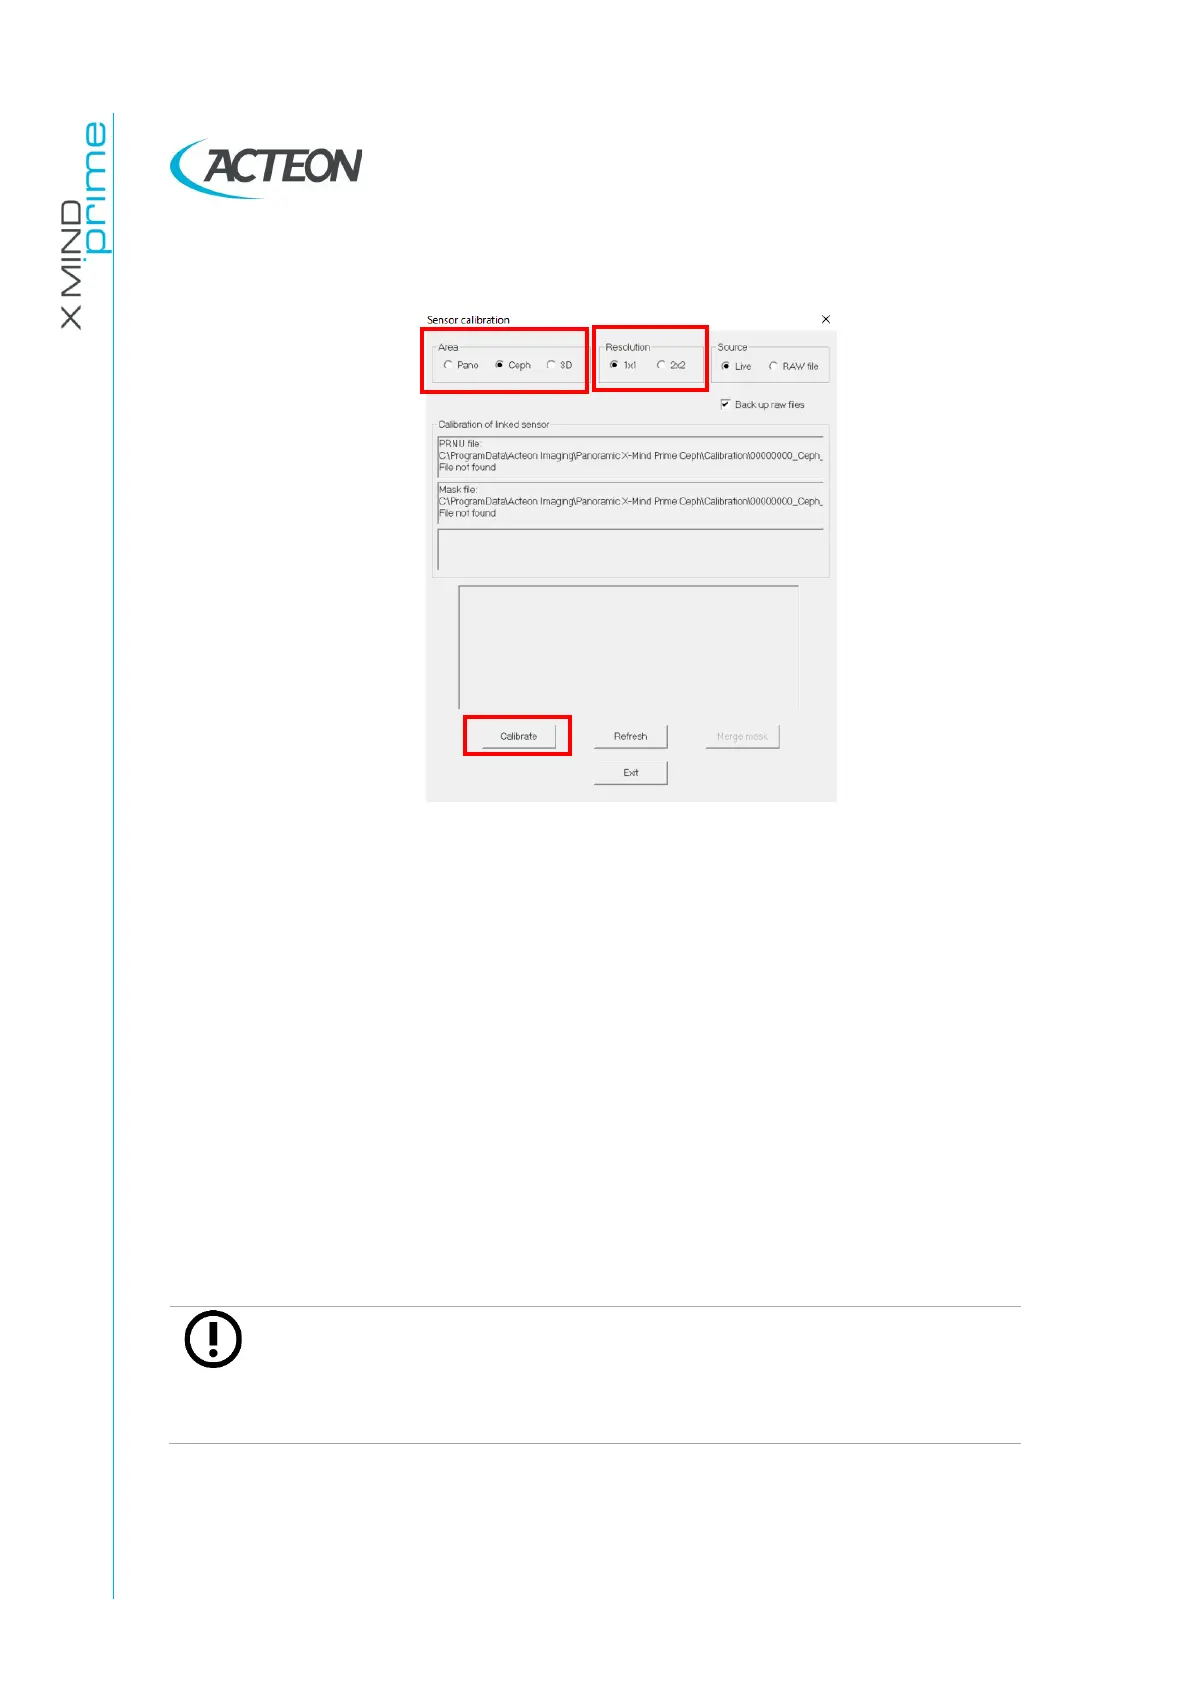
Select "Ceph" in the "Area" panel, "1x1" in the "Resolution" panel.
21.
Press the button "Calibrate”
22.
Press >O< on the machine on the keyboard, when the machine stop moving
and the blu and green leds blink open the 3D detector in ceph position; the
machine goes in calibration position;Wait unti the machine stops moving;
23.
Each time the calibration window displays the message "Waiting for an
acquisition" press the X-ray button until the end of the exposure.
24.
When the ceph 1x1 resolution area calibration is completed, the message
"Calibration finished. Remove the 1.5 mm Cu filter " is displayed. This
calibration will generate the following files in the folder
C:\ProgramData\Acteon
Imaging\Panoramic X-MIND Prime Ceph
\Calibration:
- [Sensor S/No]_Ceph_1x1.fmp
- [Sensor S/No]_Ceph_1x1.msk
- [Sensor S/No].ini
Note
If during calibration, a message "Error while computing the defect mask"
is displayed, check that the ceph head holder is in antero posterior
position. Then quit the current calibration procedure and repeat a new
calibration by clicking on "Calibrate" button.