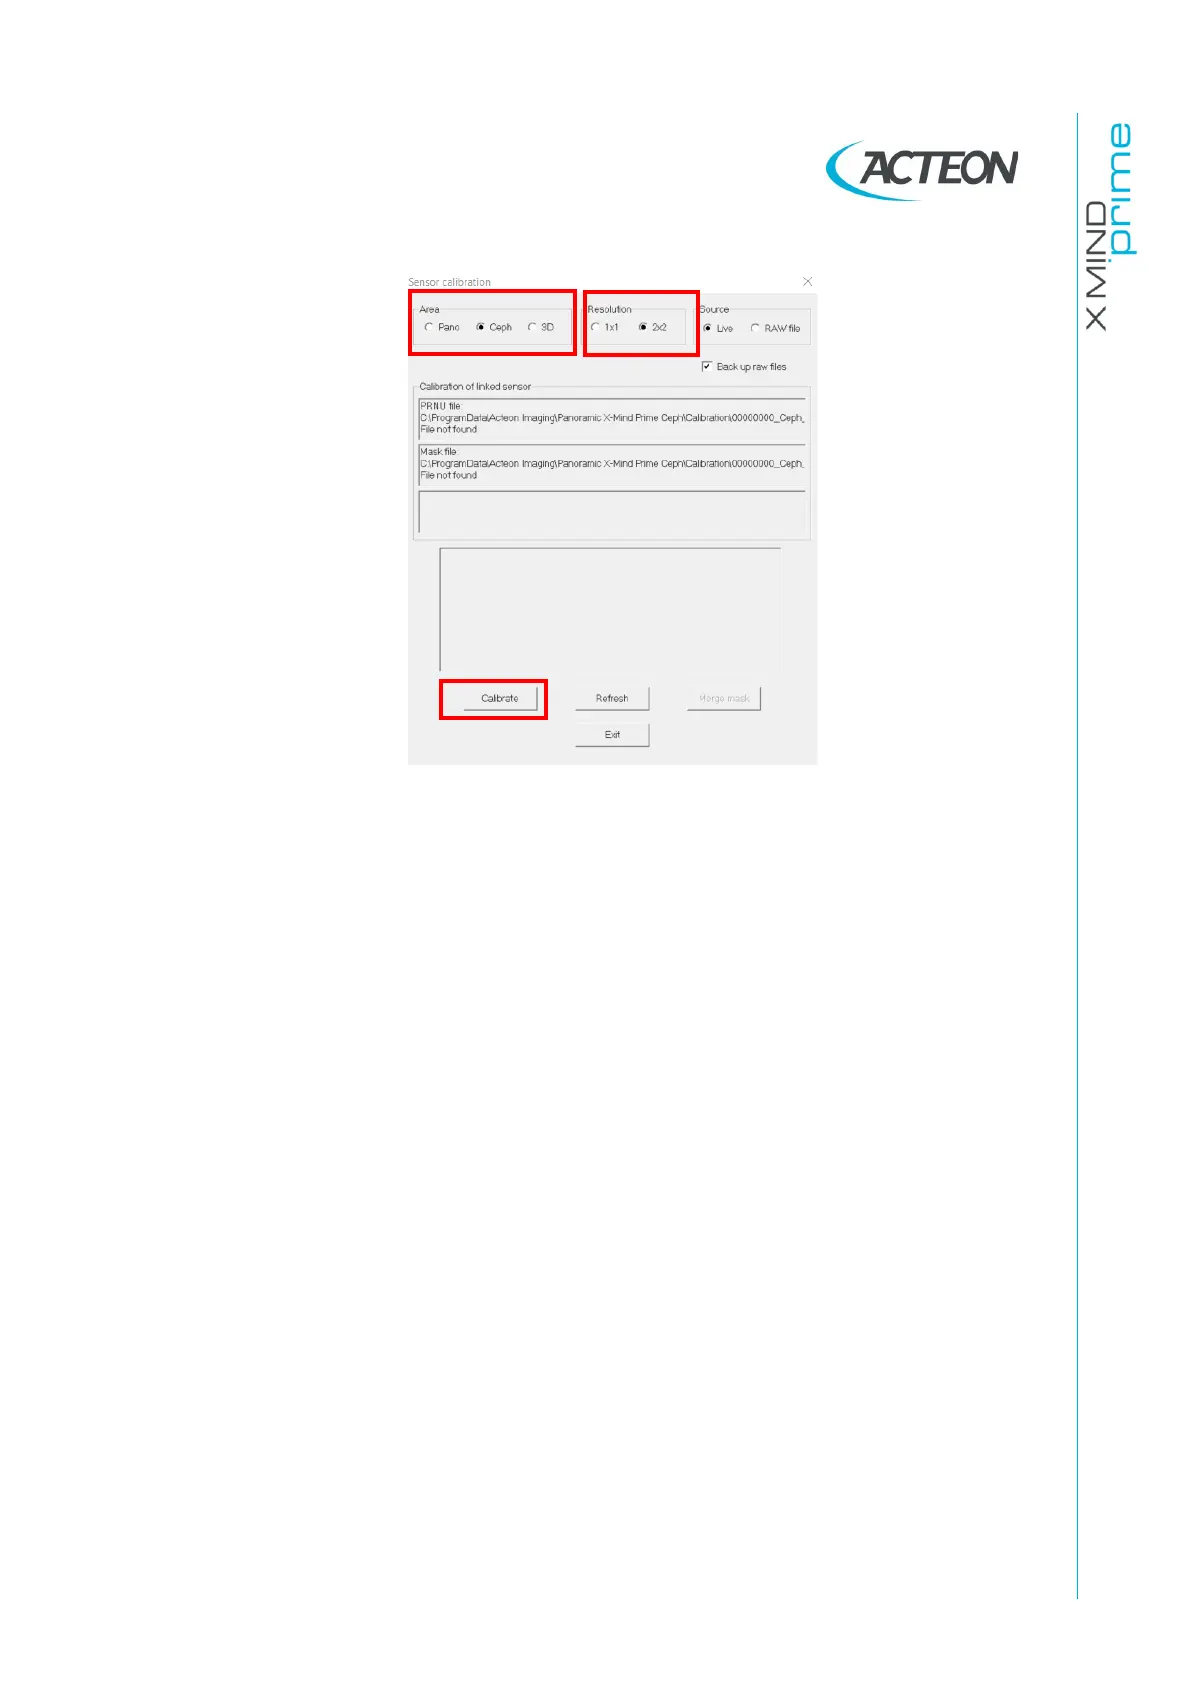
25.
Don't remove the copper filter and Select "2x2" in the "Resolution" panel.
26.
Press the button "Calibrate”.
27.
Each time the calibration window displays the message "Waiting for an
acquisition" press the X-ray button until the end of the exposure.
28.
When the ceph 2x2 resolution area calibration is completed, the message
"Calibration finished. Remove the 1.5 mm Cu filter " is displayed. This
calibration will generate the following files in the folder
C:\ProgramData\Acteon
Imaging\Panoramic X-MIND Prime Ceph
\Calibration:
-
[Sensor S/No]_Ceph_2x2.fmp
- [Sensor S/No]_Ceph_2x2.msk
29.
When the Panoramic, 3D 1x1 and 2x2, Ceph 1x1 and 2x2 calibrations are
completed, click "Exit”
30.
Select the following filters from the "Image processing" menu:
- Dark signal correction
- PRNU correction if possible
- Collimator correction if possible
- Defect pixels correction if possible
31.
Close the detector.
32.
Remove the copper filter from the tubehead, switch OFF the unit and close the
"PhD_C_Test.exe" service program.
33.
Switch ON the unit.