Service Manual – Corrective maintenance
SERVICE MANUAL • X-MIND prime 3D • (19) • 11/2019 • NXMPEN080A
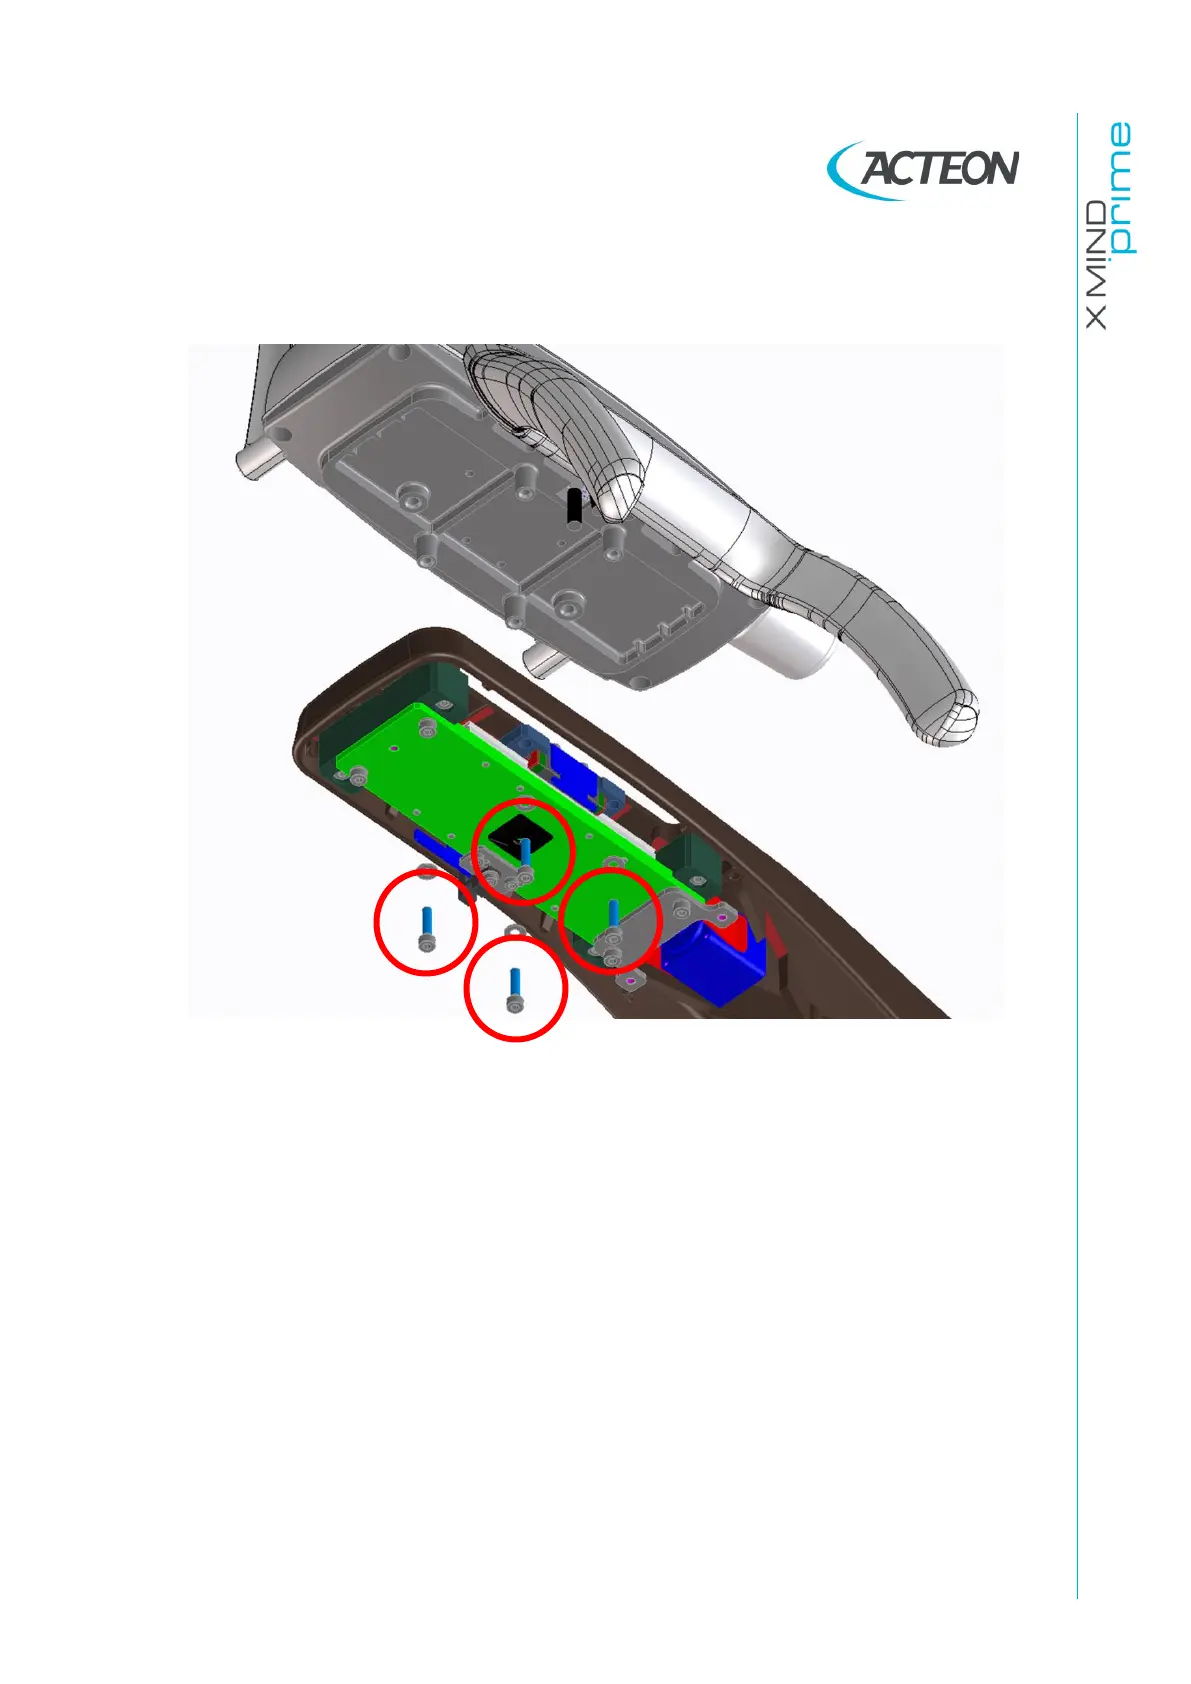
11.
Unscrew the four screws under the arm.
Figure 66
12.
Remove the group “key board-handle”.
13.
Position the new group.
14.
Turn ON the unit in Service mode.
15.
Turn ON the laser and press >0< button on the keyboard to rotate the unit.
16.
Verify that the sagittal laser is projecting on the reference on the tape and than
lightly tighten the screws under the arm. Verify that the horizontal line is on the
horizontal line on the tape.
17.
If both the sagittal and horizontal line are aligned, hard tighten the screws.
18.
Turn OFF the unit.
19.
Set DIP-switch 3 to OFF to set the unit in normal mode (see paragraph 4.2.2.1).
20.
Turn ON the unit.
21.
Make exposure and verify the image quality as described in paragraphs 7.10
and 7.11.