138
5 NVR System Setup
Switch: Activate or inactivate the detection.
Type: Choose the detection target objects. Motion will detect all moving objects, Person will detect human
beings only, Vehicle will detect vehicles only.
Sensitivity: Set the sensitivity level. Level 1 the lowest sensitivity level while level 4 is the highest sensitivity
level.
Rule Type:
A B: If a target object is detected moving from side A to side B, the system will count 1 to enter
number; if a target object is detected moving from side B to side A, the system will count 1 to exit
number.
B A: If a target object is detected moving from side B to side A, the system will count 1 to enter
number; if a target object is detected moving from side A to side B, the system will count 1 to exit
number.
Start Time: Set the detection start time.
End Time: Set the detection end time.
Dynamic Marking:If you enable this option, the border of the detection zone will be displayed in both live
view images and recording les.
Conguration Steps:
i. Activate the Switch.
ii. Choose the detection target type.
iii. To set the Sensitivity.
iv. Choose a Rule Type.
v. Set the Start Time and End Time.
vi. Use your mouse to click 2 points in the camera picture to draw a virtual line.
vii. Click Save to save your settings.
viii. If you want to modify the position or length of the line, click the red box in the line, the color of
the line will be changed to red color. Click and hold the left button of your mouse to move the line,
or drag the terminals to modify the length or position of the line.
ix. If you want to remove one of the lines from the camera picture, click the red box in the line and
then click Remove button.
x. Right click your mouse to exit the setup page.
5. Repeat step 3 to nish the conguration for all channels you want to activate the function.
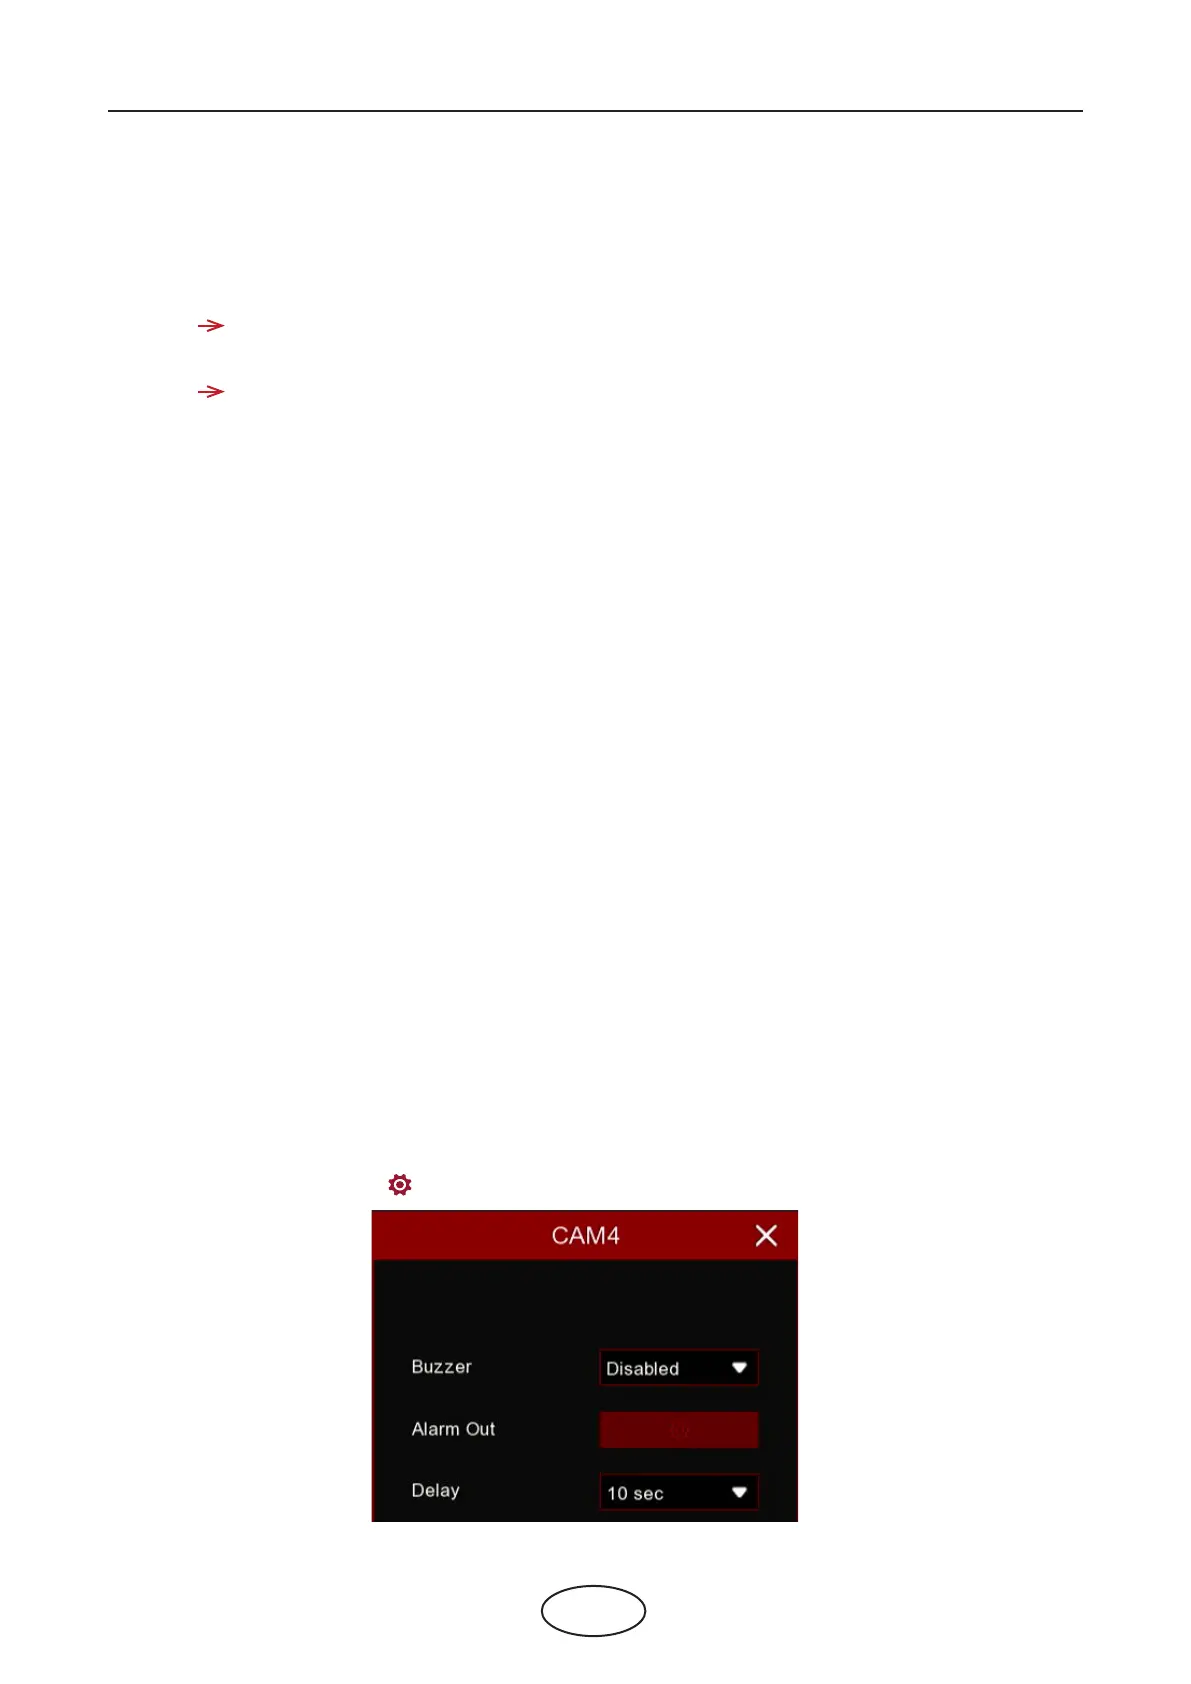
6. Click one of the Alarm icons to congure the alarm actions when the Available number is 0.