36
Resolution: This parameter denes how large the recorded image will be.
FPS: This parameter denes the number of frames per second the NVR will record.
Video Encode Type: H.264/H.265. Some cameras might be supported MJPEG.
Bitrate Control: Select the bitrate level. For a simple scene, such as a gray wall is suitable for constant
bitrate (CBR). For more complex scene, such as a busy street is suitable for variable bitrate (VBR).
Video Quality: Available for VBR only.
Bitrate Mode: If you want to set the bitrate by yourself, then choose User-dened mode. If you want to
select the predened bitrate, choose Predened mode.
Bitrate: This parameter corresponds to the speed of data transfer that the NVR will use to record video.
Recordings that are encoded at higher bitrates, will be of better quality.
Audio: enable or disable audio encode.
I Frame interval: congure the I frame interval of camera. Keep it default if you’re not a professional.
ETR: setting dierent streams for normal and alarm recording.
In the Audio section, you can dene the input/output volume, and encode type of the audio.
5 NVR System Setup
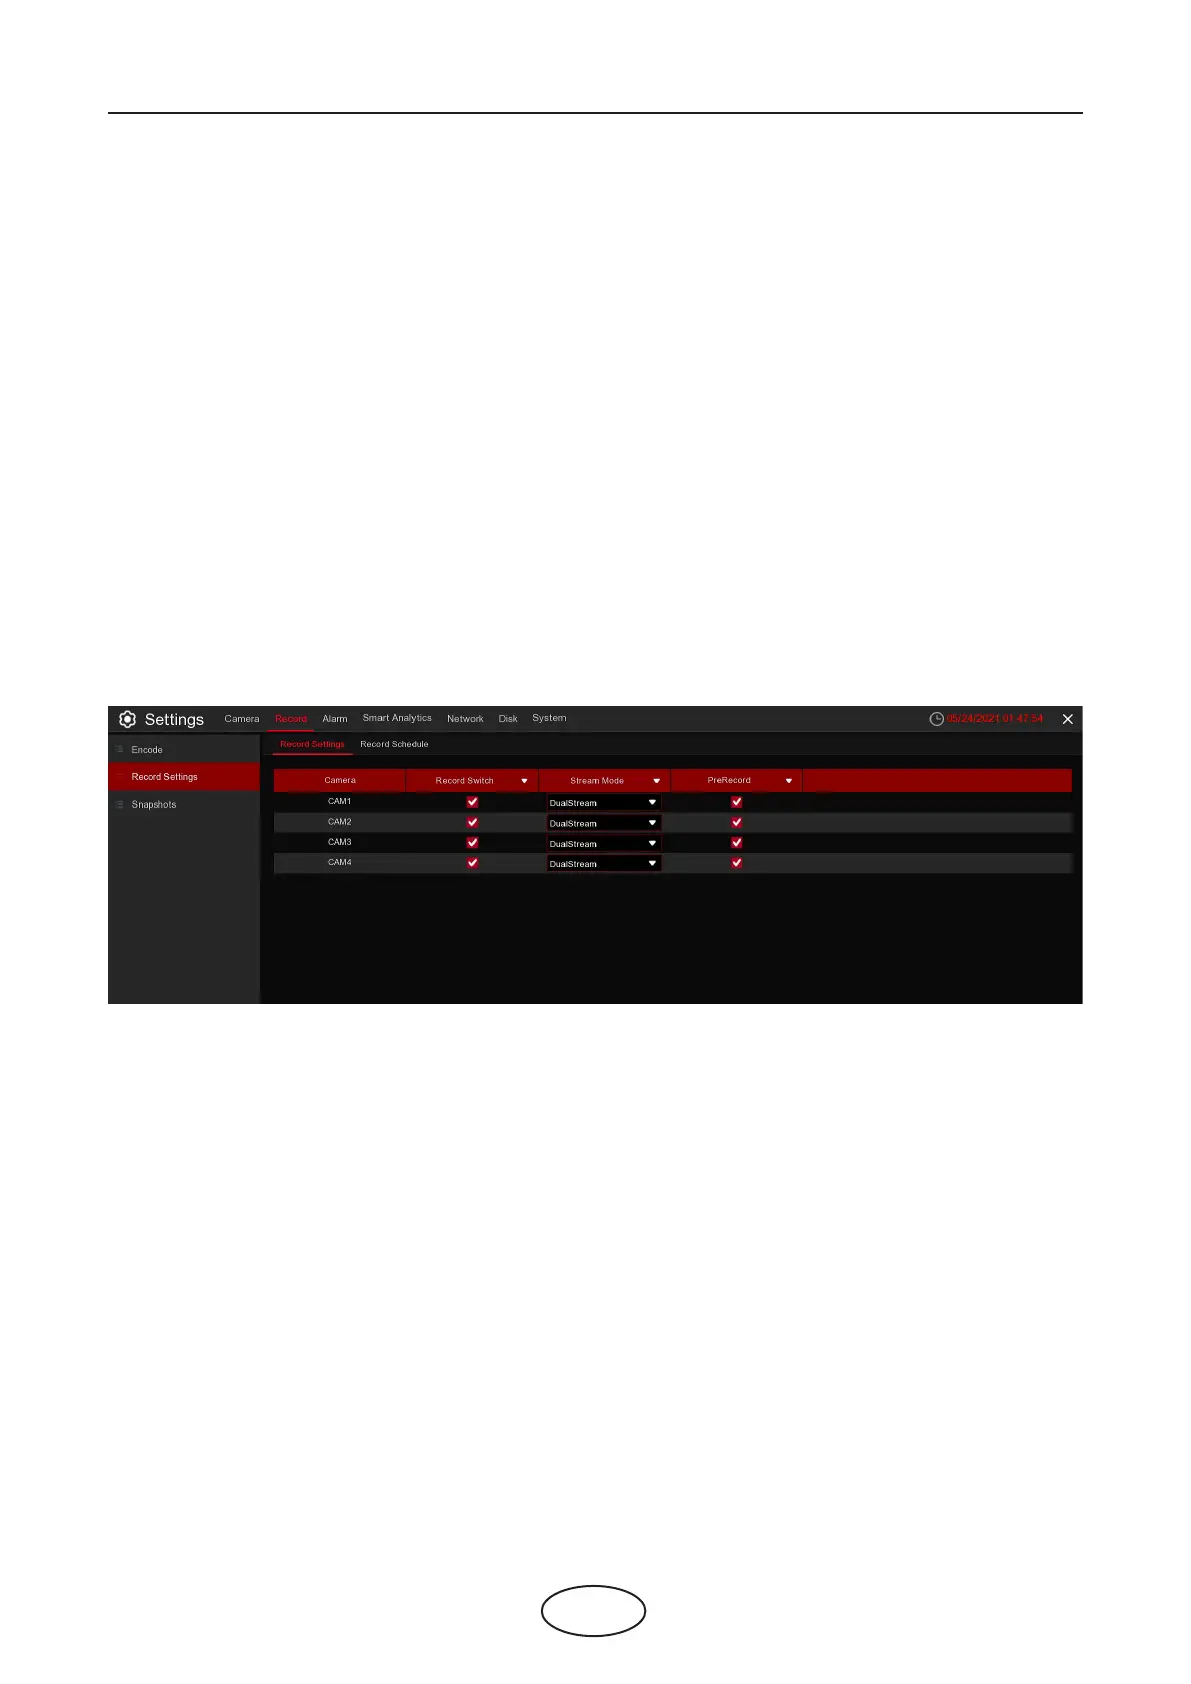
5.2.2.1 Record Settings
Record Switch: Check to enable the recording in this channel.
Stream Mode: Choose the recording quality. If you choose Dualstream, the system will record in both
Mainstream and Substream.
PreRecord: If this option is enabled, the NVR starts recording a few seconds before an alarm event occurs.
Use this option if your primary recording type is motion or I/O alarm based.
5.2.2.2 Record Schedule
This menu allows you to specify when the NVR records video and denes the recording mode
for each channel. The recording schedule lets you set up a schedule like, daily and hourly
by normal (continuous) recording, motion recording, I/O alarm recording, and PIR recording (if your
NVR supports it). To set the recording mode, click on the mode radio button (Normal, Motion, IO, PIR),
then drag the cursor to mark the slots. The recording schedule is valid only for one channel. If you want to
use the same recording schedule for other channels, use the Copy function.
5.2.2 Record
This menu allows you to congure the channel recording parameters.
5.2.2.2 Record Schedule