57
Enable: Check the box to enable the QD function.
Sensitivity: Set the sensitivity level. Level 1 the lowest sensitivity level while level 4 is the highest sensitivity
level.
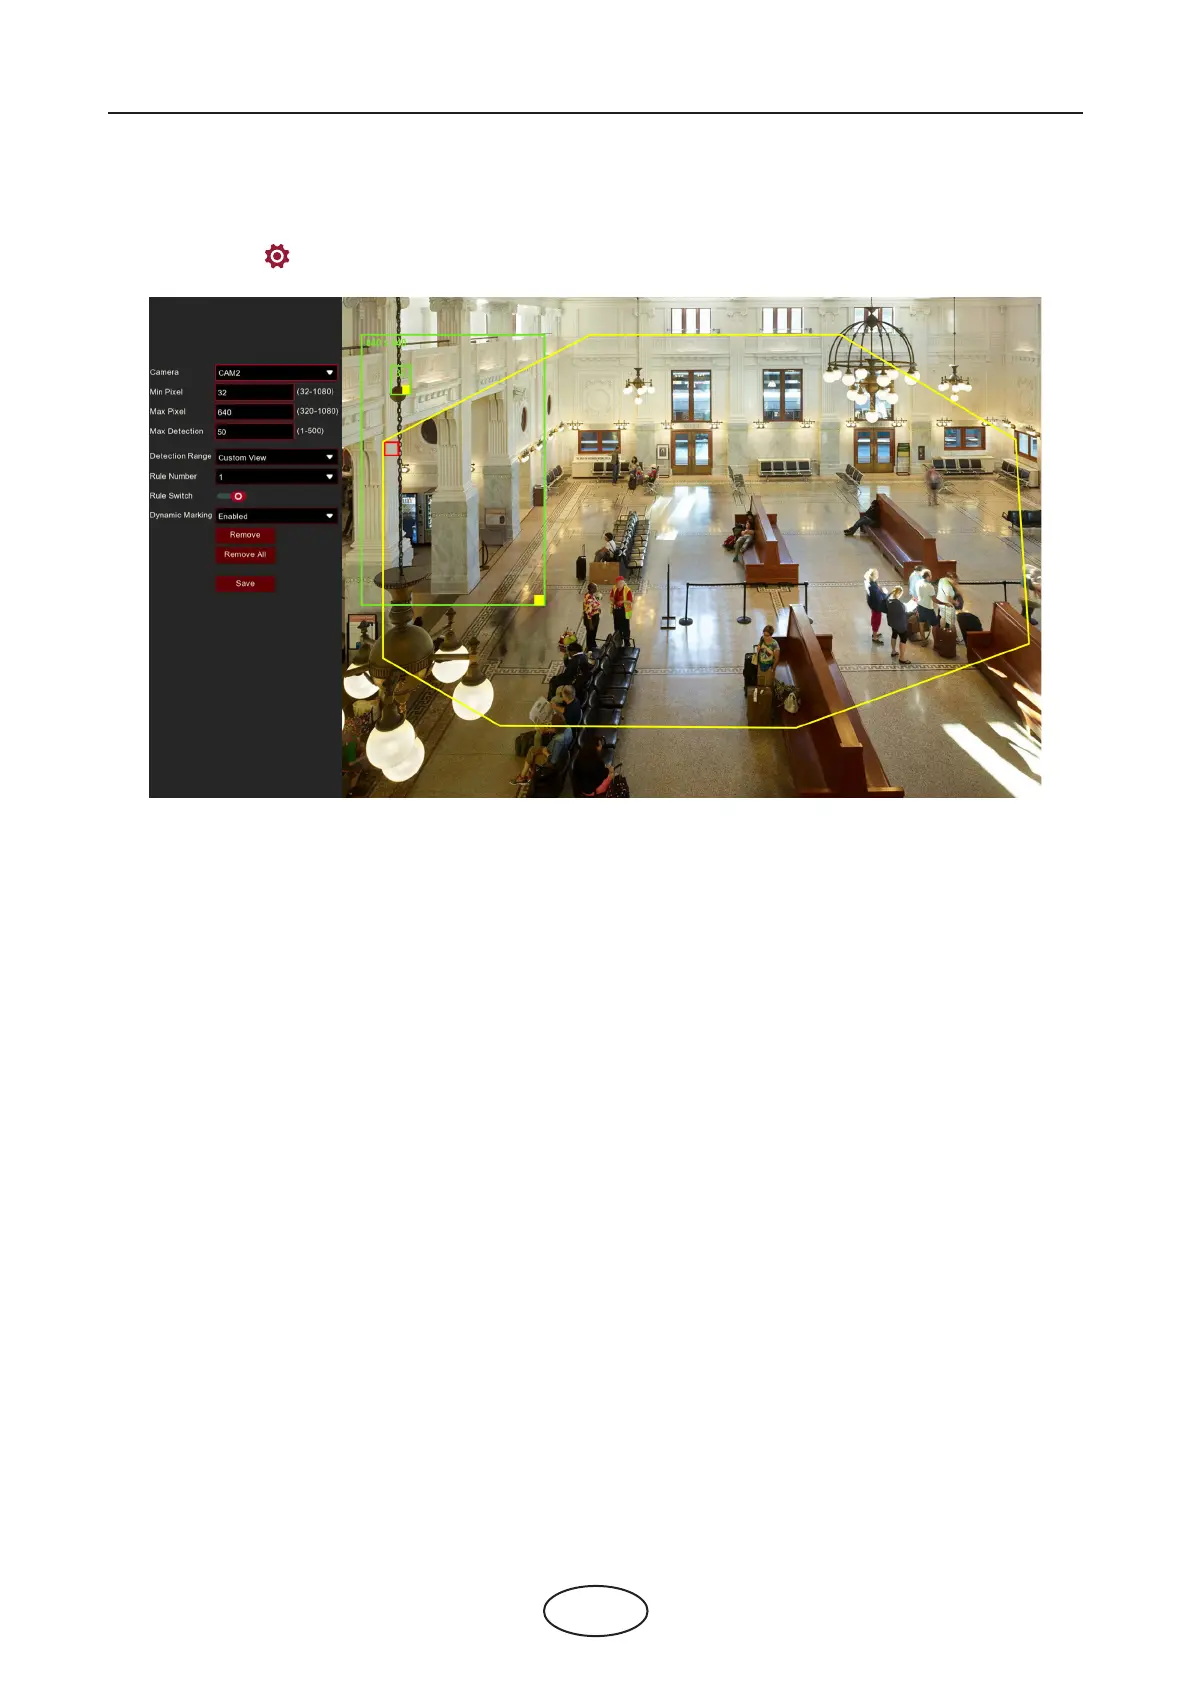
Click Setup icon to congure the detection conditions.
5 NVR System Setup
Min Pixel: Set the minimum detection pixel box. The people can be recognized only when he/she is larger
than the pixel box.
Max Pixel: Set the maximum detection pixel box. The people can be recognized only when he/she is small-
er than the pixel box.
Max Detection: The NVR will send an alert if the number of crowds in the line inside the detection area
exceeds the Max Detection number.
Max. Pro Time: The NVR will send an alert if the stagnation time of the queue is longer than the given pro-
cessing time.
Dynamic Marking: If you enable this option, the border of the detection zone will be displayed in both live
view images and recording les.
1. Set the min. pixel and max. pixel.
2. Set the limitation number in Max. Detection.
3. Set the limitation number in Max. Pro Time, the unit is second.
4. To enable the detection in Rule Switch.
5. Set the Detection Range to be full screen or customize.
6. If you choose customized detection range, you will need to use your mouse to click 8 points in the
` camera picture to draw a virtual region.
7. Click Save to save your settings.
8. If you want to modify the position or sharp of region, click the red box in the region, the borders
of the region will be changed to red color. Click and hold the left button of your mouse to move the
position of the region, or drag the corners to resize the region.
9. If you want to remove one of the regions from the camera picture, click the red box in the region
and then click Remove button. Click Remove All will delete all regions.