5.
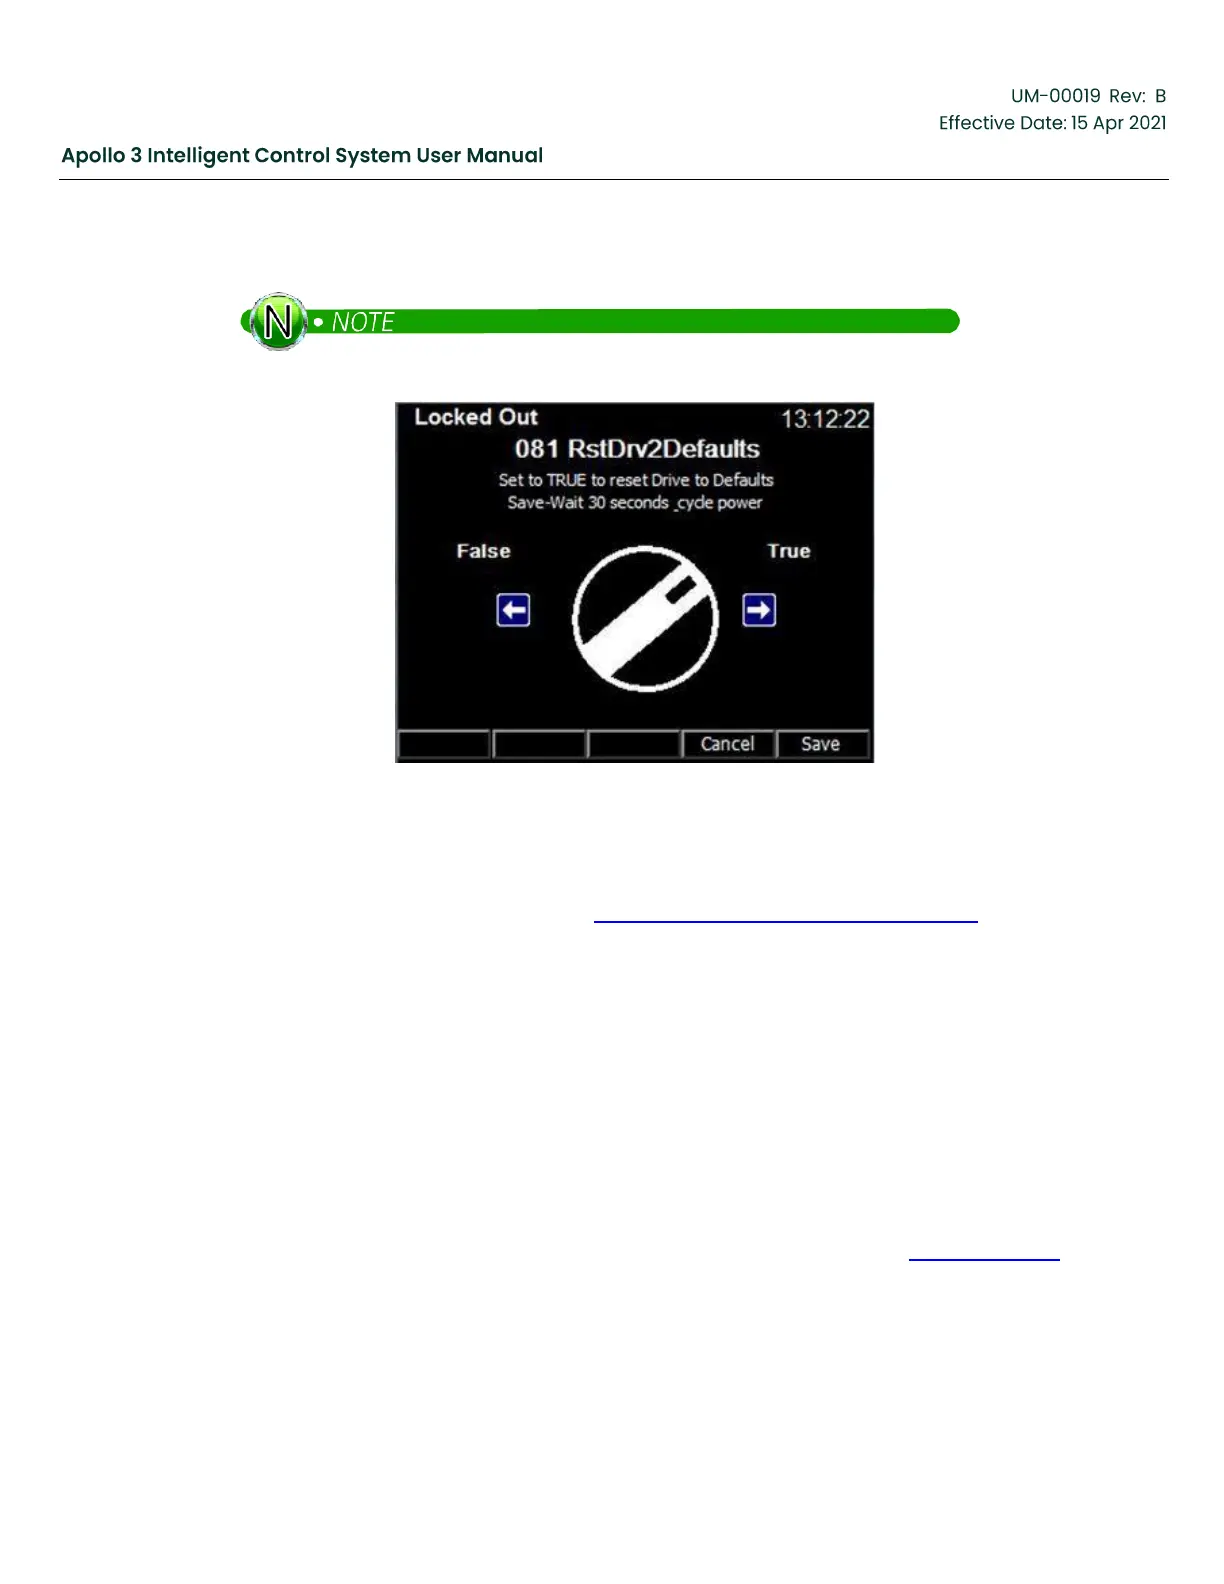
Press the Save function button and Confirm the changes. Wait at least 30 seconds. Then power the drive
off and wait until the screen goes dark. Wait an additional 10 seconds and turn the drive power back on.
The procedure is successful if no errors are displayed during the 30 second wait.
Figure 225: 30 Second Cycle Power
12.4
System Setup and Operation
Configure the Apollo system as described in Section 4: Basic Setup Sequence, page 85 of this manual.
12.5
Updating a Configuration from Apollo 2.x
When updating an Apollo system from 2.x to the current release, it is possible to update the configuration.
This procedure is not recommended for simple configurations based on the standard templates. In these
cases, it is recommended to reconfigure the system manually after the software update. However, if the
system used a custom template or a complex configuration in Apollo 2, add the following steps to the
procedure above to update the configuration for Apollo version 3.
1.
Prior to beginning the software update:
a.
Insert a USB flash drive and select the “Get Configuration Files” option.
b.
Note the name of the filename saved.
2.
Install the Version 3 Apollo software by inserting the USB flash drive used in Step 1, page 263.
a.
Select the “Load Configuration” option… select the configuration saved off earlier.
b.
Press F3 Settings and the following will be displayed:
 Loading...