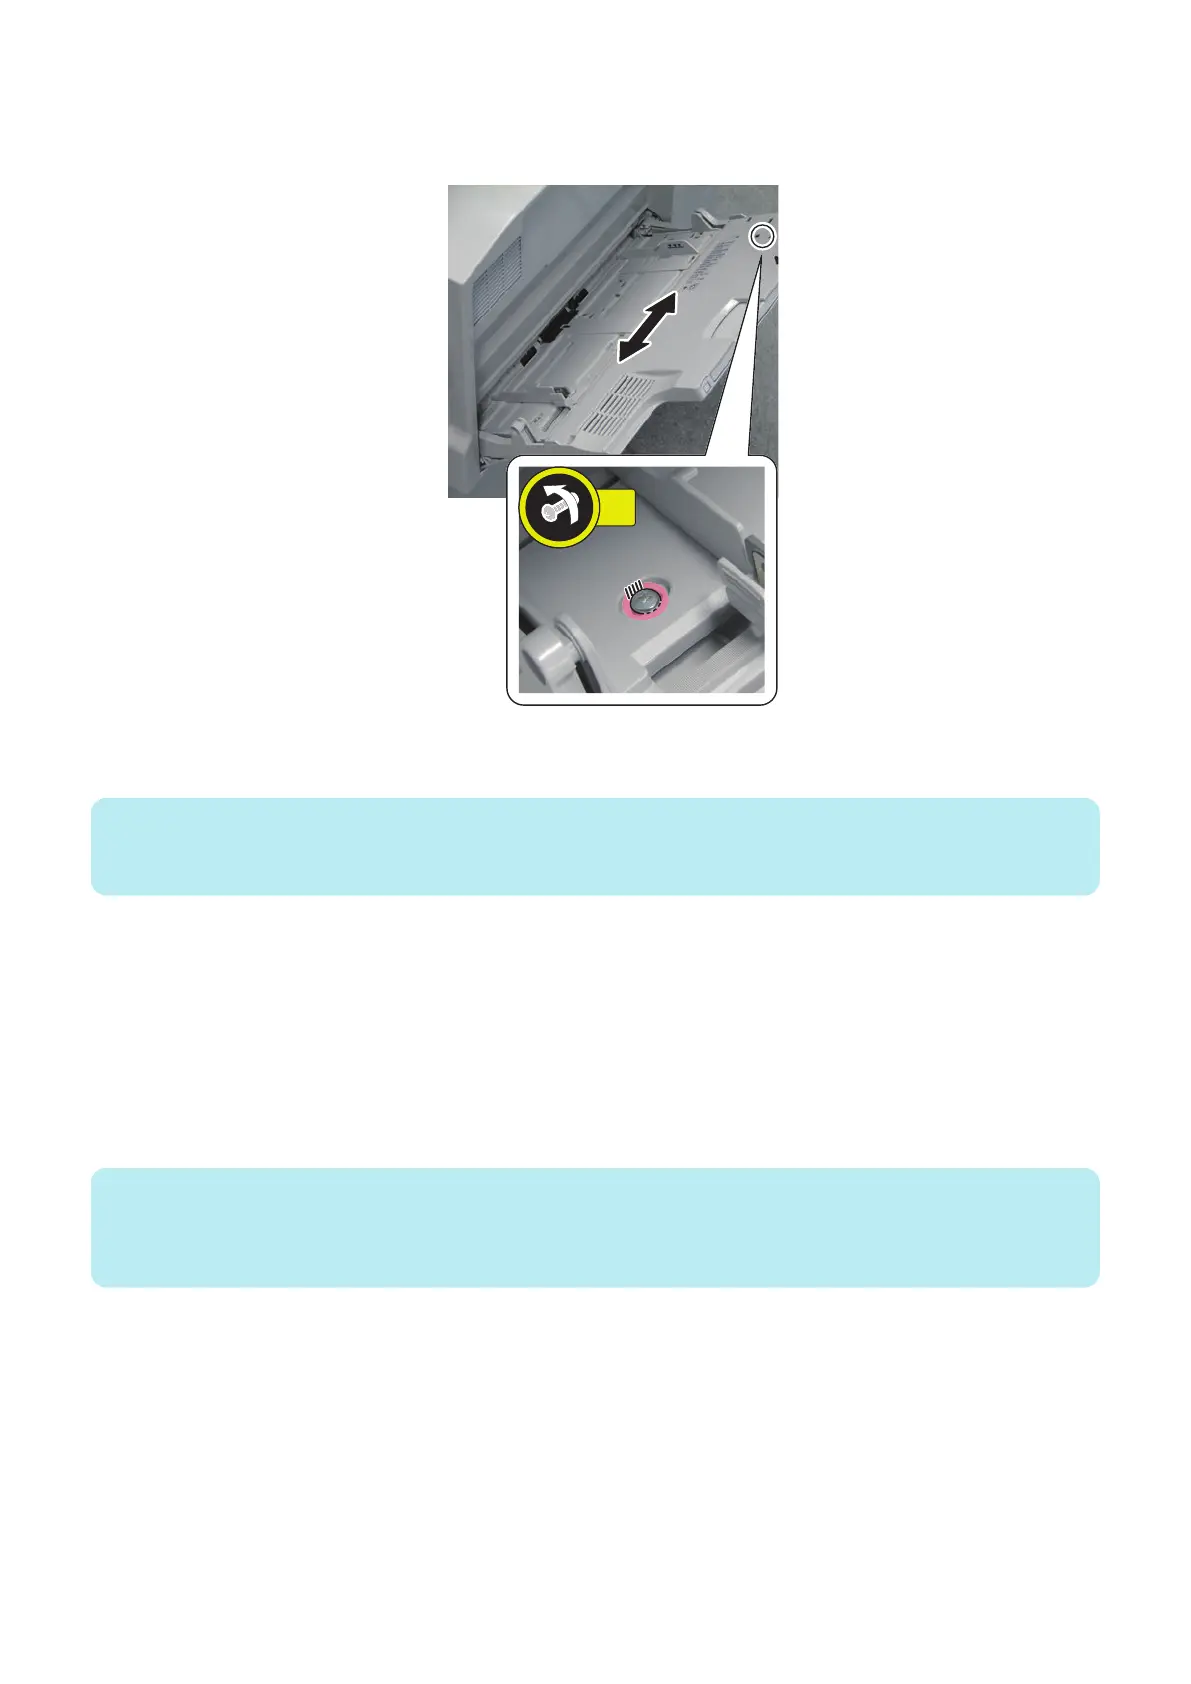
6. Loosen the screw and adjust the position on the Multi-purpose Tray upper with the scale as reference and then
tighten the loose screw.
• Reference: 1 mm per scale
<pattern A> POD Deck Lite C/XL is not installed + Out of Range
1. Adjust the position of the Multi-purpose Tray upper by following the amount of displacement checked in step 4.
NOTE:
Paper misaligned to front direction: move the Multipurpose Tray upper to the rear.
Paper misaligned to rear direction: move the Multipurpose Tray upper to the front.
2. Execute the following service mode again, open the Multi Door Unit, and check the stop position of paper.
COPIER > FUNCTION > CST > MD-MF-RG
3. Remove the stopped paper and close the Multi Door Unit.
4. After adjustment, proceed to“Adjustment of Reference Position with Host Machine (Checking the Left Edge Margin)”
on page 197.
<pattern B> POD Deck Lite C/XL installed first + In Range
1. Adjust the position of the Multi-purpose Tray upper the values displayed in the following service modes.
COPIER > ADJUST > FEED-ADJ > MD-CENT
(0.1 mm per increment)
NOTE:
Example: If the value for MD-CENT is "10", move the Multipurpose Tray upper to the front direction by 1.0 mm.
+ : When shift to the rear direction on the Multi-purpose Tray upper
- : When shift to the front direction on the Multi-purpose Tray upper
2. After adjustment, finish the installation.
("Image Position Adjustment" is not necessary since it was confirmed/adjusted at the time of installation of POD Deck
Lite C/XL.)
6. Troubleshooting
196